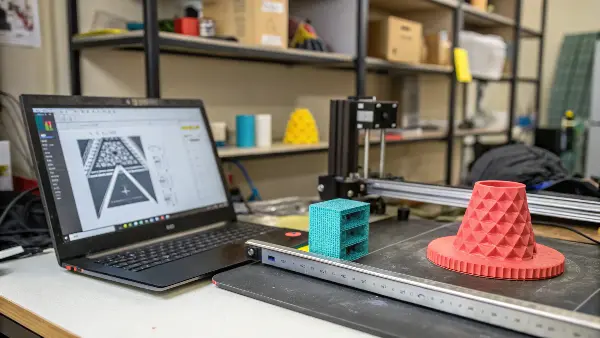
Struggling with 3D prints that don’t match your design dimensions? This discrepancy can halt projects and inflate costs. I will help you understand and master resin shrinkage1 for perfect prints.
Resin print dimensions can deviate from calculated shrinkage due to material inconsistencies, printer calibration errors2, ambient temperature changes, and variations in post-processing. Accurately predicting final dimensions requires controlling these variables and often involves empirical testing beyond theoretical calculations.
It’s a common headache in the world of 3D printing, especially with resin. You spend hours perfecting a design, run the calculations for material shrinkage, and yet, the final part is just… off. This isn’t just frustrating; for professionals like product designers, it can mean delays and added expenses. I’ve seen this many times in my journey through manufacturing. The key is to understand that theoretical calculations are just a starting point. Let’s explore how to bridge that gap between expectation and reality. We need to dig into the practical side of things to truly get a grip on dimensional accuracy3.
How accurate is resin printing typically?
Are you finding that your resin prints aren’t quite hitting the mark on precision? This can be a real setback when you need parts to fit perfectly. Let’s look at what level of accuracy you can generally expect and what influences it.
Resin printing is known for high accuracy, often achieving tolerances of ±0.05mm to ±0.1mm (50 to 100 microns) on smaller parts. However, this accuracy depends heavily on the printer quality, resin type, calibration, print settings, and post-processing consistency.
When I first ventured from traditional mold making into the specifics of 3D printing, the promise of high accuracy with resin was a big draw. And it’s true, resin printers, especially SLA, DLP, or MSLA technologies, can produce incredibly fine details and smooth surfaces. For someone like Jacky, a product designer working with consumer electronics, this level of detail is often crucial. But "typical accuracy" is a range, not a guarantee.
Factors Influencing Resin Print Accuracy
Several elements come into play:
- Printer Resolution:
- XY Resolution: This is determined by the pixel size of the LCD screen or the laser spot size. Smaller pixels mean finer detail potential.
- Z-axis Resolution (Layer Height): While you can set very thin layers, this doesn’t always translate to better dimensional accuracy if other factors aren’t optimized. It mainly affects the smoothness of sloped surfaces.
- Resin Quality and Type:
- Different resins have different shrinkage rates and curing characteristics. Engineering resins designed for dimensional stability often perform better than standard hobbyist resins.
- Consistency of the resin batch is also important. I always recommend sticking with reputable brands.
- Calibration:
- A well-calibrated printer is fundamental. This includes bed leveling and, critically, exposure time calibration for the specific resin you are using.
- Print Settings:
- Exposure times, lift speeds, and layer height all interact. Incorrect settings can lead to under-curing, over-curing, or warping, all of which affect dimensions.
- Post-Processing:
- Thorough washing to remove all uncured resin and consistent, complete post-curing are vital. Uneven or incomplete curing will lead to dimensional instability.
Compared to FDM printing, resin generally offers higher accuracy and finer detail. However, achieving the tightest tolerances, similar to what we aim for in injection molding, requires meticulous attention to every step. It’s not just about the printer; it’s about the entire process. For Jacky, this means that while resin printing is a fantastic tool for prototyping and even some end-use parts, understanding these variables is key to reliable results.How do you account for shrinkage in 3D printing?
Are your 3D printed parts consistently smaller than your digital designs? This is usually due to material shrinkage, a common issue across many manufacturing processes. Let’s explore how to anticipate and compensate for this.
- Thorough washing to remove all uncured resin and consistent, complete post-curing are vital. Uneven or incomplete curing will lead to dimensional instability.
To account for shrinkage in 3D printing, designers typically use material datasheets for initial estimates, conduct test prints with calibration objects, and then apply scaling compensation factors in the slicer software. This often requires an iterative process to fine-tune accuracy.

Shrinkage is a natural phenomenon when materials change state. In resin 3D printing, liquid photopolymer resin solidifies (cures) when exposed to UV light. This polymerization process involves molecules linking together, which causes the material to contract and occupy less volume. I remember from my days in the mold factory, we meticulously calculated shrinkage for different plastics in injection molding. The principles are quite similar here, though the exact mechanisms and influencing factors differ.
Understanding and Managing Shrinkage
- Material Datasheets:
- Most resin manufacturers provide a shrinkage percentage (e.g., 1-3%) in their technical datasheets. This is a good starting point, but it’s often an idealized value obtained under specific test conditions. Real-world shrinkage can vary.
- The Nature of Photopolymer Shrinkage:
- Shrinkage in UV resins isn’t always uniform in all directions (isotropic). It can be influenced by the part’s geometry, orientation during printing, and even the support structures.
- The degree of cure also plays a significant role. Under-cured parts might shrink less initially but could continue to shrink or warp over time as they fully cure or react to ambient UV light.
- Calibration Prints:
- This is where practical experience comes in. Printing standardized calibration models (like calibration cubes, XYZ validation parts, or even custom test pieces that mimic features of your typical designs) is essential.
- Measure these prints carefully with precise calipers. Compare the printed dimensions to the original design dimensions to determine the actual shrinkage percentage for your specific printer, resin, and settings combination.
- Software Compensation:
- Most slicer software allows you to input a scaling factor for X, Y, and Z axes. Based on your test prints, you can adjust these scaling factors to compensate for the measured shrinkage. For example, if a part designed to be 100mm prints at 98mm (2% shrinkage), you might scale it up by 1.02 (or slightly more, as scaling it up changes the volume being cured too, sometimes requiring iterative tests).
- Some advanced users even develop different scaling factors for different axes if they observe anisotropic shrinkage.
- Iterative Process:
- Accounting for shrinkage is rarely a one-shot deal. It often requires an iterative approach: print, measure, adjust scaling, print again. This is especially true when switching resins or making significant changes to print settings.
For someone like Jacky, who needs designs to be optimized for large-scale production, understanding and systematically addressing shrinkage in prototypes is crucial. It helps ensure that the transition to mass manufacturing (like injection molding, where shrinkage is also a major factor) is smoother, as the dimensional behavior of the material is better understood early on. It’s about building a reliable process.Does UV resin expand?
Confused about whether UV resin shrinks or expands during printing? This uncertainty can make troubleshooting dimensional issues even harder. Let’s clarify the typical behavior of UV resins.
- Accounting for shrinkage is rarely a one-shot deal. It often requires an iterative approach: print, measure, adjust scaling, print again. This is especially true when switching resins or making significant changes to print settings.
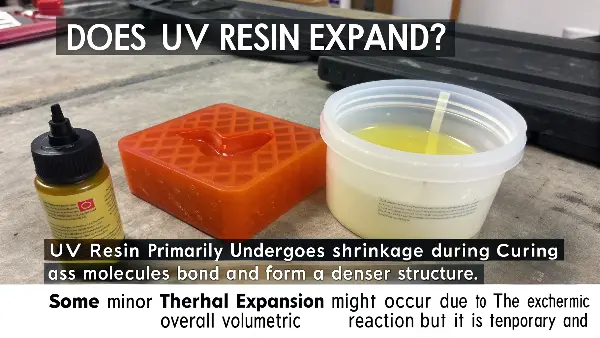
UV resin primarily undergoes shrinkage during the curing process as molecules bond and form a denser structure. While some minor thermal expansion might occur due to the exothermic curing reaction, it’s temporary and typically overshadowed by the overall volumetric shrinkage.

This question about UV resin expansion comes up surprisingly often. I think it’s because the process of curing involves energy, and sometimes people associate energy with expansion, like metals heating up. However, with photopolymer resins used in 3D printing, the dominant effect is shrinkage. The chemical reaction itself, polymerization, causes the liquid resin to transform into a solid. During this transformation, the monomers and oligomers link together to form long polymer chains. These chains pack more tightly than the free-flowing liquid molecules, leading to a reduction in volume – that’s shrinkage.
Clarifying Resin Behavior
- Primary Phenomenon: Shrinkage:
- This is inherent to polymerization. The extent of shrinkage varies between resin formulations, typically ranging from 1% to 7% volumetrically, though linear shrinkage (what we usually measure on a part) will be less. Low-shrinkage resins are specifically formulated to minimize this, but they still shrink.
- Thermal Effects:
- The curing process (photopolymerization) is exothermic, meaning it releases heat. This heat can cause a temporary, slight thermal expansion of the resin while it is curing. However, once the part cools down to ambient temperature after curing, the net effect you’ll observe is shrinkage from the polymerization. The thermal expansion component is usually minor and transient compared to the chemical shrinkage.
- Apparent Expansion – Misinterpretations:
- Trapped Uncured Resin: If a hollow part is not properly cleaned internally, or if there are enclosed voids, uncured resin trapped inside might exert pressure or slowly cure/degrade, potentially causing bulging or cracking that could be misinterpreted as expansion. This is a cleaning and design issue.
- Swelling: Some cured resins can absorb moisture or solvents (like IPA if not fully evaporated after washing) over time, leading to slight swelling. This is different from the initial curing process behavior. It’s more a post-process material stability concern.
- Blooming/Surface Effects: Sometimes, incompletely cured surface layers or reactions with cleaning agents can leave residues that might seem like an added layer, but this isn’t true material expansion.
Understanding that UV resin fundamentally shrinks is crucial for accurate dimensional control. If you’re seeing parts that are larger than expected, it’s more likely due to over-curing (layers bleeding light and curing wider than intended), incorrect scaling factors in your slicer, or perhaps issues related to insufficient cleaning before post-curing leading to residual resin curing on surfaces. Focusing on shrinkage as the primary dimensional change you need to compensate for will lead to more effective troubleshooting.How to make resin prints more accurate?
Tired of resin prints that don’t meet your dimensional specifications? This can be a major roadblock, especially for functional parts. The good news is you can significantly improve accuracy with careful attention to detail.
To make resin prints more accurate, meticulously calibrate your printer, optimize slicer settings (especially exposure times), choose high-quality resins, refine your support strategy, and ensure thorough, consistent post-processing (washing and curing). Environmental control also plays a role.

Achieving high accuracy in resin printing isn’t about a single magic setting; it’s about a systematic approach to the entire workflow. As someone who has spent years focused on precision in mold manufacturing, I can tell you that process control is everything. For designers like Jacky, who need parts that are not just aesthetically pleasing but also functionally sound, mastering these steps is key to leveraging the full potential of resin 3D printing. Let’s break down the critical areas.
Printer Calibration: The Foundation
This is non-negotiable.
- Bed Leveling: Ensure the build plate is perfectly level and at the correct Z=0 height. An unlevel bed leads to inconsistent first layers and can warp the entire print.
- Exposure Calibration: This is the most critical calibration for resin. Use calibration prints like the AmeraLabs Town, RERF (Resin Exposure Range Finder), or XP2 Validation Matrix. These help you dial in the exact exposure time per layer for your specific resin.
- Under-exposure leads to weak parts, loss of detail, and potential dimensional inaccuracies due to incomplete curing.
- Over-exposure can cause light bleed, where UV light cures resin beyond the intended layer boundaries, leading to thicker features and closed-up holes. This directly impacts dimensional accuracy.
Resin Properties & Handling: Material Matters
- Quality: Use good quality resin from reputable manufacturers. Cheaper resins can have inconsistent properties and higher shrinkage.
- Temperature: Resin viscosity is temperature-dependent. Most resins perform best within a specific temperature range (often 20-25°C or 68-77°F). Cold resin is more viscous and can lead to print failures or inaccuracies. Consider a small enclosure or heater if your print environment is cold.
- Mixing: Gently mix your resin before each print to ensure pigments and components are evenly distributed. Avoid introducing too many bubbles.
Slicing Software Settings: The Digital Blueprint
Beyond basic exposure, other slicer settings are vital:
- Layer Height: While thinner layers can improve surface finish, they also mean more layers and longer print times. For dimensional accuracy, consistency from correct exposure is more important than extremely thin layers.
- Lift Speeds & Retract Speeds: If too high, these can create excessive suction forces on the FEP film, potentially distorting delicate parts or causing layer separation. Slower, smoother movements are generally better for accuracy.
- Light-Off Delay (or Rest Time Before/After Lift): This setting allows time for the resin to settle after the build plate moves, ensuring a stable layer of resin before the next exposure. This is crucial for sharp details and dimensional stability.
Support Strategy: Holding it Together
- Orientation: Orient your part to minimize stresses during printing, reduce the number of supports on critical surfaces, and manage suction forces.
- Support Type and Density: Use appropriate support structures. Fine tips on supports reduce scarring but must be strong enough. Ensure enough supports to prevent warping or sagging, especially on overhangs and large flat areas. Incorrect supports can pull and distort the part.
Post-Processing: The Final Polish
- Washing: Thoroughly wash prints in a suitable solvent (like IPA or specialized resin cleaner) to remove ALL uncured resin. Residual resin will cure on the surface, affecting dimensions and surface finish. Use a two-stage cleaning process if possible (dirty bath, then clean bath).
- Drying: Ensure parts are completely dry before post-curing.
- Curing: Post-cure parts using UV light of the correct wavelength and intensity, and for the recommended time. Under-curing leaves parts weak and dimensionally unstable. Over-curing can sometimes make parts brittle or cause further (though usually minor) shrinkage or even slight warping. Even curing from all sides is important. A curing station with a turntable is ideal.
Environmental Factors: The Unseen Hand
- Ambient Temperature: As mentioned, resin temperature is important. Also, significant temperature fluctuations during a long print can affect consistency.
-
Vibrations: Ensure your printer is on a stable, vibration-free surface.
Here’s a quick summary:Factor Key Impact on Accuracy My Recommendation Printer Calibration Exposure, Layer Adhesion Perform regular exposure tests (e.g., RERF) for each resin. Level bed meticulously. Resin Quality Shrinkage, Cure Consistency Use reputable brands. Store resin properly. Maintain optimal temperature. Slicer Settings Detail Resolution, Warping, Feature Size Optimize exposure, lift speeds, light-off delay. Test different settings. Support Strategy Part Stability, Warping, Surface Finish Orient wisely. Use adequate supports with appropriate tip sizes. Post-Processing Final Dimensions, Material Properties Wash thoroughly. Dry completely. Cure evenly and for the correct duration. Environment Resin Viscosity, Print Stability Maintain stable ambient temperature. Minimize vibrations. By systematically addressing each of these areas, you can dramatically improve the dimensional accuracy of your resin prints. It takes patience and a bit of experimentation, but the results are well worth the effort, especially when precision is paramount.
Conclusion
Mastering resin print accuracy means moving beyond theory. Control your printer, resin, settings, and post-processing. This hands-on approach turns frustrating dimensional errors into precisely crafted parts.
-
Understanding resin shrinkage is crucial for achieving accurate 3D prints. Explore this link to learn effective control methods. ↩
-
Printer calibration is vital for precision in 3D printing. Discover insights on minimizing errors for better results. ↩
-
Achieving dimensional accuracy is key for successful 3D printing. This resource will guide you through essential practices. ↩
