Are you trying to figure out the best way to make your plastic part? The sheer number of manufacturing methods can be confusing. Choosing the wrong one can lead to wasted time, high costs, and a final product that doesn’t meet your standards. This guide will help you understand the main types of plastic molding, so you can make an informed decision for your project and avoid those costly mistakes.
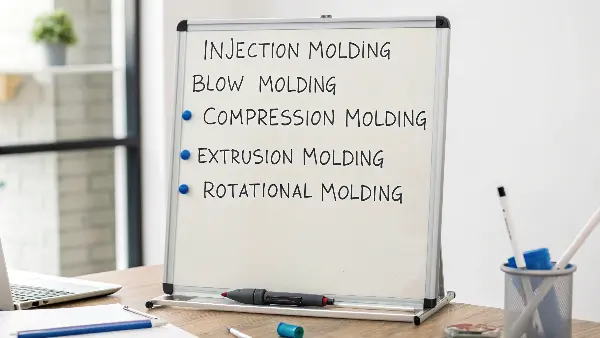
While there are many specialized techniques, most plastic parts are made using one of five main molding processes. These are injection molding, blow molding, compression molding, extrusion molding, and rotational molding. Each method is designed for different types of products, from tiny, complex components to large, hollow containers. Understanding the core strengths of these five will give you a strong foundation for selecting the right manufacturing partner and process for your specific needs, ensuring efficiency and quality.

Choosing the right process is one of the most critical decisions you’ll make. It affects everything from the initial cost of the mold to the per-unit price and the quality of the final product. I’ve seen business owners lose a lot of money because they picked a process that wasn’t a good fit for their design. Don’t let that be you. Let’s break down the most common methods so you can see which one makes the most sense for your goals. We’ll look at how they work, what they’re good for, and what you need to watch out for.
What are the five main methods of processing plastic?
Starting a new project with plastic parts can feel overwhelming. You have a great design, but how do you actually make it? The wrong choice can lead to poor quality, blown budgets, and production delays that hurt your business. You need a clear understanding of the top methods to ensure your product is made efficiently and effectively. Let’s look at the five most popular and effective plastic molding techniques I’ve relied on for years.
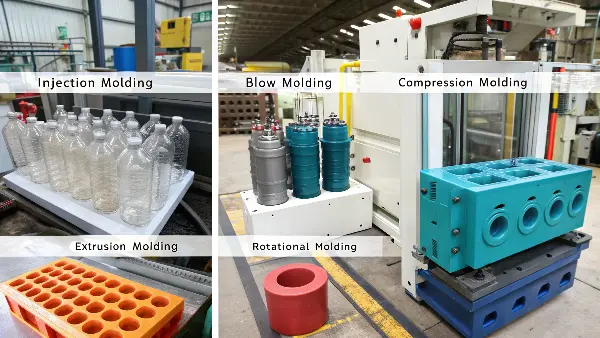
The five most popular and effective plastic molding methods are injection molding, blow molding, compression molding, extrusion molding, and rotational molding. Each process offers unique advantages for different applications. Injection molding is for high-volume, complex parts. Blow molding is for hollow items like bottles. Compression is for strong, flat parts. Extrusion creates long, continuous shapes, and rotational molding is perfect for large, hollow products. Knowing these five will cover most manufacturing needs.

Each of these five methods has its place in the world of manufacturing. Over my years in the industry, I’ve used all of them for different client projects. The key is to match the process to the part’s geometry, the material you’re using, and the volume you need to produce. A mismatch can be disastrous. For example, trying to use injection molding for a large water tank would be incredibly expensive due to the massive tooling required. That’s a job for rotational molding. Let’s dive deeper into what makes each process unique.
Injection Molding
This is the king of high-volume production. It works by injecting molten plastic under high pressure into a precisely machined mold. It’s incredibly fast and repeatable, making it perfect for creating thousands or even millions of identical parts. Think of LEGO bricks, bottle caps, or the casing for your computer mouse. The upfront cost for the mold is high, but the cost per part becomes very low at high volumes.
Blow Molding
If you need to make hollow parts, blow molding is your go-to. It’s similar to glass blowing. A tube of heated plastic, called a parison, is placed into a mold and inflated with air, pushing the plastic against the mold walls. This is how we get plastic bottles, fuel tanks, and coolers. It’s fast and efficient for hollow objects.
Compression Molding
This method is one of the originals. You place a pre-measured amount of plastic material (called a "charge") into a heated mold cavity and then use a top force to compress it into shape. It’s excellent for making very strong, durable parts, often with thermoset plastics. You’ll see it used for electrical wall sockets, dinnerware, and heavy-duty rubber components. It’s not as fast as injection molding, but the tooling is often simpler and less expensive.
Extrusion Molding
Unlike the other methods that make distinct parts, extrusion creates long, continuous shapes. Molten plastic is pushed through a die to create a specific cross-sectional profile. Think of pipes, window frames, or straws. The extruded piece is then cooled and cut to the desired length. It’s a very cost-effective process for producing linear products in high volumes.
Rotational Molding
For large, hollow, and stress-free parts, rotational molding is the answer. Plastic powder is placed in a mold, which is then heated and rotated on two axes. The melting powder coats the inside of the mold evenly. It’s a slower process, but it’s fantastic for things like kayaks, large tanks, and playground equipment. Molds are less expensive than injection molds, making it great for lower production runs.
What is the general process of molding plastic?
You’re looking at different molding methods, but they all seem to follow a similar path. It can be hard to see the bigger picture. Without understanding the fundamental steps, you might miss key details when discussing a project with a manufacturer, leading to misunderstandings. Knowing the core process empowers you to ask the right questions and ensure quality control at every stage.
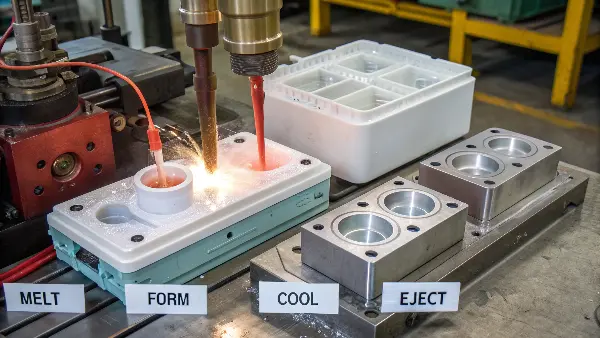
The process of molding plastic almost always involves four fundamental stages: melting the plastic material, forming it into the desired shape within a mold, cooling the plastic so it solidifies, and finally, ejecting the finished part from the mold. While the specific equipment and pressures vary greatly between methods like injection or blow molding, this basic "melt, form, cool, eject" sequence is the backbone of almost all plastic manufacturing, ensuring the raw material is successfully transformed into a usable product.

When I first started on the factory floor, this four-step cycle was the first thing I had to master. It’s the rhythm of plastic production. Whether I was watching a massive injection molding machine or a simpler compression press, I could always identify these four stages. Understanding this universal workflow is crucial because a problem in any one of these steps can ruin the final part. A part might warp if it’s not cooled properly, or it could have surface defects if the plastic isn’t melted at the right temperature. Let’s examine each stage more closely.
Step 1: Melting the Plastic
It all starts with raw plastic, usually in the form of small pellets or granules. These pellets are fed into the molding machine, typically through a hopper. Inside the machine, a combination of heaters and friction (often from a rotating screw) raises the temperature of the plastic until it becomes a thick, molten liquid. The exact temperature is critical. Too hot, and the plastic can degrade; too cool, and it won’t flow properly into the mold. Each type of plastic has its own ideal melting range.
Step 2: Forming the Shape
Once the plastic is molten, it’s ready to be shaped. This is where the different molding processes really diverge.
- In injection molding, the molten plastic is forced under extreme pressure into a closed mold cavity.
- In blow molding, it’s extruded into a hollow tube (parison) and then inflated with air inside a mold.
- In compression molding, the material is placed directly into the mold, and pressure is applied to force it into all the crevices.
- In extrusion, it’s pushed continuously through a die.
No matter the method, the goal is the same: to make the molten plastic take the exact shape of the mold or die.
Step 3: Cooling and Solidification
After the plastic has filled the mold, it needs to cool down and solidify. This is one of the most important parts of the cycle, as it locks the part into its final shape. Cooling is usually done by circulating water or oil through channels built into the mold. The cooling time depends on the type of plastic, the thickness of the part, and the desired production speed. Rushing this step can lead to defects like warping or shrinking, so it must be carefully controlled.
Step 4: Ejection
Once the part is solid, the mold opens, and the part is ejected. This can be done using ejector pins, an air blast, or a robotic arm. The part is then ready for any finishing touches, like trimming off excess material (called flash) or assembly. The machine then closes the mold, and the entire cycle begins again for the next part. This cycle can take anywhere from a few seconds to several minutes.
What are the 7 main types of plastic used in these processes?
You’ve picked a molding process, but now you need to choose a material. With thousands of plastic variations, how do you select the right one? Choosing a plastic that isn’t suited for your product’s environment or stress load can lead to catastrophic failure, damaging your brand’s reputation. You need to know the workhorses of the plastic world to make a safe and reliable choice.
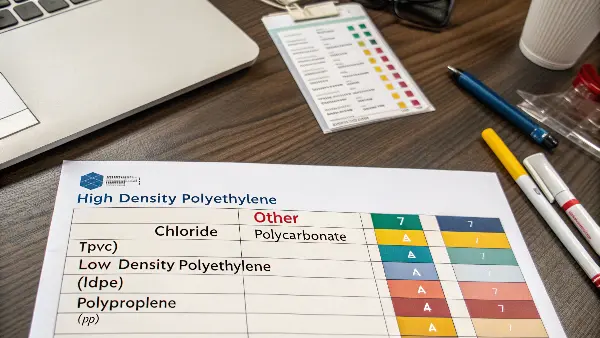
The seven most common types of plastics are identified by their resin identification codes. They are Polyethylene Terephthalate (PET), High-Density Polyethylene (HDPE), Polyvinyl Chloride (PVC), Low-Density Polyethylene (LDPE), Polypropylene (PP), Polystyrene (PS), and a final category simply marked as Other (which includes materials like polycarbonate and ABS). Each has distinct properties, making them suitable for different applications and molding processes, from flexible packaging to rigid- Bumper.

Choosing the right plastic is just as important as choosing the right molding process. I remember a client who wanted to make outdoor furniture from a type of Polystyrene. I had to explain that PS becomes brittle in sunlight and that a UV-stabilized Polypropylene or HDPE would be a much better, longer-lasting choice. The material has to fit the function. These seven categories cover the vast majority of products you see every day. Let’s look at what makes each one useful.
Understanding the Main Plastic Families
Here is a quick breakdown of the seven main types. Understanding their basic characteristics will help you have more productive conversations with your manufacturing partner.
| Resin Code | Plastic Name | Key Characteristics | Common Applications |
|---|---|---|---|
| 1 | PET (Polyethylene Terephthalate) | Clear, strong, lightweight, good barrier to gas/moisture | Soda bottles, water bottles, polyester fibers |
| 2 | HDPE (High-Density Polyethylene) | Stiff, strong, resistant to chemicals, natural waxy surface | Milk jugs, cleaning agent bottles, pipes, cutting boards |
| 3 | PVC (Polyvinyl Chloride) | Rigid or flexible, durable, chemical resistant, clear | Pipes, window frames, electrical wire insulation |
| 4 | LDPE (Low-Density Polyethylene) | Soft, flexible, clear, good chemical resistance | Plastic bags, films, squeeze bottles |
| 5 | PP (Polypropylene) | High melting point, tough, chemical resistant, flexible | Car parts, food containers, living hinges, chairs |
| 6 | PS (Polystyrene) | Rigid or foamed, clear, brittle, low melting point | Disposable cups, CD cases, foam packaging, insulation |
| 7 | Other | Includes Polycarbonate (PC), ABS, Nylon, Acrylic | Eyeglasses, car bumpers, electronics housings, Legos |
Factors to Consider When Choosing a Plastic
When I help a client like Michael choose a material, we don’t just look at the list. We discuss the specific needs of the product.
- Mechanical Strength: Will the part be under stress? Does it need to be rigid or flexible? Materials like ABS (in the "Other" category) are great for impact resistance.
- Temperature Resistance: Will the part be exposed to high heat? Polypropylene (PP) has a higher melting point than Polyethylene (PE), making it better for hot-fill food containers.
- Chemical Resistance: Will the part come into contact with oils, acids, or solvents? HDPE is widely used for chemical containers for this reason.
- Clarity: Does the part need to be transparent? PET and Polycarbonate (PC) are excellent choices for their glass-like clarity.
- Cost: While performance is key, budget is always a factor. Commodity plastics like PP and PE are generally less expensive than engineering-grade plastics like PC or Nylon.
Are there other important types of moulding to know?
You’ve learned the big five, but you keep hearing about other methods like thermoforming or transfer molding. Are these just niche processes, or are they something you need to be aware of? Ignoring other available methods could mean you miss out on a more cost-effective or better-suited process for your unique product, leaving money on the table. Knowing a few more key techniques broadens your options and ensures you’ve truly found the best fit.
Yes, beyond the main five, it’s very helpful to know about thermoforming, transfer molding, and insert molding. Thermoforming is excellent for large, thin-walled parts like packaging trays. Transfer molding offers more precision than standard compression molding, making it ideal for parts with intricate details or embedded electronics. Insert molding allows you to mold plastic around a pre-placed item, like a metal screw or bushing, creating a single, robust component. These methods solve specific manufacturing challenges that the main five might not handle as efficiently.

In manufacturing, having more tools in your toolbox is always a good thing. While the five major processes cover 80% of jobs, that other 20% is where you can find real innovation and efficiency. I’ve helped clients achieve fantastic results by suggesting one of these less-common methods. For instance, a client making electronics enclosures was able to simplify their assembly process immensely by switching to insert molding, which secured all the metal connectors in one shot. It saved them time and money. Let’s look at why these processes are so useful.
Thermoforming
This process is fundamentally different from the others. Instead of starting with plastic pellets, you start with a thin sheet of plastic. The sheet is heated until it becomes pliable and then stretched over or into a single-sided mold. A vacuum is often used to pull the sheet tight against the mold, which is why it’s sometimes called vacuum forming.
- When to Use It: It’s perfect for products with thin walls and large surface areas. Think of disposable cup lids, refrigerator liners, product packaging (like clamshells), and vehicle door panels.
- Key Advantages: Tooling is much cheaper and faster to make than for injection molding because you only need one side of the mold. This makes it ideal for prototypes and lower-volume production runs.
- Limitations: You can only make relatively simple shapes, and wall thickness can be inconsistent, especially in deep-drawn parts.
Transfer Molding
Think of transfer molding as a hybrid between compression and injection molding. Like compression molding, you start with a pre-measured charge of plastic. However, instead of placing it directly in the part cavity, you place it in a separate chamber (called the "pot"). A plunger pushes the now-molten material from the pot through channels (sprues and runners) into the closed mold cavity.
- When to Use It: It’s used for thermoset plastics when you need more intricate designs and tighter dimensional tolerances than compression molding can provide. It’s also great for molding delicate electronic components without damaging them.
- Key Advantages: It allows for more complex part geometry and the placement of delicate inserts. Because the mold is closed before the material enters, there’s less flash.
- Limitations: It creates more waste material than compression molding due to the runners and sprues, and cycle times can be longer.
Insert Molding
Insert molding is a variation of injection molding where a pre-formed object—the insert—is placed into the mold before the plastic is injected. The molten plastic then flows around the insert, securing it permanently within the part.
- When to Use It: This is the go-to process when you need to combine a plastic part with a non-plastic one, most commonly a metal component. Think of screwdriver handles with metal shafts, knobs with threaded brass inserts, or connectors with embedded electrical pins.
- Key Advantages: It creates a very strong mechanical bond, eliminates post-molding assembly steps, and improves the part’s overall strength and reliability.
- Limitations: It requires careful design of both the insert and the plastic part to ensure a good bond and prevent damage to the insert during the high-pressure injection process.
Conclusion
Understanding the different plastic molding processes is the first step toward successful manufacturing. We’ve covered the five main methods—injection, blow, compression, extrusion, and rotational molding—along with other key techniques like thermoforming. The best choice always depends on your part’s design, material, and required volume. By knowing these fundamentals, you can partner with your manufacturer more effectively, ensuring your project is done right, on time, and within budget.
