Facing constant hurdles in precision injection molding1? These challenges cost time and money, impacting your bottom line. Understanding them is the first step to smoother, more profitable production runs.
The biggest challenges include scheduling complexities, material handling issues, slow mold changes, difficult startups/shutdowns, engineering problems, maintenance delays, quality control2, tooling wear, and inadequate training. Overcoming them requires careful planning, technology, and skilled teams.
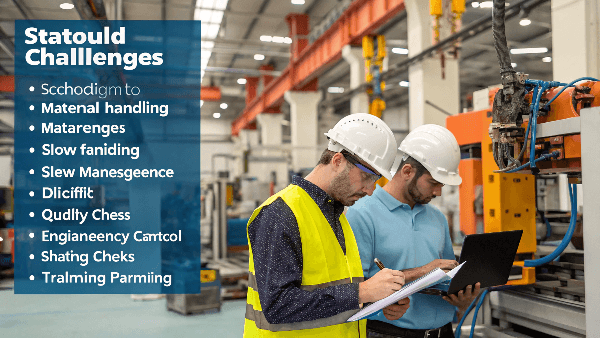
Precision injection molding is a complex process with many moving parts. Getting everything right, every single time, can feel like a constant battle. But don’t worry, you’re not alone. Let’s break down the most common challenges I’ve seen and talk about how we can tackle them together. Stick with me, and let’s find some practical solutions.
1. Scheduling: A Constant Juggling Act?
Struggling to keep production on track? Poor scheduling leads to missed deadlines and unhappy clients, hurting your reputation and profits. Effective planning is key to regaining control.
Effective scheduling balances customer demand with machine availability and material lead times. Using planning software and clear communication prevents bottlenecks and ensures timely delivery, keeping operations smooth.

Let’s dive deeper into scheduling. It sounds simple, but in reality, it’s one of the trickiest parts of managing a molding operation. I remember early in my career, juggling multiple urgent orders felt impossible. You have different machines with varying capacities, molds needing maintenance, materials arriving at different times, and customer demands constantly shifting. It’s easy for things to fall apart.
Key Scheduling Difficulties
- Machine Allocation: Assigning the right job to the right machine, considering cavitation, cycle time, and required tonnage.
- Material Availability: Ensuring the correct type and quantity of resin is ready when needed, factoring in drying times.
- Tooling Readiness: Coordinating mold changes and maintenance so molds are available for scheduled runs.
- Labor Planning: Having skilled operators and technicians available for each shift and specific job requirements.
- Unexpected Delays: Dealing with machine breakdowns, quality issues, or urgent customer requests that disrupt the plan.
How to Improve Scheduling
| Strategy | Description | Benefit |
|---|---|---|
| Use Scheduling Software | Implement ERP or MES systems designed for manufacturing. | Real-time visibility, optimized resource use |
| Buffer Times | Build small time buffers into schedules for unexpected issues. | Reduces impact of minor delays |
| Clear Communication | Ensure sales, planning, and production teams are constantly communicating. | Prevents misunderstandings, aligns priorities |
| Prioritization Rules | Establish clear rules for prioritizing jobs (e.g., deadline, customer value). | Consistent decision-making |
| Regular Reviews | Hold daily or weekly scheduling meetings to adjust plans as needed. | Adaptability, proactive problem-solving |
Mastering scheduling requires a combination of good tools, clear processes, and open communication. It’s about creating a dynamic plan that can adapt to the realities of the shop floor.
2. Material Handling: Avoiding Contamination and Waste?
Are material mix-ups or improper drying causing defects? Poor material handling leads to costly scrap and production delays. Implementing strict protocols ensures material integrity and efficiency.
Proper material handling involves correct identification, storage, drying, and conveying of resins. Using closed-loop systems and following supplier guidelines prevents contamination, moisture issues, and waste, ensuring part quality.
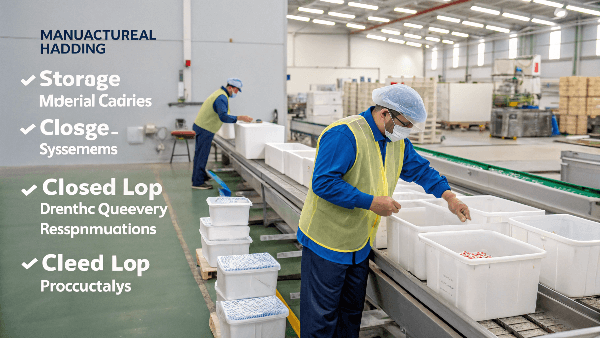
Material handling might seem like a background task, but getting it wrong can bring production to a halt or lead to parts failing in the field. I’ve seen batches ruined because someone used the wrong grade of plastic or didn’t dry it properly. The costs add up quickly, not just in wasted material but also in machine downtime and scrapped parts. Precision molding demands precision in every step, including how we manage our raw materials.
Common Material Handling Pitfalls
- Contamination: Mixing different types or grades of plastic, or introducing dust, dirt, or moisture. This often happens during transport, storage, or at the press.
- Improper Drying3: Different plastics absorb moisture differently and require specific drying temperatures and times. Insufficient drying is a major cause of cosmetic defects (like splay) and weakened part strength. Over-drying can degrade the material.
- Incorrect Identification: Mislabeling containers or relying on memory can lead to using the wrong material for a job, resulting in parts that don’t meet specifications.
- Storage Issues4: Storing materials in humid environments or for too long can affect their properties. Exposure to UV light can also degrade some plastics.
- Inefficient Conveying: Poorly designed conveying systems can cause material segregation (separating fillers or additives) or damage pellets.
Best Practices for Material Handling
| Area | Best Practice | Why It Matters |
|---|---|---|
| Receiving | Inspect materials upon arrival; clearly label everything with type and batch. | Prevents mix-ups from the start. |
| Storage | Store in designated, clean, dry areas; follow FIFO (First-In, First-Out). | Maintains material quality, prevents degradation. |
| Drying | Use calibrated dryers; verify settings (temp, time, dew point) per material specs. | Ensures material is processed in optimal condition. |
| Conveying | Use dedicated hoses or thoroughly clean lines between changes; avoid excessive distances. | Prevents cross-contamination and segregation. |
| At the Press | Keep hoppers covered; minimize material residence time in the barrel. | Reduces contamination risk and thermal degradation. |
Implementing robust material handling procedures, supported by good equipment and training, is fundamental. It protects your materials, your machines, and ultimately, the quality of your final product.
3. Mold Changes: Faster Swaps, Less Downtime?
Losing valuable production time during mold changes? Slow, inefficient mold swaps directly impact machine utilization and profitability. Streamlining the changeover process cuts downtime significantly.
Efficient mold changes rely on preparation, standardized procedures, and quick-change systems. Pre-staging molds, tools, and materials, using SMED principles, dramatically reduces non-productive time between runs.
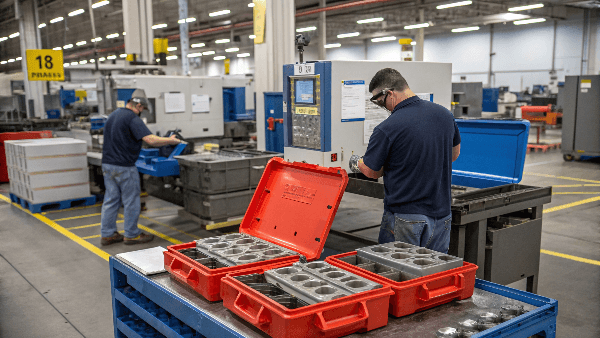
Mold changeover time, or the time from the last good part of one run to the first good part of the next, is pure downtime. In high-mix, low-volume environments, this can add up to a huge chunk of lost capacity. I remember facilities where mold changes took hours, sometimes even a full shift. This inactivity costs money and limits your flexibility to respond to customer needs. Speeding up this process is crucial for competitiveness.
Why Are Mold Changes Often Slow?
- Lack of Preparation: Not having the next mold, tools, materials, or documentation ready at the press side when the current run finishes.
- Non-Standardized Work: Each operator performs the changeover differently, leading to inconsistencies and inefficiencies. No defined best practice.
- Poor Equipment/Layout: Using slow clamping methods (manual bolts), inaccessible crane areas, or poorly organized tool carts.
- Waiting for Resources: Delays caused by waiting for technicians, forklifts, cranes, or quality approval.
- Complex Setups: Difficulties connecting water lines, hydraulics, or hot runner cables quickly and correctly.
Strategies for Faster Mold Changes (SMED – Single-Minute Exchange of Die)
The core idea of SMED is to convert internal setup steps (done while the machine is stopped) into external setup steps (done while the machine is running).
| SMED Phase | Actions | Goal |
|---|---|---|
| Preparation (External) | Prepare the next mold (preheat if needed), gather all tools, clamps, hoses, materials, documentation. | Minimize activities needed when the machine stops. |
| Mold Removal (Internal) | Standardize steps for disconnecting utilities, un-clamping, and removing the mold safely. | Make removal fast and predictable. |
| Mold Installation (Internal) | Use quick-clamping systems (hydraulic, magnetic), standardized utility connections (quick connects). | Secure the new mold rapidly. |
| Setup & Adjustment (Internal/External) | Automate parameter loading; perform initial checks quickly; fine-tune while running first parts. | Reduce time to first good part. |
| Organization | Use shadow boards, dedicated carts, clear labeling for tools and connections. | Eliminate time wasted searching or figuring things out. |
| Teamwork & Training | Train dedicated changeover teams; practice standardized procedures. | Ensure smooth, coordinated, and safe changeovers. |
Implementing these strategies requires investment in equipment (like quick-change systems) and training, but the payoff in increased machine uptime and flexibility is substantial. Focusing on SMED principles transforms mold changing from a bottleneck into a streamlined process.
4. Startup: Achieving Stability Quickly?
Wasting material and time getting new runs started? Inconsistent or lengthy startups lead to significant scrap and delayed production. Establishing standard startup procedures ensures faster stabilization.
A successful startup involves pre-flight checks, controlled material purging, gradual parameter adjustments, and quality verification. Following a defined checklist minimizes waste and gets the process to a stable state efficiently.
The startup phase after a mold change or shutdown is critical. This is often where the most scrap is generated as you dial in the process parameters to produce good parts consistently. A bad startup can waste hours and kilos of expensive material. I’ve seen operators tweak settings randomly, hoping to get it right, which only prolongs the instability. A methodical approach is essential.
Challenges During Startup
- Reaching Thermal Stability: The mold, barrel, and material need to reach and stabilize at the correct operating temperatures. This takes time.
- Purging Old Material: Ensuring all remnants of the previous material (or degraded material from shutdown) are removed from the barrel.
- Setting Initial Parameters: Starting with incorrect pressures, speeds, or times can lead to defects like short shots, flash, or burns right away.
- Process Variation: The first few shots often exhibit more variation until the entire system stabilizes.
- Operator Skill Dependency: Relying solely on operator experience without documented procedures leads to inconsistency.
Steps for an Efficient Startup Procedure
- Pre-Startup Checklist:
- Verify mold connections (water, hydraulics, electrical).
- Confirm correct material is loaded and properly dried.
- Check machine safety features.
- Ensure auxiliary equipment (robots, conveyors) is ready.
- Load Setup Parameters:
- Retrieve validated process parameters from machine memory or setup sheets. Avoid starting from scratch if possible.
- Barrel Purge:
- Purge with the new material until it runs clear and clean. Use purging compounds if necessary, especially for color changes or difficult materials.
- Initial Shots:
- Start with slightly conservative settings (e.g., lower injection pressure/speed) to avoid flashing the mold.
- Produce a few shots on semi-automatic mode.
- Inspection and Adjustment:
- Inspect the first parts for key defects (shorts, flash, sink, etc.).
- Make systematic, documented adjustments to parameters based on defects observed. Change one parameter at a time where possible.
- Stabilization and Quality Check:
- Once parts look visually acceptable, run the machine in automatic mode for a period (e.g., 10-20 cycles) to allow the process to stabilize fully.
- Perform first-article inspection (FAI) to confirm parts meet all specifications.
- Production Release:
- Only release the machine for full production once FAI is approved.
Documenting this procedure and training operators ensures consistency, reduces material waste, and gets you making good parts faster every time.
5. Shutdown: Preventing Problems on Restart?
Experiencing issues when restarting after a shutdown? Improper shutdown procedures can lead to material degradation, equipment damage, and difficult startups later. Following best practices protects your assets.
Correct shutdown involves emptying the barrel, reducing temperatures gradually, cleaning the mold, and securing the machine. This prevents material degradation, protects equipment, and ensures a smoother subsequent startup.
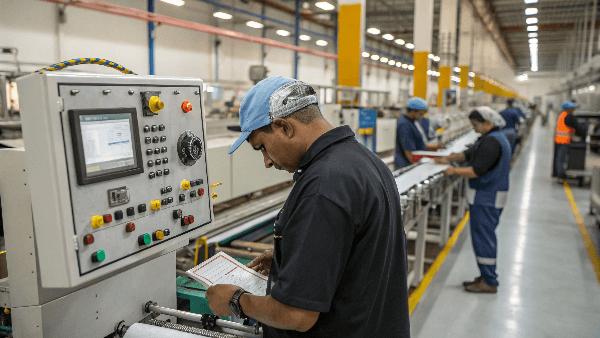
How you shut down an injection molding machine is just as important as how you start it up, especially for longer shutdowns (e.g., overnight or weekends). If you simply turn everything off, the plastic left in the hot barrel can degrade, causing black specks or weakened material on the next startup. Sensitive molds can also be affected. Taking a few extra minutes for a proper shutdown saves significant trouble later.
Risks of Improper Shutdown
- Material Degradation: Plastic left at high temperatures in the barrel for extended periods can burn or oxidize, leading to contamination (black specks) or reduced material properties upon restart. Some materials are more sensitive than others (e.g., PVC, POM).
- Barrel/Screw Damage: Degraded material can become corrosive or extremely hard, potentially damaging the screw and barrel.
- Mold Issues: Leaving molds clamped shut at temperature can sometimes cause issues. Condensation can form on cool mold surfaces if the environment is humid.
- Difficult Startups: Purging degraded material can be time-consuming and wasteful.
- Safety Hazards: Not properly isolating energy sources can pose risks.
Recommended Shutdown Procedures
The exact procedure depends on the length of the shutdown and the material being processed.
Short Stops (e.g., breaks, brief maintenance):
- Retract the injection unit.
- Stop screw rotation.
- Maintain barrel temperatures unless the stop is longer than the material supplier recommends for residence time at melt temperature.
End of Shift / Overnight Shutdown:
- Empty the Hopper: Shut off material feed and run the machine until the hopper is empty.
- Purge the Barrel: Thoroughly purge the barrel with either the production resin (if stable) or a suitable purging compound until it runs clean. For heat-sensitive resins, purging with a more stable material like HDPE or using a commercial purging compound is often recommended.
- Retract Injection Unit: Pull the nozzle away from the mold sprue bushing.
- Reduce Barrel Temperatures: Gradually lower barrel heat settings. Some recommend specific ramp-down profiles or leaving rear zones slightly warm to prevent condensation. Check machine/material supplier recommendations.
- Clean and Protect Mold: Clean the mold faces. Apply rust preventive if the shutdown is long or the environment is humid. Leave the mold slightly open (unclamped) according to company policy or mold requirements.
- Turn Off Auxiliaries: Shut down dryers, thermolators, robots, etc.
- Main Power: Turn off main power switches as required by safety protocols (Lockout/Tagout if maintenance is planned).
Following a consistent, documented shutdown procedure protects your valuable equipment and materials, paving the way for a much smoother and faster startup next time.
6. Engineering: Solving Complex Part and Mold Issues?
Hitting roadblocks with challenging part designs or mold functionalities? Engineering hurdles, from complex geometries to material selection, require deep expertise and can stall projects. Collaboration and simulation are vital.
Overcoming engineering challenges involves experienced design teams, advanced simulation software (Moldflow), and robust DFM/DFA analysis. Early collaboration between part designers and mold makers prevents costly issues later.
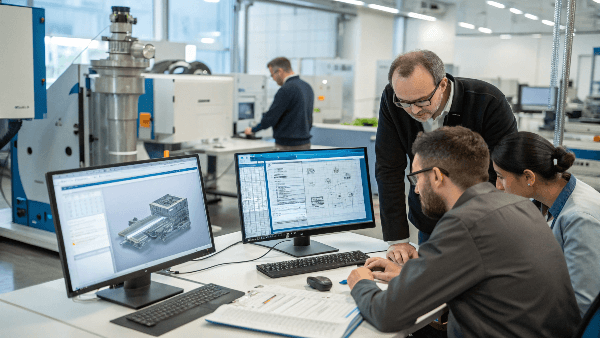
This is where the real brainpower of precision molding comes in. Designing a plastic part is one thing; designing it to be moldable efficiently and reliably is another challenge entirely. Add complex features, tight tolerances, or demanding performance requirements, and the engineering task becomes intricate. I’ve seen seemingly simple designs cause major headaches because subtle aspects of moldability were overlooked early on. Engineering is about anticipating and solving these problems before metal is cut.
Common Engineering Hurdles
- Design for Manufacturability (DFM): Parts designed without considering draft angles, uniform wall thickness, undercuts, or appropriate radii can be difficult or impossible to mold correctly or eject reliably.
- Material Selection: Choosing a plastic that meets the part’s functional needs (strength, temperature resistance, chemical compatibility) but is also processable and doesn’t warp excessively.
- Mold Complexity: Designing molds with complex actions (slides, lifters), intricate cooling channels, or multi-cavity layouts requires significant expertise to ensure reliability and longevity.
- Tolerance Stack-up: Achieving very tight tolerances on molded parts requires careful consideration of material shrinkage, tooling precision, and process control.
- Flow Simulation: Predicting how plastic will fill the cavity, where weld lines or air traps might form, and optimizing gate locations often requires specialized simulation software (like Moldflow). Getting accurate simulations depends on good data and interpretation skills.
Addressing Engineering Challenges Effectively
| Approach | Details | Impact |
|---|---|---|
| Early Supplier Involvement (ESI) | Involve mold makers and material experts during the part design phase. | Catches DFM issues early, optimizes material choice, reduces redesigns. |
| DFM/DFA Analysis | Conduct thorough Design for Manufacturability and Design for Assembly reviews. | Simplifies part/mold design, improves quality, lowers costs. |
| Moldflow Simulation | Use simulation to predict filling, cooling, warping, and optimize gate/runner design. | Reduces trial-and-error on the press, improves part quality, speeds launch. |
| Material Expertise | Maintain strong knowledge of resin properties, processing requirements, and shrinkage characteristics. | Ensures the right material is chosen and processed correctly. |
| Advanced Mold Design Techniques | Utilize conformal cooling, hot runner technology, and robust mechanisms for slides/lifters when needed. | Improves cycle time, part quality, and mold reliability. |
| Prototyping | Use 3D printing or soft tooling for early prototypes to test form, fit, and basic function. | Validates design concepts before committing to expensive hard tooling. |
Solid engineering, grounded in experience and supported by modern tools like simulation, forms the foundation of successful precision injection molding projects. It’s about proactive problem-solving.
7. Maintenance: Preventing Breakdowns, Ensuring Uptime?
Suffering from unexpected machine or mold breakdowns? Reactive maintenance leads to costly downtime and production chaos. Proactive and preventive maintenance keeps equipment running reliably.
Effective maintenance involves scheduled inspections, lubrication, component replacement based on condition or hours, and prompt repairs. A robust Preventive Maintenance (PM) program minimizes unexpected failures and maximizes equipment life.
Nothing disrupts a smoothly running production schedule like an unexpected breakdown. Whether it’s a molding machine going down, a critical mold component failing, or auxiliary equipment malfunctioning, unplanned downtime is expensive. Waiting for things to break before fixing them (reactive maintenance) is a recipe for inefficiency. I learned early on that investing time in preventing failures pays off significantly compared to the cost of emergency repairs and lost production.
Consequences of Poor Maintenance
- Increased Downtime: Unexpected failures halt production, often for extended periods while waiting for parts or technicians.
- Higher Repair Costs: Emergency repairs are often more expensive than planned maintenance. Catastrophic failures can damage related components, increasing the scope and cost.
- Reduced Equipment Lifespan: Neglecting regular care accelerates wear and tear, shortening the useful life of expensive machines and molds.
- Inconsistent Part Quality: Worn machine components (like check rings or barrels) or poorly maintained molds (clogged vents, worn pins) can lead to process variability and defects.
- Safety Hazards: Poorly maintained equipment can pose safety risks to operators.
Implementing a Strong Maintenance Program
| Maintenance Type | Description | Focus |
|---|---|---|
| Preventive Maintenance (PM) | Scheduled tasks (inspections, lubrication, cleaning, filter changes) performed at regular intervals. | Preventing failures based on time or usage. |
| Predictive Maintenance (PdM) | Monitoring equipment condition (vibration analysis, oil analysis, thermography) to predict potential failures. | Addressing issues before they cause a breakdown. |
| Autonomous Maintenance | Training operators to perform basic daily checks, cleaning, and lubrication on their own machines. | Early detection of abnormalities, operator ownership. |
| Corrective Maintenance | Repairing equipment after a failure has occurred. Necessary, but the goal is to minimize reliance on this. | Restoring functionality after a breakdown. |
| Mold Maintenance | Specific PM program for molds: cleaning, inspection of cavities/cores/pins, checking vents, lubricating mechanisms. | Maintaining tooling performance and longevity. |
| Spare Parts Management | Keeping critical spare parts in stock to minimize downtime when repairs are needed. | Reducing wait times for essential components. |
A well-structured maintenance program, combining preventive schedules, predictive techniques where appropriate, good record-keeping, and operator involvement, is essential for reliable and efficient molding operations. It shifts the focus from firefighting to prevention.
8. Quality: Meeting Specs Consistently?
Struggling with high scrap rates or customer complaints about part quality? Maintaining consistent quality in precision molding is demanding, and failures impact reputation and profitability. Robust quality systems are non-negotiable.
Consistent quality requires defined standards, rigorous process control (SPC), regular inspections (in-process and final), and effective root cause analysis. A closed-loop quality system ensures specifications are met reliably.
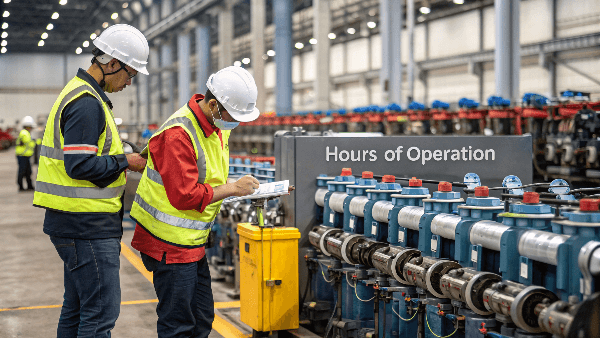
In precision injection molding, quality isn’t just a goal; it’s the baseline expectation. Customers rely on parts meeting exact specifications, often with very tight tolerances, functional requirements, and cosmetic standards. Even small deviations can lead to assembly problems, field failures, or product recalls. I’ve seen how quickly quality issues can erode customer trust. Maintaining high quality consistently requires a systematic approach woven into every stage of the process.
Common Quality Challenges
- Process Variability: Fluctuations in material, machine performance, or ambient conditions can cause dimensions or properties to drift out of spec.
- Measurement and Inspection: Ensuring accurate and repeatable measurements, especially for complex geometries or tight tolerances. Using the right tools (CMM, vision systems, gauges) and calibrating them is critical.
- Defect Identification and Control: Training personnel to correctly identify various molding defects (flash, shorts, sink, warp, burns, etc.) and understanding their root causes.
- Traceability: Being able to track parts back to specific production runs, materials batches, and process parameters, which is crucial for investigation if issues arise.
- Subjectivity: Cosmetic standards can sometimes be subjective, leading to disagreements between production and quality teams, or with the customer. Clear standards and limit samples help.
Building a Robust Quality Management System
| Quality Element | Key Activities | Purpose |
|---|---|---|
| Quality Planning (APQP) | Define critical part features, inspection methods, frequency, and standards before production starts. | Proactive approach to ensure capability and control. |
| Process Control (SPC) | Monitor critical process parameters (temperatures, pressures, times) and part dimensions statistically. | Detect process drift early and react before producing bad parts. |
| In-Process Checks (IPC) | Operators or automated systems perform checks at defined intervals during the run. | Catch deviations quickly, minimize scrap production. |
| Final Inspection | Verify parts against specifications before shipment (sampling or 100% inspection based on criticality). | Ensure only conforming product reaches the customer. |
| Calibration | Regularly calibrate all measuring and testing equipment. | Ensure accuracy and reliability of inspection results. |
| Root Cause Analysis (RCA) | Systematically investigate quality issues (e.g., using 5 Whys, Fishbone diagrams) to find and fix the root cause. | Prevent recurrence of problems. |
| Documentation & Records | Maintain setup sheets, inspection records, traceability data. | Provide evidence of control, support analysis and improvement. |
Quality must be embedded in the culture, not just the responsibility of a separate department. Consistent training, clear standards, reliable processes, and a commitment to continuous improvement are essential for meeting the demands of precision molding.
9. Tooling: Managing Wear, Tear, and Costs Effectively?
Are worn molds causing quality issues and driving up your costs? Neglecting tooling leads to frustrating production stops and expensive repairs. Proper management keeps your molds running longer.
Effective tooling management relies on quality materials, robust design, regular maintenance (cleaning, inspection, lubrication), careful handling, and planned refurbishment. This minimizes wear, ensures part consistency, and protects your investment.
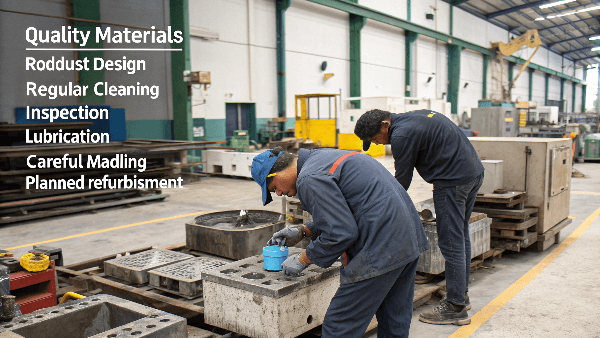
Your injection mold is a critical asset, maybe the most critical asset in your production line. But like any tool, it wears down over time. Ignoring this wear isn’t an option if you want consistent quality and controlled costs. I learned early on that treating molds carefully pays off big time. Let’s look at how to manage tooling effectively.
Why Does Tooling Wear Out?
It’s simple physics, really. High pressures, temperatures, abrasive materials, and the constant opening and closing cycles all contribute. Moving parts like slides and lifters experience friction. The cavity surfaces face wear from the flowing plastic, especially if it contains fillers like glass fiber. Even chemical reactions between the plastic and the steel can cause corrosion over time. Poor handling during setup or storage can also cause damage. It’s a tough life for a mold.
Key Management Strategies
Managing wear involves several steps. You can’t stop it completely, but you can slow it down and manage its effects.
- Material & Design: It starts here. Choose the right tool steel for the expected production volume and material type. A robust design that avoids sharp corners where possible and ensures proper cooling helps reduce stress. Sometimes, surface treatments like nitriding or coatings can significantly extend the life of high-wear areas.
- Regular Maintenance: This is absolutely essential. You need a clear schedule for cleaning molds after production runs to remove plastic residue and gas deposits. Regular inspection of critical features like parting lines, vents, gates, ejector pins, and moving components is vital. Proper lubrication according to the mold maker’s recommendations prevents friction wear. Keeping detailed maintenance logs helps track the mold’s condition.
- Careful Handling: Molds are heavy and precise instruments. Training staff on correct procedures for transport, installation, and removal from the machine prevents accidental damage. Using the right lifting gear and avoiding impacts is basic but crucial.
- Planned Refurbishment: Don’t wait for the mold to fail completely, causing major downtime. Based on the number of cycles run and regular inspection findings, plan for preventative maintenance. This could involve minor polishing, replacing worn inserts or pins, or re-coating surfaces. Scheduling this during planned machine downtime minimizes disruption.
This proactive approach prevents many unexpected breakdowns. It extends the mold’s useful life considerably and ensures the parts produced maintain their quality over the entire production run. It shifts tooling from being a potential problem area to a well-managed, reliable asset.
10. Machine Parameters: Are Incorrect Settings Causing Your Defects?
Frustrated by defects even with a perfect mold? Incorrect machine settings often cause hidden issues, leading to wasted material and lost time. Proper parameter tuning is key to quality parts.
Yes, incorrect settings are a major defect cause. Key parameters are melt/mold temperatures, injection pressure/speed, holding pressure/time, and cooling time. Adjust these based on material, mold design, and part results for optimal quality.
Sometimes, everything seems right – the mold design is solid, the material is correct – but the parts coming out are still flawed. This is often where the injection molding machine settings come into play. I’ve seen countless situations where tweaking a few parameters made all the difference. Think of it like tuning an instrument; you need the right settings for the right performance. Getting these parameters wrong can cause a whole range of defects. Let’s break down the critical ones.
Temperature Controls (Melt & Mold)
Getting the temperatures right is fundamental for processing plastic. There are two main temperatures to watch.
- Melt Temperature: This is the temperature of the plastic as it’s injected into the mold. Each plastic type has an ideal processing range, usually found on its technical datasheet. If the melt is too cold, it won’t flow easily enough to fill the entire cavity, potentially causing short shots or weak weld lines where flow fronts meet. If the melt is too hot, the plastic can degrade, leading to burn marks, gas generation, reduced strength, or a poor surface finish.
- Mold Temperature: This is the temperature of the mold surfaces that the plastic touches. It significantly affects how the plastic cools and solidifies. A mold that’s too cold can cause the plastic to freeze off too quickly near the surface, resulting in flow marks, poor replication of texture, or high internal stress. A mold that’s too hot can increase the cycle time because the part takes longer to solidify, and it might also lead to warping or issues with ejection. Consistent, uniform mold temperature is vital.
Pressure and Speed Settings (Injection and Holding)
Injection pressure and speed determine how quickly and forcefully the molten plastic fills the mold cavity. Too low pressure or speed can lead to short shots or weld lines. Too high pressure or speed can cause flash (plastic escaping the cavity) or even damage the mold. After the initial fill, holding pressure is applied. This packs more material into the cavity to compensate for shrinkage as the plastic cools. Incorrect holding pressure (too high or low) or holding time (too short or long) is a common cause of sink marks or voids.
Time Settings (Holding and Cooling)
Holding time, as mentioned, works with holding pressure to combat shrinkage. It needs to be long enough for the gate (the entry point for the plastic) to freeze off, preventing material from flowing back out. Cooling time is the duration the part stays in the closed mold after injection and holding. This allows the part to solidify enough to be ejected without deforming. Insufficient cooling time leads to warping or ejection issues. Excessive cooling time unnecessarily increases the cycle time, reducing efficiency. Balancing part quality with cycle time efficiency is the goal here. Adjusting these parameters systematically, often one at a time, helps pinpoint the cause of defects and achieve consistent, high-quality production.
-
Explore this link to discover effective strategies and insights that can enhance your precision injection molding processes. ↩
-
Understanding the latest trends in quality control can help you implement better practices and reduce defects in your production. ↩
-
Understanding the effects of improper drying can help prevent cosmetic defects and ensure part strength in plastic manufacturing. ↩
-
Exploring storage issues can provide insights into maintaining the integrity of plastic materials and preventing degradation. ↩


