Do you struggle with designing plastic components that are robust, manufacturable, and economically viable? Non-optimal designs may result in brittle components, high mold changeover costs, and protracted production schedules, dooming your project at the outset. Think instead about designing parts that satisfy all possible constraints effortlessly, from conceptual designs through to manufactured products. To help you achieve optimal designs, here are the basic do’s and don’ts.
If you want to create a superior plastic product part, you need to adhere to the First 10 Guidelines. These are ensuring the walls of uniform thickness, providing draft angles to ensure easy ejection of the part from the mold, increasing radii for reduced stress, and properly designing the ribs and gussets for added strength. Then there is consideration for boss design for added attachments, elimination of undercuts in the design process, as well as taking the right material choice.
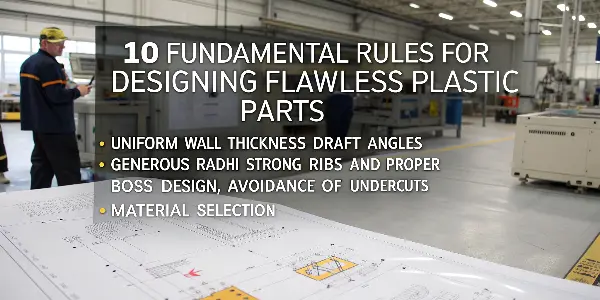
I’ve seen many projects succeed or fail based on these early design decisions. It’s a lesson I learned firsthand in my years on the factory floor and running my own business. These rules aren’t just theory; they are the bedrock of successful manufacturing. Let’s break them down one by one, so you can apply them to your own work. The journey from a great idea to a tangible product starts with understanding these principles.
What Are The Key Design Considerations For Plastic Parts?
Do manufacturing problems frequently arise with your plastic part designs? Big issues like sink marks, warping, or weak areas might result from small factors overlooked throughout the design process. Delays and expensive rework result from this. However, what if you could foresee these problems and account for them in the design process? Let’s examine the fundamental ideas that guarantee your designs are sturdy and prepared for injection molding, transforming possible challenges into achievements.
For plastic parts, there are a number of important design factors to take into account. To avoid flaws, consistent wall thickness is crucial. Additionally, you must employ radii on corners to lessen tension and add draft angles for simple mold release. Strength is added without bulk by well designed ribs and gussets. Bosses require careful fastener design, and in order to make molds simpler, undercuts should be avoided. For a successful, high-quality item, gate position, material selection, and surface treatment are also essential.
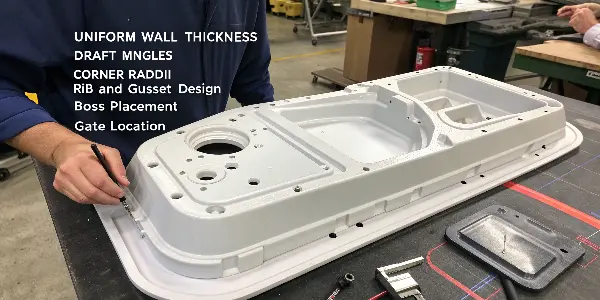
When I first started, I thought design was just about the final shape. But I quickly learned that how you make the part is just as important. These ten rules are things I wish someone had laid out for me from day one. They are the foundation for any successful plastic part. Let’s go through them in more detail.
The 10 Fundamental Rules
- Uniform Wall Thickness: This is my number one rule. Inconsistent walls cause the plastic to cool at different rates. This leads to warping and internal stress. Always aim for a consistent thickness throughout your part. If you need to change thickness, make the transition gradual.
- Draft Angles: Think of trying to pull a cup straight out of wet sand. It creates a vacuum and is difficult. A draft angle is a slight taper added to the vertical walls of your part. This taper helps the part release cleanly from the mold. Without it, you can get drag marks or even damage the part during ejection.
- Radii on Corners: Sharp corners are weak points. They concentrate stress and can easily crack. They also disrupt the flow of molten plastic in the mold. Adding a smooth, or a radius, distributes stress evenly and improves plastic flow. A good rule of thumb is to make the inside radius at least 50% of the wall thickness.
- Ribs & Gussets: If your part needs more strength, don’t just make the walls thicker. Thicker walls lead to longer cooling times and defects. Instead, add ribs. Ribs are thin, wall-like features that add support. Gussets are triangular supports that reinforce areas like a wall meeting a boss.
- Boss Design: Bosses are raised features for screws or mounting points. Their design is critical. Their wall thickness should be about 60% of the main wall to avoid sink marks.
- Avoid Undercuts: An undercut is a feature that prevents the part from being ejected directly from the mold. Things like side holes or clips create undercuts. They require complex, expensive mold mechanisms called sliders or lifters. If you can design without them, you will save a lot of money.
- Gate Location: The gate is where molten plastic enters the mold cavity. Its location affects how the part fills, its strength, and its final appearance. I always work with the mold maker to decide the best gate location early in the process.
- Material Selection: The type of plastic you choose affects everything—strength, flexibility, temperature resistance, and cost. Pick a material that fits your part’s function and environment.
- Tolerances: It’s impossible to make a part with perfect dimensions every time. Tolerances define the acceptable range of variation. Be realistic. Tighter tolerances mean a more expensive mold and a higher rejection rate. Only specify tight tolerances where they are absolutely necessary.
- Surface Finish: The texture of your part’s surface is created by the mold. A polished mold gives a glossy finish, while a textured mold can hide minor imperfections. The finish also affects how the part releases from the mold.
How does Gate and Runner design impact the quality of plastic components?
The design of the gate and the runner affects the flow of the plastic material into the mold cavity. The result will affect the strength, aesthetics, and dimensional stability of the parts. A gate that is wrongly located will end up creating flow paths that will result in defects like weld lines, air traps, flow hesitation, and marks on the surface. This happens because the melting plastic will cool at different rates depending on the areas.
Runner design is also equally important, especially in multi-cavity moldings. Imbalanced runners generate differences in pressure and temperature among the cavities, leading to variations in the weight and quality of the molded parts. Larger runners result in increased scrap and cycle times, and smaller runners generate flow restrictions and increased shear rates, which might affect the polymer itself.
The type and size of the gate must correlate with the part shape and material characteristics. In the case of a thin-wall part, the gate should provide for rapid flow into the cavity to prevent the part from cooling too quickly, whereas a cosmetic part may require gates positioned out of sight. Effective gate and runner design enables a uniform flow of material into the cavity.
How Do You Start Designing a Plastic Part while following fundamental rules to Design Flawless Plastic Parts
Are you staring at a blank screen, unsure where to begin with your plastic part design? Many great ideas stall at this stage because the process feels overwhelming. You might worry about making a mistake that will be expensive to fix later. But what if you had a clear, step-by-step process to guide you from concept to a manufacturable design? This framework can give you the confidence to start and see your project through to completion.
To design a plastic part, start by clearly defining its function and requirements, including strength, environment, and lifespan. Next, choose the right plastic material that meets these needs. Then, create a 3D CAD model, focusing on the fundamental rules like uniform wall thickness and draft angles. Finally, perform a Design for Manufacturability (DFM) analysis to identify and fix potential molding issues before any steel is cut. This structured approach minimizes risks and ensures a successful outcome.
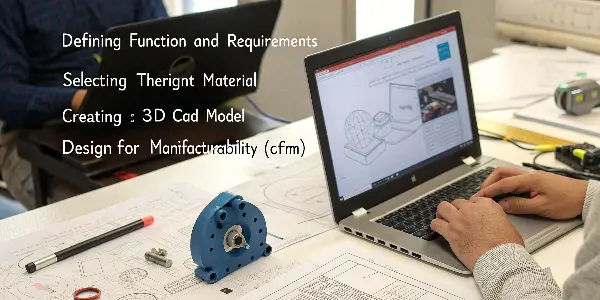
I’ve guided many clients through this process. The ones who succeed are always the ones who are the most systematic. They don’t jump straight to the fine details. They build a solid foundation by answering the big questions first. Rushing this early stage is the most common mistake I see, and it almost always leads to problems down the road. Let’s break down this systematic approach into clear, actionable steps that you can follow for your next project.
Step 1: Define the Part’s Purpose
Before you draw a single line in your CAD software, you need to know exactly what this part is supposed to do. A part for a children’s toy has very different requirements than a part inside a car engine. Ask yourself these questions:
- What is the main function of this part?
- What other parts will it interact with?
- What loads or forces will it experience?
- What temperatures or chemicals will it be exposed to?
- What is the expected lifespan?
Step 2: Select the Right Material
Your answers from Step 1 will guide your material choice. There are thousands of plastics, each with unique properties. For example, ABS is great for durable consumer products, while Polycarbonate is strong and impact-resistant. Nylon is good for gears because it has low friction. I always consult material datasheets and often talk to my material suppliers. Don’t just pick a material you’ve used before. Do the research to ensure it’s the best fit for this specific application.
Step 3: Create the 3D Model with DFM in Mind
Now you can start designing in your CAD software. As you create the geometry, keep the 10 fundamental rules in your mind at all times.
- Start with the overall shape.
- Establish your nominal wall thickness and stick to it.
- Add features like ribs, bosses, and mounting points.
- Apply draft angles to all vertical faces.
- Add radii to all corners, both inside and outside.
Think about the mold from the very beginning. Imagine the two halves of the mold pulling apart. This will help you identify undercuts and areas that will be difficult to eject. This is the core of Design for Manufacturability (DFM).
Step 4: Review and Refine
Once you have a complete design, it’s time to review it. Better yet, have someone else review it. I always run a DFM analysis with my team. We look for potential issues like thick sections that could cause sink marks or areas that are hard to fill. We might also run a mold flow simulation. This software simulates how the plastic will fill the mold, helping us predict and solve problems before we ever make the mold. This review stage is where you turn a good design into a great one.
What is a Boss in Plastic Part Design?
Have you ever wondered how screws hold plastic items together? or the safe mounting of circuit boards inside an electronics casing. Frequently, a minor yet crucial aspect is involved in the solution. Assembly would be challenging and unreliable without it. Despite being ubiquitous in plastic design, these tiny pillars are frequently poorly designed, which results in weak connections or cracks. What is this crucial component, and why is its design so crucial?
A boss is a hollow, cylindrical feature that resembles a pillar and is made of plastic. Its main function is to serve as a mounting point for assembly, usually for a pin, screw, or threaded insert. A well-designed boss ensures a robust and dependable connection by precisely locating and securing another component. However, poorly made bosses can develop into weak spots that fracture under pressure or produce molding flaws like sink marks.
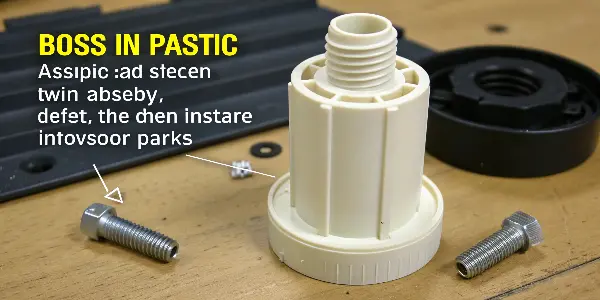
I’ve seen boss design make or break a product’s assembly. In my early days, a client had a part with bosses that kept cracking when the assembly line workers inserted the screws. The problem wasn’t the material or the screws; it was the boss design itself. The walls were too thin, and there was no reinforcing gusset. We had to modify an expensive mold to fix it. This taught me a valuable lesson: small features can have a huge impact. Getting the boss design right from the beginning saves enormous headaches later on.
The Purpose of a Boss in fundamental rules to Design Flawless Plastic Parts
The main role of a boss is to create a strong point for mechanical assembly. It raises the mating surface away from the main wall of the part, which provides several benefits. It allows for a shorter screw, which saves on cost and assembly time. It also adds significant stiffness to the area without needing to thicken the entire part wall. Here are the most common uses:
- Self-Tapping Screws: The hole in the boss is designed to have threads formed by the screw itself during the first assembly.
- Threaded Inserts: For applications that require repeated assembly and disassembly, a metal threaded insert can be heat-staked or molded into the boss. This provides a durable metal thread.
- Locating Pins: Bosses can also serve as simple locating points, aligning one part with another without any fasteners.
Key Design Rules for Bosses
Achieving the ideal boss requires striking a balance between moldability and structural integrity. I always abide by the following important design guidelines:
- Wall Thickness: The wall of the boss should never be more than 60% of the nominal wall thickness of the part. If it’s too thick, you will get a noticeable sink mark on the opposite side of the part wall.
- Base Radii: Just like any other wall intersection, the base of the boss where it meets the part floor must have a generous radius. A radius of at least 25% of the nominal wall thickness is a good starting point. This prevents a sharp corner, which would concentrate stress and be a likely point of failure.
- Gussets for Support: Tall bosses (more than three times their outer diameter) can act like levers and break easily if a side force is applied. To prevent this, we add gussets. These are triangular ribs that connect the boss wall to the part floor, providing crucial support without adding thick sections of material.
- Core Pin Design: The hole in the boss is formed by a core pin in the mold. The hole should extend all the way to the base wall to ensure the pin is well-supported and to avoid creating a thick section at the bottom of the boss.
Following these rules will help you design bosses that are both strong and easy to manufacture, ensuring your product assembles smoothly and lasts for years.
Cooling System Design: What is its role in Plastic Part Performance?
The cooling system design is one of the most important aspects of injection molding since it determines how quickly and evenly the heat will be removed from the molded part. Warpage, sink marks, internal stress, dimensional inconsistency, and longer cycle times are all results of poor cooling design. Ineffective cooling also indirectly reduces production efficiency because it typically accounts for 70–80% of the molding cycle.
When a part is uniformly cooled, every part freezes at roughly the same rate. Differential shrinkage occurs when some parts of the part cool considerably more quickly than others, causing the part to distort. Cooling channels must be evenly spaced and positioned close enough to the cavity surface, especially in the vicinity of thick areas and structural components like bosses and ribs.
Advanced cooling methodologies, including conformal cooling or optimized cooling circuit layouts, will significantly enhance temperature uniformity. Appropriate coolant flow rate and temperature control further stabilize the process. A properly designed cooling system enhances surface finish, reduces internal stress, improves mechanical performance, and permits shorter cycle times and cycle time consistency.
What Makes a Good Boss for a Self-Tapping Screw?
When designing a product that must be screwed together, do you discover that the plastic cracks or the connections are weak? Self-tapping screws are a popular and economical technique, but they require careful plastic boss design. Your product may be ruined by stripped threads or cracked parts caused by a poorly designed boss. What particular characteristics, then, make a boss strong and ideal for a self-tapping screw?
A well-designed boss for a self-tapping screw has specific dimensions for its outer and inner diameters, which are determined by the screw size and plastic material. The hole should be deep enough to engage the full length of the screw threads. Crucially, the outer diameter must be large enough—typically 2 to 2.4 times the screw’s nominal diameter—to withstand the hoop stress generated during thread-forming. Adding gussets for tall bosses also prevents them from breaking during assembly.
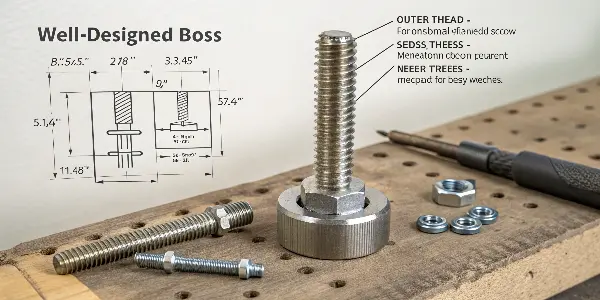
I often get questions from designers about why their screw bosses are failing. The most common cause is ignoring the immense pressure a screw creates when it cuts its own threads. It’s not just cutting; it’s pushing the plastic outward. This outward force is called hoop stress. If the outer walls of the boss aren’t thick enough to contain this stress, the boss will simply crack open. You have to design the boss specifically to handle this force.
Sizing the Boss Correctly
The most critical aspect is getting the diameters right. These dimensions are not arbitrary; they are based on the screw you plan to use and the type of plastic.
- Hole Diameter (Inner Diameter): The hole must be the correct size. If it’s too small, the stress will be too high, and the boss will crack. If it’s too large, the screw threads won’t engage properly, and the connection will be weak. Screw manufacturers and material suppliers provide detailed charts with recommended hole sizes for different screw types and plastics. I always have these charts handy.
- Outer Diameter: As I mentioned, the outer diameter is what contains the hoop stress. A general rule is that the outer diameter of the boss should be at least 2 times the nominal diameter of the screw. For example, for an M3 screw (3mm diameter), the boss should have an outer diameter of at least 6mm. I often go for 2.4 times for extra safety, especially with more brittle plastics.
Sizing Chart Example
This is a simplified example. Always check your specific screw and material supplier’s data.
| Screw Size | Recommended Hole Diameter (ABS) | Recommended Outer Diameter (ABS) |
|---|---|---|
| M2.5 | 2.1 mm | 5.5 mm |
| M3 | 2.6 mm | 6.5 mm |
| M4 | 3.5 mm | 9.0 mm |
Other Important Features
Beyond the diameters, a few other details are essential for a reliable connection.
- Draft: Like any other feature, the inside and outside walls of the boss need draft. I usually add about 0.5 to 1 degree of draft.
- Core Pin: The hole should go as deep as possible, ideally to the surface of the main part wall. This ensures the core pin in the mold is stable and strong.
- Countersink: Adding a small countersink, or lead-in chamfer, at the top of the hole helps guide the screw and makes assembly easier and faster on the production line.
- Screw Engagement Length: The screw should engage the boss for a length of at least 2 times its nominal diameter. This provides sufficient thread engagement for a strong hold without making the screw unnecessarily long.
By carefully considering these dimensions and features, you can design a screw boss that provides a strong, reliable, and cost-effective assembly method for your product.
Conclusion
The secret to making successful products is to understand these ten basic principles of plastic part design. Every guideline aids in preventing typical manufacturing issues, from preserving consistent wall thickness to thoughtfully creating features like bosses. By using these guidelines, you can create parts that are not only robust and useful but also economical to manufacture, transforming your imaginative concepts into high-caliber, practical goods.
