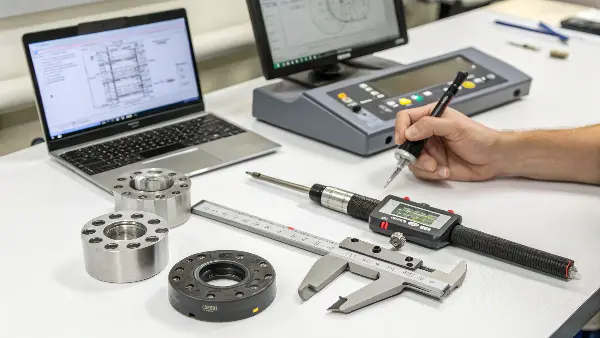
Struggling with parts not matching your CAD designs due to shrinkage? This mismatch can derail projects. I’ll guide you on accurately measuring real-world shrinkage1 to bridge this gap.
To validate shrinkage calculations2, meticulously measure critical dimensions on both the mold and the cooled, stabilized parts using precision instruments3. Then, compare these actual measurements against your theoretical shrinkage values to refine your design and process.
Transition Paragraph:
I’ve seen it countless times in my career – a perfectly designed mold, based on datasheet shrinkage values, produces parts that are just slightly off. For someone like Jacky, working on consumer electronics where tolerances are tight, "slightly off" can mean the difference between a perfect fit and a failed assembly. That’s why simply calculating shrinkage isn’t enough; you have to validate those calculations with real-world measurements. It’s about closing the loop between theory and reality. Let’s explore how to do this effectively, ensuring your parts come out right, every time.
How to calculate part shrinkage accurately?
Are your molded parts consistently missing the mark on dimensions? Understanding the precise method to calculate shrinkage from actual measurements is the first step to gaining control and improving accuracy.
Calculating part shrinkage involves precisely measuring a specific dimension on the cold mold and the corresponding dimension on the fully cooled and conditioned part, then applying these values to a standard shrinkage formula.
!
Dive deeper Paragraph:
The journey from a mold dimension to a final part dimension is where shrinkage makes its impact. To truly understand and quantify this, we need a systematic approach. It’s not just about a quick check; it’s about careful, repeatable measurements.
Step-by-Step Guide to Calculation
- Identify Critical Dimensions: First, pinpoint the features on your part where dimensional accuracy is most crucial. These are the dimensions you’ll focus on. For Jacky, this might be mating surfaces or snap-fit features.
- Measure Mold Cavity/Core Dimension (Cold): Before any production, accurately measure the relevant dimension on the actual steel of the mold cavity or core at room temperature. Don’t rely solely on the mold’s design drawing, as manufacturing tolerances can exist. Use calibrated instruments.
- Mold Parts Under Stable Conditions: Run the injection molding process until it’s stable and producing consistent parts. Ensure all process parameters (temperatures, pressures, times) are set and maintained.
- Allow Parts to Cool and Stabilize: This is vital. Plastic parts continue to shrink slightly as they cool and sometimes as moisture content stabilizes. A common practice is to wait 24 to 48 hours at a controlled ambient temperature (e.g., 23°C / 73°F) before taking final measurements.
- Measure Part Dimension: Carefully measure the same critical dimension on several (e.g., 5-10) stabilized parts. Take the average of these measurements to account for minor variations.
- Apply the Shrinkage Formula: Use the formula:
Shrinkage Rate (%) = [(Mold Dimension - Average Part Dimension) / Mold Dimension] * 100.
I recall a project involving intricate internal features. The initial parts were too tight. By meticulously following these steps, we identified that our assumed shrinkage for that specific flow path within the mold was slightly off. This precise calculation allowed for a minor tool adjustment that solved the problem.How do you calculate actual shrinkage using the formula?
Got your mold and part measurements but unsure how to turn them into a practical shrinkage percentage? The formula is simple, but its correct application is key to understanding material behavior.
Actual shrinkage is calculated with the formula: Shrinkage (%) = [(Dimension of Mold – Dimension of Part) / Dimension of Mold] x 100. This expresses the reduction in size as a percentage of the original mold dimension.

Dive deeper Paragraph:
The formula itself looks straightforward, but the integrity of the data you plug into it is everything. Let’s break down its components and why precision matters here.
Understanding the Shrinkage Formula Components
- Dimension of Mold (Dm): This is the specific dimension measured directly on the mold cavity (for an external part feature) or mold core (for an internal part feature) at a standard temperature (e.g., room temperature before the mold heats up in production). This is your baseline, the size you intended the plastic to conform to when molten.
- Dimension of Part (Dp): This is the corresponding dimension measured on the actual injection-molded part after it has been ejected, fully cooled, and allowed to stabilize (typically 24-48 hours). This represents the final, settled size of the feature.
The formula,Shrinkage (%) = [(D<sub>m</sub> - D<sub>p</sub>) / D<sub>m</sub>] * 100, essentially tells you how much smaller the part became relative to the mold size that formed it.
For example, if a mold cavity length (Dm) is 150.00 mm and the average measured part length (Dp) after 24 hours is 149.10 mm:
Shrinkage (%) = [(150.00 mm – 149.10 mm) / 150.00 mm] 100
Shrinkage (%) = [0.90 mm / 150.00 mm] 100
Shrinkage (%) = 0.006 * 100 = 0.6%
This 0.6% is the actual, measured shrinkage for that specific dimension, material, and set of processing conditions. For Jacky, accurately calculating this for different features of a complex part helps him understand if the shrinkage is uniform or anisotropic (different in different directions), which is crucial for fit and function. I always emphasize to my team that small errors in measuring Dm or Dp can lead to significant misinterpretations of the shrinkage rate, potentially leading to incorrect tooling adjustments.How do you measure shrinkage effectively?
Are your shrinkage calculations inconsistent or unreliable? The tools and techniques you use for measurement can significantly impact the accuracy of your data, directly affecting mold design and part quality.
Effective shrinkage measurement relies on using calibrated, high-precision instruments like digital calipers, micrometers, or CMMs, and consistently applying them to defined features on both the mold and conditioned parts under controlled environmental conditions.

Dive deeper Paragraph:
Getting reliable shrinkage data isn’t just about having a formula; it’s about the quality of the measurements you feed into it. This is where the "rubber meets the road" in mold and part validation.
Essential Tools and Techniques
- Choosing the Right Instrument:
- Digital Calipers: Good for general-purpose measurements with resolutions typically around 0.01-0.02mm. Ideal for larger dimensions.
- Micrometers: Offer higher precision (e.g., 0.001-0.01mm) and are better for measuring thicknesses or specific external/internal diameters.
- Coordinate Measuring Machines (CMM): The gold standard for complex geometries, GD&T verification, and establishing datums. They provide highly accurate and repeatable 3D measurements.
- Optical Comparators/Vision Systems: Useful for measuring profiles, radii, angles, and small features that are hard to access with contact instruments.
- Calibration is Key: All measuring instruments must be regularly calibrated against traceable standards. An uncalibrated tool is worse than no tool at all.
- Consistent Measurement Points: Define exactly where on the mold and part you will take measurements. Use datums or clearly marked reference points. Ensure you measure the same feature in the same way every time.
- Part Conditioning: As mentioned before, allow parts to cool and stabilize for at least 24 hours (ideally 48 hours for some materials like Nylon that absorb moisture) at a consistent temperature (e.g., 23°C ± 2°C) and humidity (e.g., 50% ± 5% RH). Record these conditions.
- Measure Multiple Samples: Don’t rely on a single part. Measure a statistically relevant number of parts (e.g., 5, 10, or more from different cavities if it’s a multi-cavity mold) produced under stable processing conditions and average the results.
- Document Everything: Record the date, time, operator, instrument used, calibration status, ambient conditions, and all measurements.
I once saw a major discrepancy in shrinkage data between shifts. It turned out one operator was measuring parts straight off the machine, while the other waited a day. This simple difference in technique led to weeks of confusion. For Jacky, whose electronic components might have very tight tolerances, adopting such rigorous measurement practices is non-negotiable.What is the shrinkage percentage of nitrile rubber?
Dealing with nitrile rubber parts that don’t meet size specifications? Nitrile’s shrinkage can be quite different from common thermoplastics, often higher and more variable, making datasheet values only a rough guide.
Nitrile rubber (NBR) typically exhibits a shrinkage percentage ranging from about 1.5% to 3.5%. However, this value is highly dependent on the specific compound formulation, cure parameters, mold design, and part geometry, necessitating empirical measurement.

Dive deeper Paragraph:
Nitrile rubber, or NBR, is an elastomer, and its "shrinkage" behavior is more complex than that of many rigid thermoplastics. While thermoplastics shrink primarily due to thermal contraction and crystallization (if semi-crystalline), elastomers also undergo changes related to the crosslinking (vulcanization) process and relaxation of polymer chains.
Factors Influencing NBR Shrinkage:
- Compound Formulation: This is huge for NBR. The type and amount of acrylonitrile (ACN) content, plasticizers, fillers (like carbon black, silica), and the cure system (e.g., sulfur or peroxide) dramatically affect shrinkage. A softer, highly plasticized compound might shrink differently than a hard, highly filled one.
- Cure Temperature and Time: The vulcanization process locks the rubber’s network structure. Higher cure temperatures or longer times can sometimes lead to slightly increased crosslink density and potentially different shrinkage.
- Mold Temperature: This affects the rate of cure and the thermal contraction component.
- Part Geometry & Thickness: Thicker sections of NBR may exhibit different shrinkage compared to thinner sections due to thermal gradients during cooling and curing.
- Pressure During Molding/Curing: Sufficient pressure helps ensure the compound fills the cavity and minimizes voids, but the primary shrinkage mechanism is still thermal and cure-related.
- Post-Cure: Some NBR compounds may undergo additional slight dimensional changes if a post-cure process is applied.
Datasheet values for NBR shrinkage are very general. I always tell clients, especially someone like Jacky if he were designing a precision seal, that for elastomers, building a prototype mold or at least a test cavity to measure actual shrinkage with the exact compound and process intended for production is critical. I recall a project with NBR gaskets where the datasheet suggested 2.0% shrinkage. Our tests with the chosen compound showed closer to 2.8% under production conditions. That 0.8% difference was critical for the sealing function, and catching it early saved a costly mold modification.Conclusion
Validating shrinkage through precise measurement of actual parts is essential. It transforms theoretical calculations into reliable data, ensuring your molded components meet critical design specifications consistently.
-
Understanding real-world shrinkage is crucial for accurate CAD designs and ensuring parts fit perfectly. Explore this link for in-depth insights. ↩
-
Validating shrinkage calculations is essential for successful manufacturing. Discover effective methods and best practices in this resource. ↩
-
Precision instruments are vital for accurate measurements in manufacturing. Learn about their importance and types in this informative article. ↩
