Are defects like sink marks or warpage ruining your ABS parts? Production halts and scrap waste time and money. I’m here to help you diagnose and fix these common issues.
Troubleshooting ABS defects involves systematically checking material preparation, machine settings, and mold design. Identifying the root cause, from sink marks to warpage, allows targeted solutions for quality parts.
Dealing with defects in ABS injection molding is a common challenge, but it’s one you can overcome. I’ve spent years in mold factories and seen my share of problems. The key is not to panic, but to approach it methodically. It’s like being a detective; you look for clues and narrow down the suspects. Once you understand the "why," the "how to fix it" becomes much clearer. Let’s dive into some of the most frequent culprits and how I’ve learned to tackle them.
What Causes Unsightly Sink Marks in ABS Parts and How Can You Fix Them?
Seeing ugly depressions on your otherwise perfect ABS parts? These sink marks often appear over thick sections. I know how frustrating this can be, but there are ways to solve it.
Sink marks in ABS are surface depressions typically found above ribs, bosses, or thick sections. They are caused by localized shrinkage as the plastic cools. Adjusting packing pressure, hold time, and mold/part design can eliminate them.
Sink marks are one of those defects that can really spoil the look of a part. I remember working on a project for an electronics enclosure. It had internal ribs for strength, and right on the outer surface opposite those ribs, we kept getting these noticeable sinks. It was because the plastic in those thicker rib areas was cooling and shrinking more than the surrounding thinner walls. The material was literally pulling itself inward. We had to adjust our process. It’s a common issue when you have non-uniform wall thicknesses.
Here’s a breakdown of common causes and solutions I’ve used:
Identifying Causes and Implementing Solutions for Sink Marks
| Cause Category | Specific Cause | Solution(s) | My Quick Tip |
|---|---|---|---|
| Processing Issues | Insufficient injection or packing pressure | Increase injection pressure; increase packing pressure and hold time. | Don’t just crank it up; make small, methodical adjustments. |
| Melt temperature too high | Lower the melt temperature to reduce overall shrinkage. | Check your material supplier’s recommended range for ABS. | |
| Mold temperature too high | Lower the mold temperature, especially on the side where sinks appear. | Ensure cooling channels are effective near the problem area. | |
| Inadequate cooling time | Increase overall cooling time to allow the part to solidify more completely under pressure. | This might slow your cycle, but quality often demands it. | |
| Mold Design | Gate size too small | Enlarge the gate to allow for better packing of material into the cavity. | A small gate can freeze off too early, preventing effective packing. |
| Gate location not optimal | Relocate the gate closer to the thick section or gate directly into the thick section if possible. | Think about how the plastic flows and packs. | |
| Part Design | Excessive wall thickness variations | Redesign the part to have more uniform wall thicknesses. Core out thick sections. Reduce rib thickness to 50-60% of the adjacent wall. | This is often the best long-term fix if sinks are persistent. |
| Ribs/bosses too thick | Reduce the thickness of ribs and bosses relative to the main wall. Use multiple thinner ribs instead of one thick one. | Follow good design guidelines for plastic parts. | |
| Material Issues | Material shrinkage rate too high | Consider a lower shrinkage grade of ABS if design and process changes don’t fully resolve the issue. | Always check the datasheet for your specific ABS grade. |
Addressing sink marks often involves a combination of these adjustments. I usually start with process parameters because they are easiest to change. If that doesn’t work, then we look at mold or part design modifications.
Why Do My ABS Molded Parts Warp and How Can This Be Prevented?
Are your ABS parts twisting or bending out of shape after molding? Warpage is a serious issue that affects assembly and function. I’ve battled this many times, and it usually comes down to stress.
Warpage in ABS parts is a dimensional distortion caused by non-uniform shrinkage and internal stresses during cooling. Preventing it involves ensuring uniform mold temperature, optimized packing, and careful part design.

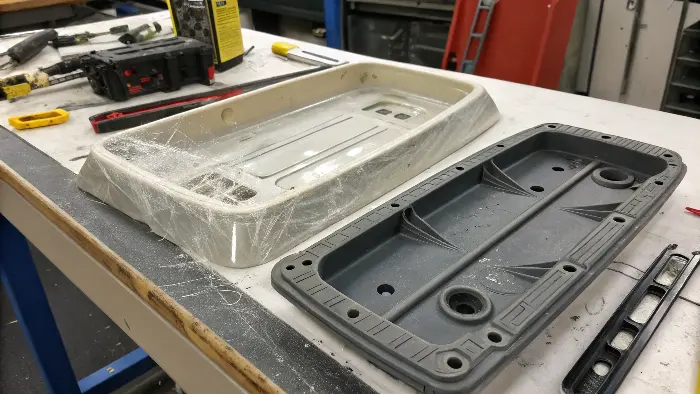
Warpage is a real headache. I once had a project for a long, flat ABS cover. It kept bowing like a banana after it came out of the mold. The problem was differential shrinkage – one side was cooling and shrinking at a different rate than the other. This creates internal stresses, and when the part is ejected, those stresses relieve themselves by distorting the part. It’s a common problem, especially with large, flat parts or parts with big differences in wall thickness. It’s like the part is fighting itself.
Here’s how I approach diagnosing and fixing warpage in ABS:
Understanding and Countering Warpage
Warpage is often a result of several factors working together. You need to look at the whole system: part design, mold design, and processing.
- Part Design Issues:
- Non-uniform wall thickness: This is a major cause. Thicker sections cool slower and shrink more than thinner sections. Try to design for uniform wall thickness. If you must have thick sections, transition gradually.
- Sharp corners: These create stress concentrations. Use generous radii on all corners.
- Large, flat unsupported areas: These are prone to bowing. Adding ribs or design features can increase stiffness.
- Mold Design Issues:
- Uneven cooling: If one side of the mold (e.g., cavity) is much hotter or colder than the other (e.g., core), the part will cool unevenly. Ensure cooling channels are well-distributed and effective on both mold halves. Sometimes, I’ve had to add extra cooling circuits or use a different mold material in certain areas.
- Gate location: Gating into a thin section that then feeds a thick section can cause issues. The gate location affects how the plastic flows and packs, which in turn influences shrinkage patterns.
- Ejection: Uneven ejection force or ejecting the part too hot can also contribute to warpage. Ensure ejector pins are balanced and the part is cool enough before ejection.
- Processing Parameter Adjustments:
- Melt temperature: Too high a melt temperature can increase shrinkage. Too low can increase stress. Find the sweet spot for your ABS grade.
- Mold temperature: As mentioned, ensure it’s uniform. Sometimes, slightly raising the overall mold temperature can help reduce stress, but this can also increase shrinkage, so it’s a balance.
- Packing pressure and time: Insufficient packing can lead to more shrinkage and warpage. Too much can cause stress. Optimize these carefully.
- Cooling time: Ensure adequate cooling time for the part to solidify and stabilize before ejection.
I always tell people, solving warpage is about managing stresses and shrinkage. It’s about finding balance in your design and process.What Causes Flash on ABS Parts and How Do I Eliminate It?
Finding thin, unwanted webs of plastic on the edges of your ABS parts? This is flash, and it means your mold isn’t sealing correctly. I know it’s a common annoyance that adds extra trimming work.
Flash on ABS parts is excess material forced out of the mold cavity along parting lines, vents, or ejector pins. It’s typically caused by insufficient clamp force, worn mold components, or excessive injection pressure/speed.

Flash is that annoying thin layer of plastic that squeezes out where the two halves of the mold meet, or around ejector pins. It’s like the plastic is trying to escape. I’ve seen cases where flash was so bad, parts looked like they had little wings. This not only looks bad but also usually requires a manual trimming operation, which adds cost and time. It’s a clear sign that something is wrong with how the mold is closing or how the plastic is being injected. Most often, the mold halves are not held together tightly enough to resist the pressure of the molten plastic.
Here’s a look at the common culprits and their fixes:
Diagnosing and Preventing Flash in ABS Molding
| Cause Category | Specific Cause | Solution(s) | My Quick Tip |
|---|---|---|---|
| Mold Issues | Worn or damaged parting line surfaces | Inspect mold parting lines. Repair or re-grind surfaces if damaged or worn. Ensure mold faces are clean. | Even a small piece of debris can prevent proper sealing. |
| Insufficient venting or clogged vents | Vents can get filled with plastic. Clean existing vents. If vents are too deep, they can cause flash; if too shallow, they cause burns. | Proper venting is crucial, not just for flash but also for complete filling. | |
| Mold components not fitting properly (e.g., inserts) | Check alignment and fit of all mold components. | Loose inserts are a common spot for flash to occur. | |
| Machine/Process | Insufficient clamp force | Increase machine clamp tonnage. Ensure the projected area of the part isn’t too large for the machine’s clamping capacity. | Always calculate required clamp force for your part and material. |
| Injection pressure or speed too high | Reduce injection pressure or speed, especially during the packing phase. | Too much force can literally push the mold open. | |
| Melt temperature too high | Lower melt temperature. Hotter, more fluid plastic can more easily sneak into tiny gaps. | Stick to the recommended processing range for your ABS. | |
| Barrel temperature too high | Similar to melt temperature, ensure barrel zones are not overheating the material. | Profile your barrel temperatures correctly. | |
| Nozzle/sprue bushing mismatch | Ensure proper seating and alignment between the machine nozzle and the mold’s sprue bushing. | A poor seal here can cause leakage and issues. |
Preventing flash starts with a well-maintained mold and a properly set up machine. I always emphasize regular mold maintenance. It’s cheaper to prevent flash than to constantly trim it off parts.
Why Are My ABS Parts Coming Out Incomplete (Short Shots)?
Frustrated by ABS parts that aren’t fully formed? These "short shots" mean the plastic isn’t reaching all areas of the mold. This common issue usually points to flow problems or insufficient material.
Short shots in ABS molding occur when the molten plastic fails to completely fill the mold cavity, resulting in an incomplete part. This can be due to insufficient material, low pressure/speed, premature solidification, or poor venting.

A short shot is pretty obvious – you get a part that’s missing a bit, or maybe a whole section. I’ve seen this happen many times, especially with complex parts that have long flow paths or very thin walls. It’s like the plastic just gives up before it reaches the end of the cavity. The material might be freezing off too early, or there just isn’t enough push behind it. I remember a case with a thin-walled ABS container. We kept getting short shots at the very end of the fill. We eventually found that our vents were too small and were getting clogged, creating back pressure that the plastic couldn’t overcome.
Let’s look at how to troubleshoot and fix short shots with ABS:
Tackling the Causes of Short Shots
If your parts are incomplete, something is stopping the plastic from getting where it needs to go.
- Material & Temperature Issues:
- Insufficient material: Check if there’s enough plastic in the shot. Increase shot size if needed.
- Melt temperature too low: Colder ABS is more viscous and doesn’t flow as easily. Increase the melt temperature (within the recommended range).
- Mold temperature too low: A cold mold can cause the plastic to freeze off prematurely, especially in thin sections. Increase the mold temperature.
- Injection Process Parameters:
- Injection pressure too low: Not enough force to push the material to the furthest points of the cavity. Increase injection pressure.
- Injection speed too slow: Slow flow can allow the plastic to cool and solidify before filling. Increase injection speed. This is often a very effective fix for thin-walled parts.
- Hold pressure/time insufficient: While mainly for packing, if the initial fill is borderline, a bit more hold might help finish it off, but this isn’t the primary solution for a true short shot.
- Mold Design & Condition:
- Blocked gates or runners: Check for any obstructions in the flow path.
- Inadequate venting: Trapped air in the cavity can create back pressure, preventing complete fill. Ensure vents are present, correctly sized (typically 0.025-0.05mm deep for ABS), and clean. I’ve often added more vents to solve stubborn short shots.
- Gate size too small: A small gate can restrict flow or freeze off too early. Consider enlarging the gate.
- Long or restrictive flow paths: If the part design forces the plastic to travel a very long, thin path, it might be inherently difficult to fill. Sometimes, part design changes or adding flow leaders are needed.
I usually start by checking the easiest things: Is there enough material? Are the temperatures okay? Then I move to pressures and speeds. If it’s still an issue, then it’s time to look closely at the mold’s venting and gating.Conclusion
Effectively troubleshooting ABS defects comes from understanding their causes. By systematically checking process, mold, and material, you can achieve consistent, high-quality ABS parts. My journey taught me this.
