
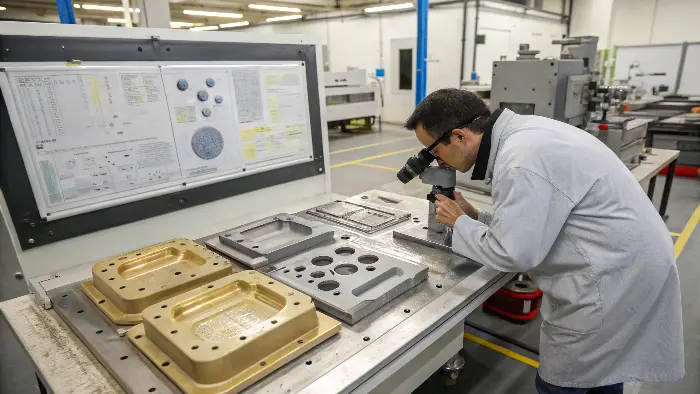
Struggling with metalized ABS parts that peel or look dull? It’s frustrating when your efforts don’t shine. We can fix this by mastering the molding process.
ABS plating-grade molding is not ordinary ABS molding with an extra finishing step. The plated surface only looks good when the resin, mold surface, gate location, flow pattern, stress level and cleaning process all support metal adhesion.
Related CKMOLD resources: injection mold services, DFM analysis, mold design, insert molding and overmolding, and mold testing and validation.
Successful ABS metalizing hinges on using specific plating-grade resins and meticulously controlling the injection molding process. Key factors include material selection, mold design, processing parameters, and post-molding handling, all ensuring a surface prime for adhesion.
Why is Selecting the Right ABS Grade So Critical for Plating?
Ever wonder why some ABS parts plate beautifully while others are a disaster? It’s not just any ABS; the specific grade you pick is absolutely foundational for good metal adhesion. Ignoring this costs you big time, believe me!
Plating-grade ABS contains specific butadiene rubber particles that, after etching, create microscopic anchoring sites for the metal layers. Standard ABS grades lack this optimized morphology, leading to poor adhesion and plating failures. Choosing the right grade is non-negotiable.
- The Role of Butadiene: During the pre-plating chemical etch (usually with a nasty chromic acid solution – handle with care!), these rubber particles are selectively attacked. This process basically eats away at the butadiene, creating a microporous surface. Think of it like creating millions of tiny little caves and crevices on the plastic’s face.
-
Mechanical Anchoring:When the first layer of metal, often electroless nickel or copper, is deposited, it flows into these micropores. Once it solidifies, it’s mechanically locked onto the ABS surface. It’s like super-strong, microscopic Velcro! Without these anchor points, the metal just sits on top and can peel off with the slightest provocation. Feature Plating-Grade ABS Standard ABS Butadiene Content Optimized for etching performance Variable, not designed for etching Surface after Etch Uniform, rich in micropores Irregular, fewer/poor anchor sites Metal Adhesion Strong, reliable mechanical bond Weak, prone to peeling and blistering Plating Success High probability of good results High probability of failure Cost Impact Slightly higher upfront, saves on rejects Lower upfront, high cost of failures So, when you’re sourcing your material, don’t just mumble “ABS” to your supplier. You must be crystal clear: “I need plating-grade ABS.” Get the technical datasheets, and even better, talk to their technical folks. Confirm it’s specifically formulated for electroplating. It might cost a few cents more per pound, but trust me, it’s an investment that pays off massively by preventing those soul-crushing, expensive failures down the line. Trying to save a buck here is a classic example of being penny-wise and pound-foolish. It’s a foundational step – get it wrong, and everything that follows is an uphill battle. Seriously, it’s the bedrock of successful plating.
How Can Precise Injection Molding Parameters Make or Break Your Plating Results?
Your parts look okay to the eye, but the plating is patchy or inconsistent? Those subtle, sneaky issues often trace right back to how the plastic was actually molded. Bad parameters create hidden stresses and almost invisible surface flaws that plating will cruelly expose.
Optimal injection molding parameters for plating-grade ABS involve higher melt temperatures, appropriate injection speeds, and sufficient packing pressure. These ensure complete mold filling, minimize internal stresses, and create a smooth, defect-free surface crucial for strong metal adhesion.
- Melt Temperature: You generally want to be on the higher side of the recommended range for your specific plating-grade ABS. Why? A hotter melt flows more easily, almost like warm honey versus cold molasses. This reduces shear stress on the material as it’s forced through the nozzle, runners, and gate. High internal stress is a plating killer because the chemical etching process can preferentially attack these stressed areas, leading to uneven plating or even tiny cracks. It’s like trying to paint on a surface that’s already tensed up and about to crack – it just won’t end well.
- Injection Speed: This is a real balancing act. Too slow, and you can get flow marks, hesitation lines, or premature freeze-off, especially in thin sections. Too fast, and you risk high shear (which degrades the material), gas traps, or jetting. Usually, a moderate to reasonably fast, controlled speed is best. Sometimes a profiled injection speed (varying the speed during injection) can really help to get a good cosmetic surface without over-stressing the polymer chains.
- Packing Pressure and Time: This is absolutely crucial for minimizing sink marks and internal voids, especially in thicker sections or near ribs and bosses. These aren’t just cosmetic uglies; they can become stress concentration points or areas where the plating doesn’t adhere properly. You need enough pressure, held for long enough, to compensate for the material’s natural shrinkage as it cools and solidifies in the mold.
-
Mold Temperature: Again, generally warmer is better, often towards the higher end of the material supplier’s recommendation. A warm mold helps the plastic flow better, reduces built-in stress, and improves the replication of the mold surface onto the part. Cold molds can lead to a “frozen-in” stressed surface layer, which is bad news for plating.
Here’s a quick table with general guidance, but please, I beg you, generally check your specific material datasheet from your resin supplier – they know their material best!Parameter General Guideline for Plating ABS Rationale for Plating Success Melt Temperature 230-260°C (446-500°F) (often higher end) Better flow, lower molecular stress Mold Temperature 60-80°C (140-176°F) (often higher end) Good surface finish, reduced stress, better replication Injection Speed Moderate to Fast (profiled if possible) Balance smooth flow and minimize shear/degradation Packing Pressure Sufficient to avoid sinks/voids (e.g., 60-80% of Inj. Pr.) Dimensional stability, uniform density, good surface Back Pressure Low to moderate (e.g., 50-100 psi) Homogeneous melt, good mixing of colorants (if any) Drying (CRITICAL!) 2-4 hours @ 80-90°C (176-194°F) Prevents splay, silver streaks, material hydrolysis Oh, and let me shout this from the rooftops: DRY YOUR MATERIAL! ABS is hygroscopic, meaning it loves to suck moisture from the air. If you try to mold even slightly damp ABS, you’ll get splay marks or silver streaks on the part surface. These are not just ugly; they are actual surface imperfections, areas of weakness or porosity, that will totally mess up your plating adhesion and appearance. Seriously, invest in good drying equipment and use it diligently. It’s such a simple step that saves a world of hurt. Every time A common observation is those tell-tale streaks on a part destined for plating, I just know it’s going to be a problem. Don’t skip this!
Are There Special Mold Design Secrets for consistent ABS Plating?
Is your mold design secretly sabotaging your plating efforts without you even realizing it? Things like sharp corners, poor gate locations, or an inadequate surface finish on the mold itself can create unseen stresses and defects in the part, leading to plating nightmares. These are expensive and super frustrating to fix later!
Yes, mold design for plating-grade ABS requires generous radii on all corners (especially internal ones), smooth transitions in wall thickness, and strategically placed gates (like tab or fan gates) to minimize stress. Proper venting and high-polish cavity surfaces are also absolutely key for a consistent finish.
- Radii, Radii, Radii! And then some more Radii! Sharp internal corners are evil for plating. I can’t stress this enough. They are massive stress concentrators. During molding, as the plastic cools and shrinks, it pulls against these sharp corners, creating high localized stress. Then, during the aggressive chemical etching stage of plating, these stressed areas can over-etch, crack, or simply cause the plating to lift. My rule of thumb: minimum 0.5mm (0.020″) radius on all internal corners, but 1mm (0.040″) or even more is much, much better. Seriously, tell your designer – no sharp inside corners! External corners should also be radiused for durability and even plating thickness.
- Gate Design and Location: This is huge. The gate is where the molten plastic enters the cavity, and it’s a point of high stress. You want to minimize this.
- Avoid pin gates directly onto critical appearance surfaces if possible, as they can leave a noticeable stress witness mark (blush) that plating will highlight.
- Tab gates or fan gates are often preferred because they spread the flow of plastic more gently into the cavity, reducing shear and stress.
- Position gates in non-critical areas or where they can be easily and cleanly trimmed without damaging the cosmetic surface. The flow front of the plastic should be uniform and unidirectional if possible.
- Wall Thickness Transitions: Avoid abrupt or sudden changes in wall thickness. Aim for smooth, gradual transitions. If you have a thick section meeting a thin section directly, that interface is a prime candidate for stress, sink marks, or voids – all bad for plating.
- Venting, Venting, Venting: Trapped air or gas in the mold cavity is a big no-no. It gets compressed by the incoming plastic, heats up, and can cause gas burns or diesel effects (little black scorched marks) on the part surface. These are blemishes that plating will make even more obvious. Ensure generous and well-placed vents, especially at the end of fill and in any areas that could become potential gas traps (like around ribs or bosses).
- Surface Finish of the Mold Cavity: The mold cavity surface needs to be highly polished, typically to an SPI A-2 or A-1 finish (which is a diamond buff, mirror-like finish). Why? The ABS part will faithfully replicate this finish. A smooth, glossy ABS surface is much, much better for plating adhesion and the final lustrous appearance than a textured or even slightly rough one. Any tiny scratch or imperfection in the mold steel will be a tiny raised line or defect on the part, and plating might not adhere well there or could look terrible.
- Draft Angles:Ensure adequate draft angles on all vertical surfaces (1-2 degrees or more is typical). This allows the part to eject easily from the mold without drag marks, scuffing, or distortion. Drag marks are surface defects that, you guessed it, will ruin your plating. Think of the mold as laying the suitable, pristine foundation for a skyscraper. If you build a house on shaky, uneven ground, it doesn’t matter how good the paint job is, right? The structure will be compromised. Same principle here. A little extra investment in a well-thought-out mold design tailored specifically for plating will save you a mountain of headaches, rejected parts, and money later on. Don’t be that company!
What Are the Sneaky Surface Defects That Ruin Plating and How Do We Stop Them?
Your molded ABS parts look reliably fine to the naked eye, maybe even good! But then, after plating, a host of ugly surprises appear – blisters, peeling, dull spots. Tiny surface defects, almost invisible before, can become glaring, costly issues after metalizing. This is a common source of frustration. Let’s uncover these culprits.
Common defects like flow lines, weld lines, blush, splay marks (from moisture), and excessive lubricant or mold release residue can all ruin ABS plating. Preventing them involves optimized processing, good mold design, proper material handling (especially drying!), and avoiding mold release agents whenever possible.
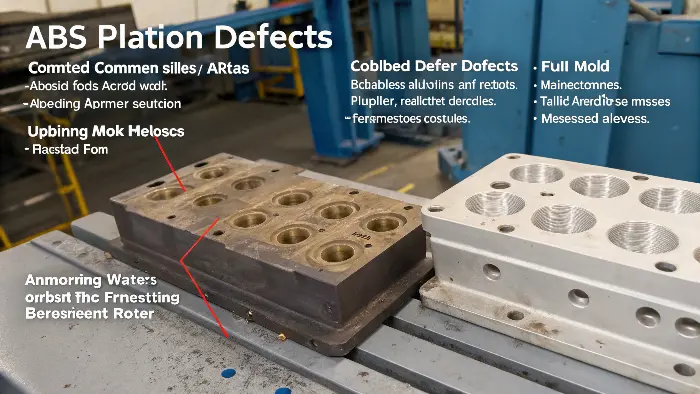
It’s like this: the plating process, especially the initial chemical etching stage, is incredibly sensitive to the slightest imperfection or variation on the ABS surface. What might look like a minor blemish, or even be completely invisible to you before plating, can turn into a major adhesion failure or a glaring cosmetic disaster once that shiny metal layer is on top. I generally tell the production team, and any client who’ll listen, “When you’re inspecting ABS parts destined for plating, inspect them as if you’re looking through a powerful magnifying glass under harsh lighting!” Because that’s essentially what the plating process does – it highlights everything.
Here’s a rogue’s gallery of common culprits and how to put them out of commission:
- Flow Lines/Ripples: These look like subtle waves or lines on the part surface, often indicating the melt was too cold, injection speed was too slow, or there was hesitation in flow. They create an uneven surface texture that won’t etch or plate uniformly, leading to a blotchy or streaky appearance.
- Fix: Increase melt temperature, increase mold temperature, optimize injection speed (often faster, or profiled), ensure adequate venting.
- Weld Lines (Knit Lines): These form where two or more melt fronts meet as the plastic flows around an obstacle (like a core pin) or enters from multiple gates. These are inherently weaker areas because the polymer chains haven’t fully intermingled. They can be sites for poor adhesion or even crack during thermal stress after plating.
- Fix: Relocate gates to change flow patterns, improve venting at weld line locations, increase melt/mold temperatures to help the melt fronts fuse better. Ideally, design the part so weld lines are in non-critical, non-cosmetic areas.
- Blush/Splay/Silver Streaks: Blush is a cloudy or hazy area, often near the gate. Splay and silver streaks look like, well, silvery streaks on the surface. These are usually caused by moisture in the resin (ABS is hygroscopic!), but can also result from excessive shear heating degrading the material, or entrapped gas. Looks absolutely terrible after plating.
- Fix: First and foremost: DRY YOUR MATERIAL THOROUGHLY according to supplier specs! This is number one. Also, check for nozzle freeze-off, reduce injection speed if shear is the suspected issue, and improve mold venting.
- Sink Marks: These are depressions or dimples on the part surface, usually occurring in thicker sections or opposite ribs or bosses where the material has shrunk more. The plating can look different in these areas, may not cover well, or even bridge over the sink, creating a void underneath.
- Fix: Increase packing pressure and/or packing time, reduce material volume in thick sections (core out bosses and ribs), optimize gate location and size for better packing, ensure melt/mold temps are not too high (which increases shrinkage).
- Contamination (Oil, Grease, Dust, Fingerprints): Any foreign substance on the part surface can act as a barrier to the plating chemicals, preventing proper etching and adhesion.
- Fix: Maintain a clean molding environment (good housekeeping!), operators should wear clean gloves when handling parts, ensure no hydraulic oil leaks from the machine are dripping onto or near the mold.
- Mold Release Residue: This is a big one, a major plating killer! Many common mold releases, especially those containing silicone, are absolute death for plating. They create a thin, invisible film on the part surface that prevents the plating chemicals from doing their job, leading to widespread adhesion failure.
- Fix: The best solution is to AVOID MOLD RELEASE AGENTS COMPLETELY if your parts are going to be plated. Design the mold with sufficient draft angles, highly polished surfaces, and proper ejection systems so parts release easily without needing any “help.” If a release is absolutelyunavoidable (which should be extremely rare), use only a “paintable” or “platable” grade, use it as sparingly as humanly possible, and conduct thorough testing. Even then, parts will likely need very aggressive pre-cleaning by the plater. We checked everything – material grade, processing parameters, mold design. It was a mystery! It turned out an operator on one shift, trying to be “helpful” when a few parts occasionally stuck, was giving a tiny, quick spray of a standard silicone release into a tricky mold core every hour or so. That “tiny bit” was enough to subtly contaminate batches of parts and cause thousands of dollars in rework and lost time. It’s these little, seemingly insignificant things that can bring you undone with plating. Vigilance and strict adherence to protocol are absolutely key!
Is Pre-Treatment Really That Important Before Sending ABS Parts for Metalizing?
Think your job as a molder is done once those shiny (or matte) ABS parts pop out of the machine and into the box? Not so fast! What happens between the moment a part is molded and the moment it’s loaded onto the plating rack at the plater’s facility can make or break your beautiful metallic finish.
- Fix: The best solution is to AVOID MOLD RELEASE AGENTS COMPLETELY if your parts are going to be plated. Design the mold with sufficient draft angles, highly polished surfaces, and proper ejection systems so parts release easily without needing any “help.” If a release is absolutelyunavoidable (which should be extremely rare), use only a “paintable” or “platable” grade, use it as sparingly as humanly possible, and conduct thorough testing. Even then, parts will likely need very aggressive pre-cleaning by the plater. We checked everything – material grade, processing parameters, mold design. It was a mystery! It turned out an operator on one shift, trying to be “helpful” when a few parts occasionally stuck, was giving a tiny, quick spray of a standard silicone release into a tricky mold core every hour or so. That “tiny bit” was enough to subtly contaminate batches of parts and cause thousands of dollars in rework and lost time. It’s these little, seemingly insignificant things that can bring you undone with plating. Vigilance and strict adherence to protocol are absolutely key!
Yes, pre-treatment and careful handling are critical. This includes meticulous handling to avoid any contamination (like fingerprints or dust), specific cleaning steps often performed by the plater to remove any residues, and sometimes an annealing step to relieve molded-in stress. Proper pre-treatment ensures the ABS surface is reliably prepared for the crucial chemical etching process.
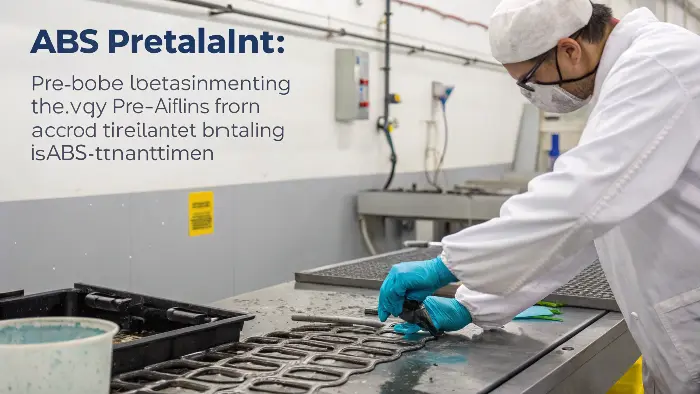
Okay, so you’ve followed all the advice. You’ve selected the right plating-grade ABS, you’ve dialed in your molding process reliably, your mold design is a masterpiece of smooth curves and high polish, and your parts are coming out looking great, free of visible defects. You’re golden, right? Well, almost. The journey to a reliably plated part isn’t quite over. What you, and then the plater, do after molding and before they hit those chemical tanks is super important. A recurring observation is this as a neglected area, a bit of an afterthought, but it’s where a lot of good work can be undone in a heartbeat. For someone like the buyer, who needs reliable supply chains, ensuring this hand-off to the plater is seamless is vital.
Let’s talk about what needs to happen post-molding:
- Handling with Utmost Care:
- Gloves are a must! Clean, lint-free gloves. Our skin oils, salts from sweat, and general grime on our hands are contaminants. Fingerprints on a part can show up as defects after plating because they interfere with the uniform etching. Imagine trying to paint over a greasy spot – same idea, but at a microscopic level.
- Clean packaging: Use new, clean, non-contaminating bags (like polyethylene) or dedicated clean containers. Cardboard boxes can shed dust and fibers. Avoid materials that might outgas plasticizers or other chemicals that could deposit on the parts.
- Minimize abrasion: Parts shouldn’t be just tossed into a giant bin where they can tumble over each other. This can cause scuffs, scratches, or wear on the surface. For delicate or highly cosmetic parts, individual cell packing or soft interleaving might be necessary.
- Cleaning (This is often done by the plater, but it’s good for you, the molder, to be aware of what’s involved):
Even if parts look reliably clean to you, they will almost certainly go through a rigorous cleaning sequence at the plater’s facility before the actual plating process begins. This might include:- Alkaline soak cleaners: To remove any organic soils like light oils, processing aids (if any were on the resin), and general shop grime.
- Acid dips/neutralizers: To remove any oxides or prepare the surface.
- Rinses, Rinses, Rinses: Multiple, thorough rinses with clean water (often deionized water) are absolutely vital between each chemical step to prevent drag-out of chemicals from one tank to another, which can contaminate baths and ruin plating.
- Annealing (Stress Relief) – Sometimes a Secret Weapon:
- For parts with particularly complex geometry, significant variations in wall thickness, or known high levels of molded-in stress, an annealing step can be a real lifesaver. This typically involves heating the molded parts in an oven at a temperature well below their heat distortion point (e.g., for ABS, around 60-70°C or 140-160°F for a few hours) and then allowing them to cool slowly.
- Why do this? It allows the polymer chains in the plastic to relax and rearrange themselves, relieving internal stresses that were frozen in during the rapid cooling in the mold. This makes the surface less prone to over-etching, crazing, or cracking during the aggressive chemical pre-treatment steps at the plater.
- I had a case with some fairly intricate automotive interior trim pieces that kept failing a thermal cycling test after plating – the plating would crack or lift. We introduced an annealing step for the raw ABS parts post-molding, before sending them to the plater. Problem vanished! The molded-in stress was the silent culprit, only revealed after the plating and temperature changes.
- A Glimpse into the Plater’s World (The Actual Plating-on-Plastics Process):
Once the parts are cleaned and (if necessary) annealed, they arrive at the plater. The typical sequence for plating on ABS is a multi-stage chemical and electrochemical marvel:- Etching: Usually a hot, aggressive chromic-sulfuric acid solution. This is the step that selectively attacks the butadiene phase in the ABS, creating that crucial microporous surface for adhesion.
- Neutralizing: Removes residual chromic acid.
- Catalyzing/Activating: Deposits a thin layer of a noble metal catalyst (often palladium) onto the etched surface. This catalyst is needed for the next step.
- Accelerating: Chemically prepares the catalyst to accept the electroless metal.
- Electroless Plating: The first continuous metallic layer (often electroless nickel or sometimes electroless copper) is deposited chemically, without any external electrical current. This layer provides the conductive base for subsequent electrolytic plating. It has to be suitable!
- Electrolytic Plating: Now that the part has a conductive surface, further layers of metal (like bright acid copper for leveling, semi-bright nickel for corrosion resistance, bright nickel for luster, and finally chromium for appearance and tarnish resistance) are built up using an electrical current.
Understanding this whole complex chain helps you appreciate why every single step, from selecting your raw ABS pellets to how you pack the molded parts for shipment, matters so incredibly much. You’re not just making a plastic part; you’re making a precision substrate for a highly sophisticated chemical and electrochemical process. It truly is a team effort between the molder and the plater. And for a business owner like the buyer, ensuring this entire process is robust and reliable means he can confidently deliver high-quality, beautifully metalized components to his own customers. It’s all about that final, consistent finish! 🔥Why Plating-Grade ABS Is Different
Plating-grade ABS is formulated so the butadiene phase can be chemically etched and prepared for metal deposition. If the wrong ABS grade is used, adhesion can become inconsistent even when the molded part looks acceptable. Buyers should confirm the exact grade and plating process before mold steel is finalized.
Mold Design Priorities for Metalized Surfaces
The mold should protect the plated face from flow marks, sink, weld lines, ejector marks and gate scars. A defect that might be acceptable on a painted ABS part can become highly visible after chrome or nickel plating. CKMOLD reviews optical/cosmetic zones, gate vestige location and ejection layout during DFM.
Process Stress Can Become Plating Failure
High molded-in stress can lead to blistering, cracking or poor adhesion after chemical treatment and thermal cycling. Balanced melt temperature, mold temperature, injection speed and packing are important because plating exposes stress that the eye may not see on the raw molded part.
Validation Before Production
A reliable plating project should validate both molded part quality and post-plating appearance. Trial samples should be checked for adhesion, surface defects, dimensional shift after plating and assembly fit. The best result comes when the molder and plating supplier share feedback early.
ABS Plating-Grade Injection Molding for Reliable Metalizing: Buyer Review Checklist
- Confirm the exact plating-grade ABS resin before mold sizing.
- Keep gates, ejectors and parting lines away from decorative surfaces where possible.
- Control sink, weld lines and stress before sending parts to plating.
- Validate adhesion and appearance with plated trial samples, not only raw molded parts.
- Document resin, process window and plating supplier feedback for production repeatability.
FAQ
Can any ABS be plated?
No. Plating normally requires a suitable plating-grade ABS or ABS blend. General-purpose ABS may not etch or bond consistently.
Why do plated ABS parts blister?
Blistering can come from poor resin selection, contamination, trapped stress, surface defects or plating-process problems. The molded part and plating line should both be reviewed.
Conclusion
Mastering ABS plating requires careful material choice, precise molding, smart mold design, diligent part handling, and understanding the plater’s needs. Get these elements right, and you’ll achieve stunning, durable metalized finishes every time. It’s all about control and attention to detail!