Struggling with warped or misshapen thin-wall parts? This costly issue ruins production. Learn key strategies to achieve perfect results every time.
Controlling deformation in thin-wall injection molding means careful material choice, smart mold design, and precise process settings. Focus on uniform wall thickness, good cooling, and the right injection speed and pressure for success.
It’s a common headache, right? You’ve designed this sleek, lightweight part, but when it comes out of the mold, it looks… well, a bit sad. Don’t worry, we’ve all been there. I want to walk you through how we can tackle this. So, let’s dig into what causes these issues and, more importantly, how to fix them – or better yet, prevent them altogether. Stick with me, and you’ll get a clearer picture.
What is deformation in injection molding, really?
Ever had a plastic part look different than your design? Deformation can twist, bend, or shrink your components, causing big headaches and waste. It’s a sneaky problem we need to understand.
Deformation in injection molding is when a cooled plastic part doesn’t match the mold’s shape. This includes issues like warpage, shrinkage, and sink marks, often due to uneven cooling or internal stresses.
When we talk about deformation, it’s not just one single gremlin causing trouble; it’s a whole family of them! I’ve seen my fair share over the years. You’ve got your warpage, where the part twists or bends like it’s trying to do yoga. Then there’s shrinkage, which is kinda natural – plastics shrink as they cool, but uneven shrinkage is the real villain here, leading to distorted shapes. And let’s not forget sink marks, those annoying little depressions usually found on thicker sections, or opposite ribs and bosses.
Think about it – the plastic is shot into the mold super hot and under pressure. As it cools, it wants to contract. If one part of your component cools faster than another, or if the internal stresses aren’t managed, bam! Deformation. It’s especially tricky with thin-wall parts because they cool down so fast, and any tiny imbalance gets magnified. It’s like trying to lay a really thin, wet piece of paper flat – any slight breeze or uneven drying will make it curl up, right? We’re dealing with similar physics here, just with molten plastic. Understanding these types is the first step to outsmarting them. It’s something I always emphasize when talking with business owners like Michael, because getting this right upfront saves a ton of resources.
What is the most important rule for wall thickness for plastic injection molded parts?
Designing plastic parts? Uneven walls cause big molding problems like warping and sink marks. Uniformity is key, but how do you achieve it consistently, especially with thin designs that need to be strong?
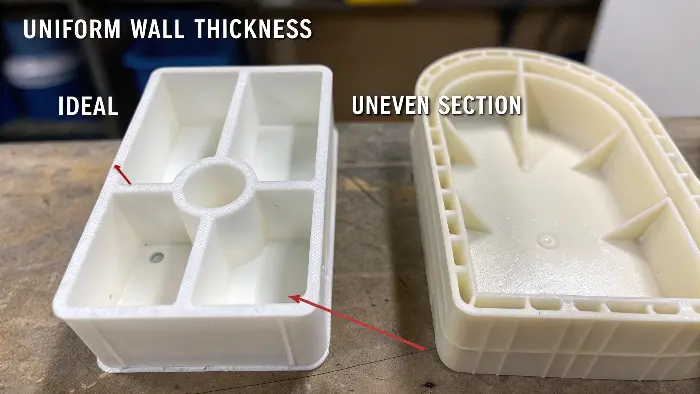
The golden rule for wall thickness in injection molding is uniformity. Keeping wall thickness as consistent as possible throughout the part minimizes differential shrinkage, a major cause of warpage and stress.

Okay, if there’s one thing I hammer home to designers, it’s this: keep your wall thickness uniform! Seriously, this is a game-changer, especially for thin-wall parts. Imagine you have a part where one section is 1mm thick and it suddenly transitions to 3mm. The 3mm section will take much longer to cool and will shrink more than the 1mm section. What happens? Stress! And that stress leads straight to warpage or sink marks.
I remember a client, let’s call him Tom, who was making these sleek electronic enclosures. He had these beautiful thin walls, but then added a chunky boss for a screw. The area around the boss kept warping. We pinpointed the non-uniform wall thickness as the culprit. Once we helped him redesign it with a cored-out boss and more gradual transitions, the problem practically vanished. It took a bit of rework, sure, but the production yield went way up.
So, what can you do?
- Gradual Transitions: If you absolutely must change thickness, make the transition as smooth and gradual as possible. Think gentle slopes, not sharp cliffs. A good rule of thumb is a 3:1 transition ratio.
- Coring Out: For thicker sections that are unavoidable (like bosses or ribs), core them out to maintain a more uniform wall. This means making them hollow from the back.
- Ribs for Strength: Instead of making a whole section thicker for strength, use ribs. But even with ribs, follow guidelines – rib thickness should typically be 50-60% of the wall they’re attached to, to avoid sink marks on the opposite surface.
It’s a balancing act, sure, but getting this right saves so much pain down the line. It’s not just about avoiding defects; it’s about a stronger, more stable part. This rule is fundamental.What considerations do part designers have to make when a part will be produced with injection molding, especially for thin walls?
Designing for injection molding isn’t just CAD work. Thin-wall parts bring unique challenges. Neglect key design rules, and you’ll face production nightmares and costly fixes later. What should you always keep in mind?
Part designers must consider material flow, cooling, and ejection. For thin walls, this means selecting appropriate resins, incorporating draft angles, carefully planning gate locations, and ensuring features support rapid, even cooling.

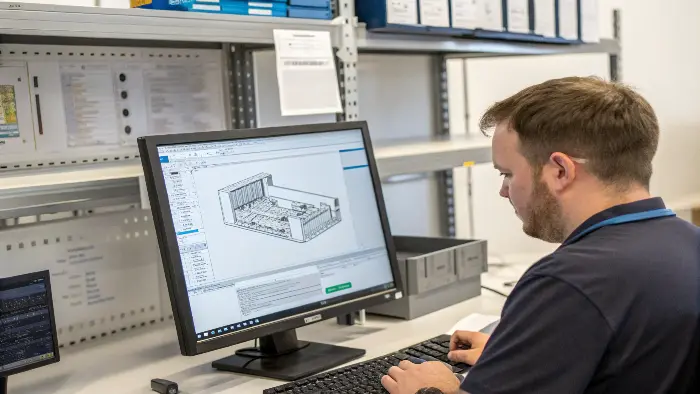
When you’re designing a part, especially a thin-walled one, you’ve got to think like the plastic for a minute. How’s it going to flow into that tiny cavity? How will it cool? How will it get out? It’s not just about aesthetics; it’s about manufacturability. I always tell designers, your CAD model might look perfect, but if it’s a pain to mold, it’s not a good design. This is a core part of our mission at CKMOLD – helping folks understand this bridge between design and real-world manufacturing.
Here are some big ones: - Material Selection: This is huge for thin walls. You need a resin with good flow properties (high Melt Flow Index or MFI) so it can fill the thin sections quickly before freezing off. Some materials are also more prone to warping than others. For instance, Polypropylene (PP) might flow well and is cost-effective, but it can also shrink quite a bit. Materials like ABS or Polycarbonate (PC) might offer better dimensional stability but could be trickier to fill in very thin sections. I often advise clients to consult material datasheets carefully.
- Draft Angles: Oh, the number of times I’ve seen parts stuck in molds because of insufficient draft! For thin walls, even a tiny bit of drag can cause deformation or scuffing during ejection. Aim for at least 0.5 degrees per side, and more if you can, especially on textured surfaces or deeper draws. It’s like trying to get ice out of an old-school ice tray – a little taper makes all the difference. Seriously, don’t skimp on draft.
- Gate Location & Type: Where the plastic enters the cavity (the gate) is super critical. For thin parts, you want to fill it quickly and evenly. Poor gate location can cause "race-tracking" (where plastic flows faster in thicker sections, leaving thin ones partly filled) or jetting, leading to weak spots and visual defects. Multiple gates might be needed, or a film gate along an edge for wide, flat parts. We often run flow simulations to optimize this.
- Ribs and Gussets: We talked about ribs for uniform thickness, but they also add stiffness, which is vital for thin parts that might otherwise be flimsy or warp easily. Gussets can reinforce corners and prevent them from distorting.
- Cooling Channels in the Mold: While this is more on the mold maker’s side, the part designer should be aware. Complex thin parts need thoughtful cooling channel design in the mold to ensure even temperature distribution. If one side of the part cools slower, it’s a recipe for warpage. I often discuss this with my clients like Michael, so their designs are mold-friendly from the get-go. It’s about teamwork.
How do you troubleshoot common problems like deformation or inconsistencies in thin-walled molded products?
Your thin-walled parts are coming out warped, with sink marks, or short shots. Production is stalled. How do you systematically diagnose and fix these frustrating injection molding defects effectively and quickly?
Troubleshooting thin-wall defects involves a systematic check of material, machine, and mold. Start with material drying and melt temperature, then examine injection pressure, speed, and holding time. Finally, inspect mold cooling and venting.

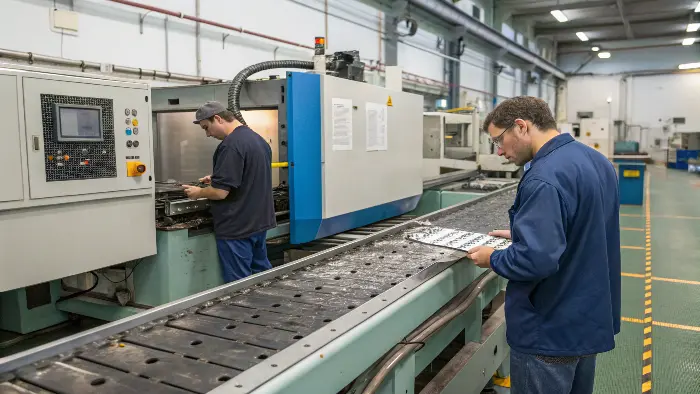
Alright, so despite our best efforts in design, sometimes things still go sideways, especially with tricky thin-wall parts. When defects like warpage or inconsistencies pop up, you need a methodical approach – randomly tweaking settings is a recipe for more headaches. I usually think in terms of "The Big Three": Material, Machine, and Mold. This structured approach helps my team and clients like Michael to zero in on solutions faster.
Here’s a typical troubleshooting thought process I’d go through:Category Potential Issue What to Check/Adjust Why it matters for thin walls? Material Incorrect drying Ensure resin is dried to spec. Hygroscopic materials (like Nylon, PC, PET) absorb moisture, which can cause splay, bubbles, or reduced strength. Moisture vaporizes at processing temps, impeding flow in thin sections or causing visual/structural issues. Bad news! Wrong melt temperature Check barrel temperatures against material supplier recommendations. Too low: poor flow, short shots, high stress. Too high: material degradation, gas, or excessive shrinkage. Thin sections need optimal flow viscosity; material degradation is more critical with less material volume, leading to brittleness. Contamination / Wrong Material Verify the correct material grade is being used and that there’s no contamination from previous runs or regrind. Even small amounts of a different polymer can wreak havoc on properties and processing for thin designs. Machine Insufficient injection pressure/speed Increase pressure or speed incrementally. Material might be freezing off before the cavity is fully packed. Consider a machine with higher injection capabilities. Crucial for filling thin, long flow paths quickly before solidification. Think of it like pushing honey through a tiny straw – needs force! Inadequate holding pressure/time Optimize holding pressure and time. This phase compensates for shrinkage as the plastic cools from melt to solid. Helps minimize sink marks and voids, which can be very apparent on thin surfaces. Too much can cause flash, though! Mold temperature Verify mold surface temperature with a pyrometer. Too cold: premature freezing, short shots, poor surface, high stress. Too hot: longer cycle times, potential warping due to slow, uneven cooling, or sticking. Uniform and correct mold temp is key for controlled cooling rate and reducing internal stress in thin parts. A few degrees can make a big difference. Screw recovery / Back pressure Ensure consistent screw recovery and appropriate back pressure. Inconsistent shot size or melt quality leads to inconsistent parts. Vital for melt homogeneity, which impacts flow and packing in delicate thin sections. Mold Poor venting Check vent adequacy (depth, length, location) and cleanliness. Trapped air can prevent full part formation, cause burn marks, or poor welds. Air gets trapped easily in fast-filling thin cavities; good vents are absolutely essential. They need to be deep enough to let air out but not plastic. Gate size/location Re-evaluate gate. Is it too small, causing high shear heat or freeze-off? Is it in a spot that induces stress or uneven flow patterns? Gate design directly impacts flow pattern, fill balance, and stress concentration, all critical for thin sections. Cooling channel issues Ensure cooling channels are clear, effective, and providing uniform cooling across the mold halves. One side cooling faster than another is a prime cause of warpage. Differential cooling is a major warpage driver in thin, flat parts. Sometimes we need to add more circuits or use conformal cooling. Ejection issues Check ejector pin marks, signs of sticking. Uneven ejection can distort a still-warm, thin part. Thin parts are more susceptible to damage or deformation during ejection if not supported correctly. I always say, change one thing at a time and document it! Otherwise, you won’t know what actually fixed the problem. It’s a bit like being a detective. For example, if I see warpage in a thin, flat part, my first suspects are often uneven cooling across the mold or non-uniform packing. I might check the mold surface temperatures on both core and cavity sides or play with the holding pressure profile. It takes patience, but a systematic approach, often backed by experience, usually gets you there. This problem-solving is a big part of how we deliver value at CKMOLD.
Conclusion
Mastering thin-wall molding means balancing design, material, and process. Focus on uniform walls, smart cooling, and precise settings. These steps will minimize deformation and improve your part quality significantly. Success is achievable! 🔥
