Are jetting defects ruining your plastic parts? This causes ugly marks and weak spots. I will show you how to fix this common molding problem.
Jetting happens when melted plastic shoots too fast into the mold without touching the walls. This guide helps you find causes like gate issues or wrong settings, and fix them step-by-step.
Jetting is a headache for many designers like you, Jacky. I’ve seen it many times. But don’t worry. We can break down this problem. We will look at how to find it and how to stop it. Let’s dive into the details. This will help you make better parts.
What really causes that frustrating jetting defect in your molded parts?
Seeing strange snake-like patterns on your parts? This could be jetting, making your parts weak. I will explain what causes this annoying issue.
Jetting is caused by melted plastic entering the mold cavity too quickly, like a jet. It doesn’t touch the mold walls right away. This creates surface flaws and weakens the part.
Jetting is a common defect in injection molding. It happens when the molten plastic is pushed through the gate at a very high speed. Instead of flowing smoothly and filling the cavity by hugging the mold walls, it shoots out. It forms a narrow, uncontrolled stream into the open cavity. This stream then folds over itself as more material comes in.
Identifying Jetting
You’ll often see specific signs:
- Surface Marks: Look for wavy or snake-like patterns on the part’s surface. These are most common near the gate area. I remember a project with thin-walled electronic casings where this was a major issue until we adjusted the gate.
- Weak Parts: The jetting stream cools down too fast. It doesn’t mix well with the plastic that follows it. This poor fusion leads to weaker parts. They might break easily under stress.
Areas Prone to Jetting
Some part designs are more likely to have jetting:
- Sharp Corners: Molten plastic struggles to flow smoothly around sharp internal corners.
- Sudden Wall Thickness Changes: If the plastic flows from a thin section into a much thicker section abruptly, jetting can occur.
Understanding these basic causes is the first step. Next, we will look at how your mold design plays a big role.How can you optimize your mold design to stop jetting before it starts?
Is your mold design contributing to jetting? Poor gate or runner design can be the culprit. I’ll show you how smart design changes can prevent jetting.
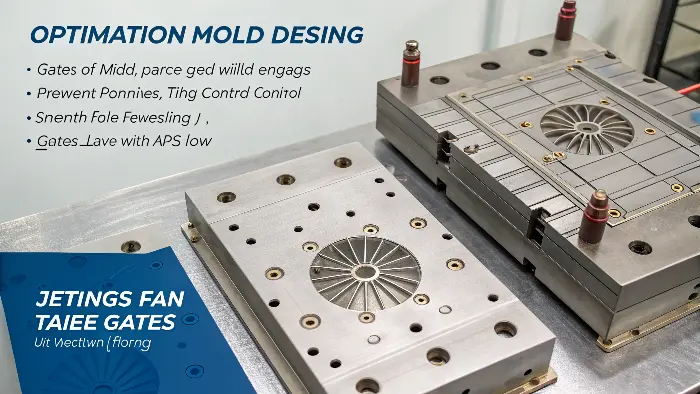
Optimize your mold by using larger, well-placed gates. Fan or tab gates often help. Ensure runners are smooth and venting is good. This controls plastic flow and stops jetting.

Your mold design is critical in preventing jetting. If the plastic doesn’t flow correctly from the start, you will face problems. I always tell designers like Jacky that the mold is where quality begins.Gate Design Adjustments
The gate is where the plastic enters the part cavity. It’s a key control point.
- Gate Size: Small gates force the plastic to speed up. This high speed causes jetting. Try making the gate wider and shorter. This slows down the plastic.
- Gate Location: The plastic should hit a mold wall or a pin as soon as it enters the cavity. This breaks up the jet stream. If you can’t move the gate, sometimes adding a small pin or feature opposite the gate helps. I once worked on a project where we added a small, almost invisible rib. It completely solved a persistent jetting problem.
- Gate Type: Different gate types affect flow.
- Submarine (Tunnel) Gate: Can sometimes cause jetting if not designed perfectly for the material.
- Fan Gate: Spreads the flow out. This reduces speed and helps prevent jetting.
-
Tab Gate: Adds a small tab for the plastic to flow into first. The plastic then flows more gently into the main cavity.
Here’s a quick comparison:Gate Aspect Problem Leading to Jetting Solution to Reduce Jetting Size Too small, too restrictive Increase cross-sectional area Location Direct shot into open cavity Aim flow at a wall or obstruction Type Pinpoint, small edge gates Consider fan, tab, or larger edge gates Runner System and Venting
- Runner Design: The channels that carry plastic to the gate (runners) must be smooth. They need to be large enough. Avoid sharp turns between the runner and the gate. These can create turbulence.
- Mold Venting: Trapped air in the mold cavity can fight against the incoming plastic. This can make jetting worse. Ensure your mold has good vents. Vents allow air to escape as the plastic fills the cavity.
Making these mold design changes can greatly reduce or even eliminate jetting.Which processing parameters should you adjust first to fight jetting effectively?
Are your machine settings causing jetting? Incorrect injection speed or temperatures can be the problem. I will guide you on what to adjust for better results.
Reduce injection speed, especially at the start. Increase melt and mold temperatures to help plastic flow smoothly. Proper holding pressure also helps. These changes stop jetting effectively.

Even with a good mold, your machine settings need to be right. Adjusting process parameters is often the quickest way to tackle jetting. I’ve spent countless hours by machines, tweaking settings to get things just right. It’s a bit like tuning an instrument.Key Process Parameters to Adjust
- Injection Speed: This is usually the first thing to check. High injection speed is a direct cause of jetting.
- Reduce Overall Speed: Try slowing down the injection.
- Profiled Injection: A great technique is to use multi-stage injection. Start with a very slow speed as the plastic goes through the gate. Once the plastic front has established smooth flow and hit an opposite wall, you can increase the speed to fill the rest of the part.
- Melt Temperature:
- Increase Melt Temperature: Hotter plastic flows more easily. It has a lower viscosity. This can reduce the chance of jetting. But be careful. Too high a temperature can degrade some plastics. Always check the material supplier’s recommendations.
- Mold Temperature:
- Increase Mold Temperature: A warmer mold helps the plastic stay fluid longer. It prevents the front of the plastic flow from cooling too quickly. This promotes better filling and reduces jetting. I remember a case with a polycarbonate part. We struggled with jetting until we significantly increased the mold temperature.
Pressure and Fill Settings
- Increase Mold Temperature: A warmer mold helps the plastic stay fluid longer. It prevents the front of the plastic flow from cooling too quickly. This promotes better filling and reduces jetting. I remember a case with a polycarbonate part. We struggled with jetting until we significantly increased the mold temperature.
- Holding Pressure (Packing Pressure): After the mold is mostly full, holding pressure is applied. While not a direct cause of jetting (which happens during filling), incorrect holding pressure settings can sometimes interact with fill issues. Ensure it’s balanced with your fill speed.
-
Fill Rate: Related to injection speed. Optimizing the fill rate ensures the melt flows uniformly. You want to fill the cavity smoothly, not aggressively.
Here’s a summary of adjustments:Parameter Adjustment to Reduce Jetting Why it Helps Injection Speed Decrease, especially initial phase Slows down melt entry, prevents "jet" effect Melt Temperature Increase (within material limits) Lowers viscosity, improves flow Mold Temperature Increase Keeps melt fluid, prevents premature cooling Holding Pressure Optimize after fill adjustments Ensures proper packing without worsening flow fronts Experiment with these settings one at a time. This helps you see what works best for your specific part and material.
How has CKMOLD tackled tough jetting challenges in real-world production?
Facing persistent jetting that standard fixes don’t solve? Complex parts can be tricky. I’ll share how CKMOLD’s experience can guide you through tough cases.
CKMOLD uses a systematic approach. We analyze part and mold design, then fine-tune processes. For one automotive client, we solved jetting by redesigning the gate and optimizing flow profiling.

Dive deeper Paragraph:
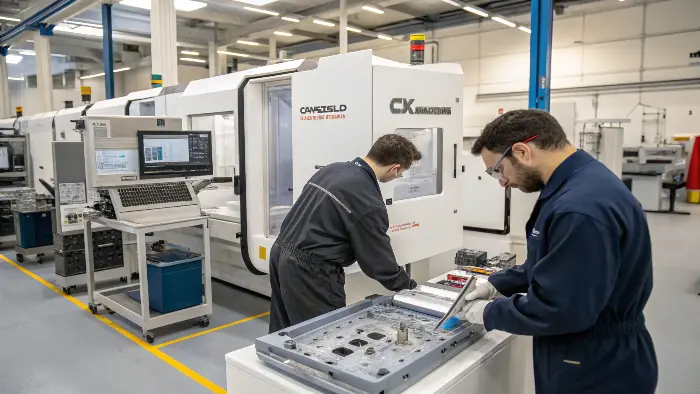
At CKMOLD, we’ve seen many tough jetting problems, especially with complex parts. I want to share an approach that has worked for us and might help you, Jacky. It’s about being systematic and sometimes thinking a bit outside the box.A CKMOLD Case Study: Automotive Components
We once worked with a client producing intricate interior components for cars. They faced constant jetting. The parts had thin sections leading to thicker bosses, a classic jetting trap. The material was an ABS/PC blend, which can be sensitive.
- Initial Analysis: We first looked at their existing mold. The gate was a pinpoint gate, directly shooting into a relatively open area of the cavity. The injection speed was set very high to try and fill the thin sections quickly. This was a recipe for jetting.
- Mold Design Modifications: We proposed a mold modification. We changed the pinpoint gate to a small, well-placed tab gate. This tab gate directed the flow towards a nearby wall feature. This simple change helped the plastic establish a stable flow front immediately.
- Process Optimization: We then worked on the process. We implemented a profiled injection speed. It started very slow until the tab and initial part of the cavity filled. Then, the speed was increased to fill the remainder. We also slightly increased the mold temperature to improve the flow of the ABS/PC blend.
CKMOLD’s Broader Strategies
This specific case highlights our general approach:
- Thorough Part Review: Understand the part geometry. Identify high-risk areas for jetting like those sudden thickness changes or isolated features.
- Holistic Mold Evaluation: We don’t just look at the gate. We check runners, venting, and even mold cooling if it affects flow patterns indirectly.
- Material-Specific Adjustments: Every plastic behaves differently. We always consider the material’s rheology (flow behavior) when suggesting solutions.
- Preventive Thinking: When designing new molds, we incorporate anti-jetting features from the start. This includes things like flow leaders or optimised gate positions. This proactive approach is part of a good preventive maintenance strategy for overall mold health and part quality. It avoids costly fixes later.
By combining careful design analysis with smart processing, even the most stubborn jetting issues can be resolved. We aim to make molding right, from the start.Conclusion
To beat jetting, check your gate, adjust speeds, and tweak temperatures. These steps will lead you to smoother, stronger parts and less production waste.
