
Are you tired of unexpected production halts caused by a failing mold? The frustration of dealing with poor-quality parts, missed deadlines, and spiraling repair costs can seriously hurt your business. A well-maintained mold is the heart of your operation, but neglecting it leads to predictable failure. The solution isn’t just reacting to problems; it’s preventing them with a systematic maintenance schedule that protects your investment and keeps production running smoothly.
Preventive maintenance extends injection mold life by finding wear, contamination, corrosion and alignment problems before they become flash, dimensional drift, ejection failure or an unplanned shutdown. The best schedule is based on cycles, resin risk, mold complexity and defect history, with clear records that connect each inspection to a decision.
Related CKMOLD resources: mold repair or modification, mold testing and validation, export injection molds.
A preventive maintenance (PM) schedule is the single most effective way to extend your mold’s life and support part quality. It involves a structured routine of cleaning, inspecting, lubricating, and replacing wear components before they fail. The ideal frequency depends on factors like the material’s abrasiveness, part complexity, and production volume. A great starting point is a general service every 50,000 to 100,000 cycles, with more frequent checks for molds running harsh materials or making complex parts.
That’s the core principle, but putting it into practice requires a clear plan. Just wiping a mold down isn’t enough, but a full teardown after every run is a waste of time and resources. To truly master your mold maintenance and get the most out of your valuable tooling, you need to understand the different levels of care and when to apply them.
What Are the Key Levels of a Mold Maintenance Program?
You know your molds need regular maintenance, but figuring out the right amount of work can be confusing. Do you just perform a quick clean in the press, or do you need a full teardown? This uncertainty can lead to doing too little and risking failure, or doing too much and wasting valuable production time. The best approach is a tiered system that matches the maintenance effort to the mold’s immediate needs and production history.
A robust mold maintenance program is built on three distinct levels of care. Level 1 is basic in-press maintenance performed by the operator during or between production runs. Level 2 is a more thorough general maintenance on the bench after a set number of cycles. Level 3 is a complete mold overhaul, a major teardown scheduled at much longer intervals or when performance data shows it’s necessary. This tiered system optimizes your efforts, saving time while preventing catastrophic failures.
The Three Tiers of Mold Maintenance
Think of it as escalating levels of care, from a daily check-up to major surgery.
| Maintenance Level | Frequency | Key Activities | Goal |
|---|---|---|---|
| Level 1 | Daily / Per Shift | Parting line cleaning, vent inspection, visual check. | Prevent immediate part defects (e.g., flash). |
| Level 2 | Every 50k-100k cycles | Remove mold, clean all components, lubricate moving parts, inspect for wear. | Address wear before it impacts quality. |
| Level 3 | Every 250k-500k+ cycles | Complete teardown, measure all components, replace wear items, polish surfaces. | Restore the mold to original specifications. |
How Do Material and Part Complexity Affect Maintenance Frequency?
You followed a standard 100,000-cycle maintenance schedule, but your mold still showed significant wear far too early. It’s incredibly frustrating when you think you are doing everything right but still face unexpected downtime and costs. The problem is that a “one-size-fits-all” schedule doesn’t work. The material you are molding and the complexity of your part are two of the biggest factors that should dictate your maintenance frequency. Ignoring them is a recipe for trouble.
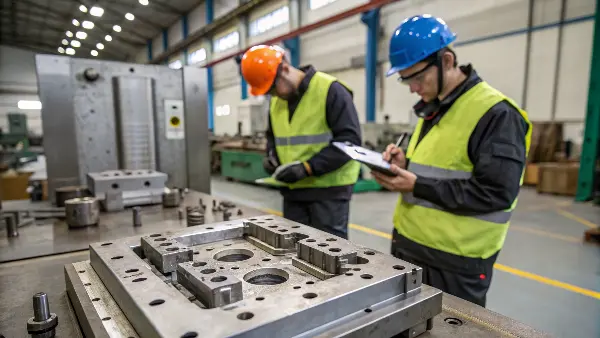
Abrasive materials, like glass-filled resins, act like sandpaper, rapidly wearing down gates, vents, and cavity surfaces. This requires more frequent maintenance. Similarly, complex parts with features like sliders, lifters, or thin walls have more moving components and delicate areas prone to wear, breakage, or misalignment. For these demanding applications, you must shorten the interval between maintenance checks, often by 50% or more, to maintain part quality and prevent premature tool failure.
Impact of Material Choice
The type of plastic you inject has a direct and significant impact on mold life. Some materials are gentle on the steel, while others are incredibly harsh.
Here’s a simple guide to adjusting your schedule based on material type:
| Material Type | Abrasiveness/Corrosiveness | Recommended PM Frequency Adjustment |
|---|---|---|
| Commodity Resins (PP, PE) | Low | Standard Schedule (e.g., every 100,000 cycles) |
| Engineering Resins (ABS, PC) | Moderate | Reduce Interval by 25% (e.g., every 75,000 cycles) |
| Glass-Filled Resins (GF-Nylon) | High Abrasiveness | Reduce Interval by 50%+ (e.g., every 25,000-50,000 cycles) |
| Corrosive Resins (PVC) | High Corrosiveness | Requires frequent in-press cleaning to remove gas residue. |
Impact of Part Complexity
The geometry of the part itself also dictates maintenance needs. A simple, open-and-shut mold for a flat lid is much easier to maintain than a complex mold for a medical device housing.
What Essential Tools and Documentation Make Maintenance Effective?
Your team tries to perform maintenance, but they are working with the wrong tools and have no records to follow. This leads to inconsistent work, forgotten steps, and repeat problems that should have been solved long ago. You end up chasing the same issues over and over. Effective maintenance isn’t just about effort; it’s about having a systematic approach supported by the right equipment and a clear history for every single tool.
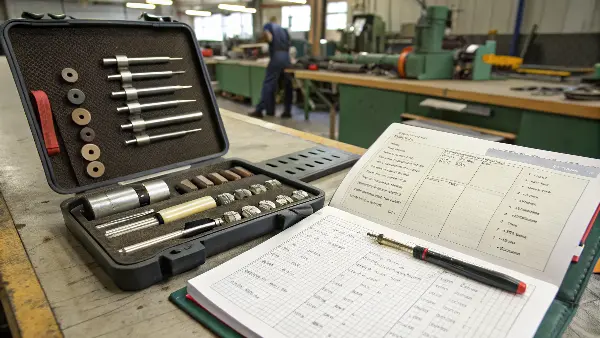
Truly effective maintenance relies on two pillars: a dedicated toolkit and meticulous documentation. The right tools, such as brass scrapers, polishing stones, and pin gauges, allow for safe and precise work. Just as important is a detailed logbook for each mold. This log should record every maintenance action, cycle count, parts replaced, and any issues observed. This history is invaluable for troubleshooting, predicting future needs, and continuously improving your maintenance strategy.
The Essential Maintenance Toolkit
You can’t do a professional job without professional tools. Using a steel screwdriver to scrape plastic residue is a recipe for a scratched cavity. A dedicated maintenance cart or station should be equipped with tools designed for mold care:
- Cleaning Tools: Soft brass picks, scrapers, and brushes are essential because they won’t damage the much harder tool steel. A set of nylon brushes and cleaning solvents specific to the resins you use are also necessary. For deep cleaning, an ultrasonic cleaner is an excellent investment.
- Polishing and Finishing Tools: A set of polishing stones, diamond paste, and felt bobs are needed to repair minor scratches or polish surfaces to maintain part finish.
- Assembly/Disassembly Tools: A quality set of hex keys, torque wrenches (to ensure bolts are tightened correctly), and soft-faced mallets are crucial for safely taking apart and reassembling molds.
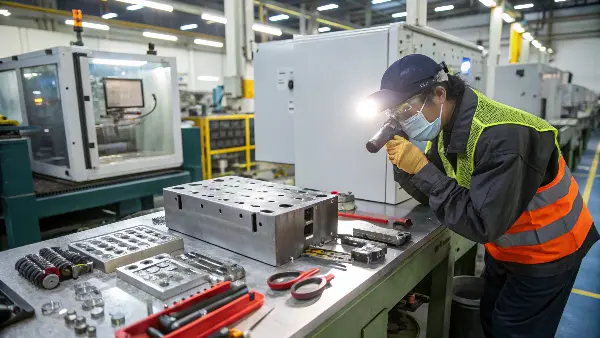
- Inspection Tools: A good light source and a magnifying glass or a simple USB microscope are vital for inspecting for small cracks or wear. Pin gauges are used to measure the wear on holes and ejector pins, while calipers and micrometers check critical dimensions.
The Power of Meticulous Documentation
A mold’s logbook is its medical chart. It tells the complete story of its life and is the most powerful tool you have for predictive maintenance. Every single mold in your facility should have one.
| Log Entry Field | Description | Why It’s Important |
|---|---|---|
| Date & Cycle Count | Date of maintenance and total cycles run. | This is the core data for scheduling future maintenance. |
| Technician Name | Who performed the work. | Creates accountability and provides a point of contact for questions. |
| Actions Performed | A detailed checklist of all tasks completed. | Ensures consistency and completeness, serves as a record of work. |
| Parts Replaced | Specific part numbers or descriptions (e.g., “Ejector Pin #4”). | Helps with inventory management, cost tracking, and identifying weak spots. |
| Issues Found | Notes like “Minor wear on parting line” or “Galling on lifter #2.” | This is your early warning system for predicting future major repairs. |
| Next PM Due | The scheduled date or cycle count for the next service. | Makes maintenance proactive instead of reactive. |
Define Maintenance by Risk and Cycles
A simple part may need a different frequency from a multi-cavity tool with slides, lifters, hot runner and abrasive resin. Track cycle count and identify high-risk components such as gates, shutoffs, ejector systems, guide components, cooling circuits, heaters and valve pins.
After-Run Cleaning and Storage
Remove resin residue, moisture and debris before storage. Dry and protect cooling connections, use appropriate rust prevention, relieve pressure where required and store the mold in a condition that allows the next start-up to be checked. Soft or textured surfaces need suitable cleaning tools to avoid damage.
Inspect Wear and Movement
Check parting-line contact, slides, lifters, ejector return, guide pins, inserts, shutoffs and fasteners. Look for polishing loss, galling, burrs, abnormal marks, looseness or uneven contact. Early wear can often be corrected with an insert or adjustment before the part becomes consistently out of specification.
Maintain Cooling and Hot Runner Systems
Flow restrictions, scale, corrosion, leaks, heater faults and thermocouple drift can change cycle and quality. Record circuit condition, leak checks, temperature alarms and hot-runner spares. A cooling problem should be treated as a mold-maintenance issue, not only a machine-setting issue.
Use Records to Trigger Corrective Action
Maintenance records should include date, cycles, person, finding, action, parts replaced and verification result. Link repairs to defects and inspection trends. This creates a useful life history for the mold and supports decisions about refurbishment, spare inserts or replacement.
Preventive Maintenance for Injection Molds: Buyer Review Checklist
- Set maintenance intervals from cycle count, resin abrasiveness, complexity and defect history.
- Clean, dry and protect the mold before storage or transfer.
- Inspect parting surfaces, slides, lifters, ejectors, guides, inserts and fasteners for wear.
- Check cooling flow, leaks, scale, heaters, thermocouples and hot-runner alarms.
- Record findings, repairs, replaced parts and verification results in the mold history.
FAQ
How often should an injection mold be serviced?
The interval depends on cycles, resin, mold complexity, hot runner, slides, surface and defect history; use a risk-based schedule rather than one universal number.
What is the first sign of mold wear?
Flash, changing dimensions, abnormal ejection, gate variation, increased cycle, surface marks or cavity-to-cavity drift can all be early signs.
Conclusion
Ultimately, a preventive maintenance schedule isn’t a cost; it’s an investment. By implementing a tiered program, you ensure every mold gets the right level of attention. Adjusting that schedule based on material and complexity saves you from premature failures. And by using the right tools and keeping detailed records, you build a powerful system for continuous improvement. This approach will dramatically extend your tool life, support part quality, and eliminate costly, unscheduled downtime.