Are you a product designer who has perfected a digital design, but the path to turning it into thousands of physical parts feels like a mystery? You know the mold is the key, but its creation is a complex black box. This gap in knowledge can lead to design choices that cause major manufacturing headaches, costing time and money. Understanding how a mold is born empowers you to design better and collaborate more effectively.
A plastic mold is made by shaping blocks of high-strength steel or aluminum into a precise core and cavity using advanced machining techniques. The process starts with a detailed Design for Manufacturability (DFM) review, followed by creating a 3D mold design. Key manufacturing steps include CNC milling for rough shaping, Electrical Discharge Machining (EDM) for intricate details, and manual grinding and polishing for the final surface finish. After assembly, the mold is tested and refined to ensure it produces perfect plastic parts.

When I first started in this industry, I was just an employee at a large mold factory. I would see these massive blocks of steel enter the workshop and, weeks later, emerge as incredibly complex tools worth tens of thousands of dollars. It felt like magic. But the day my mentor walked me through the entire process, step-by-step, was a revelation. It wasn’t magic; it was a symphony of engineering, precision machining, and skilled craftsmanship. That understanding changed how I viewed every plastic product around me. It’s that clarity I want to share with you, because it will make you a more effective and knowledgeable designer. Let’s break down that "magic" into its core components.
What is the complete process of plastic mold manufacturing?
You’ve finalized your part design, and you’re ready for mass production. But what really happens between sending your CAD file and receiving your first sample parts? The journey of making the mold itself is a detailed process that can make or break your project timeline and budget. Getting it wrong at any stage can cause a cascade of expensive problems and delays. Let’s map out this critical path from start to finish.
The plastic mold manufacturing process is a systematic journey with five main stages. It begins with Design for Manufacturability (DFM) analysis to optimize your part design for molding. This is followed by the detailed mold design phase, where engineers create the blueprint for the tool. Next is material procurement and precision machining using CNC and EDM. The fourth stage involves meticulous assembly and polishing of all components. The final stage is the mold trial (T1), where the mold is tested and refined until it produces parts that meet every specification.

I will walk you through the entire journey a mold takes in our workshop. Think of it as a roadmap. Knowing these steps helps you ask the right questions at the right time. In my experience, designers who understand this process can forecast potential issues and work with us to solve them before they ever become expensive realities. A project I remember clearly involved a complex housing for a medical device. The designer understood the DFM stage so well that his initial design already accounted for draft angles and uniform wall thickness. This saved us an entire week of back-and-forth communication and redesign, getting his critical product to market that much faster.
Step 1: Design for Manufacturability (DFM) Analysis
This is the single most important step. Before any steel is cut, we analyze your part design. The goal is to identify and correct any features that would make manufacturing difficult or impossible. We look for things like impossible undercuts, lack of draft angles, or radical changes in wall thickness that could cause sink marks. We create a DFM report with our suggestions. This collaborative step ensures the final part will not only look good but can also be produced consistently and economically.
Step 2: Mold Design and Flow Analysis
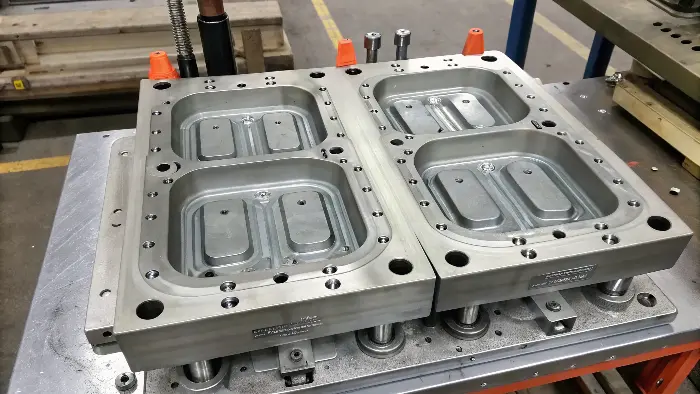
Once the part design is locked, our engineers design the mold itself. This is a highly detailed 3D CAD process. We determine the parting line, the placement of gates (where plastic enters), ejector pins (that push the part out), cooling channels, and sliders or lifters for any undercuts. We also run a mold flow analysis, a computer simulation that shows how plastic will fill the cavity. This helps us predict potential issues like air traps or weld lines and optimize the gate location for a perfect fill.
Step 3: Machining the Mold Core and Cavity
With the mold design approved, we start making the physical tool. Precision is everything here. We use different techniques to shape the hardened steel blocks:
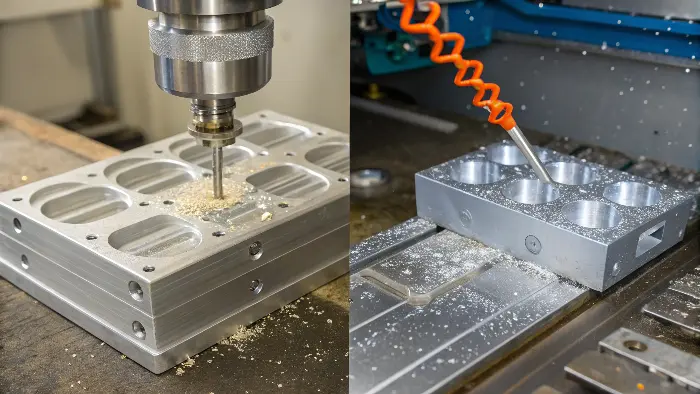
- CNC Milling: This is the workhorse. A computer-controlled machine carves out the main shape of the core and cavity.
- EDM (Electrical Discharge Machining): For fine details, sharp internal corners, or complex textures that a CNC mill can’t create, we use EDM. It uses an electrical spark to erode the steel with extreme precision.
Step 4: Polishing, Fitting, and Assembly
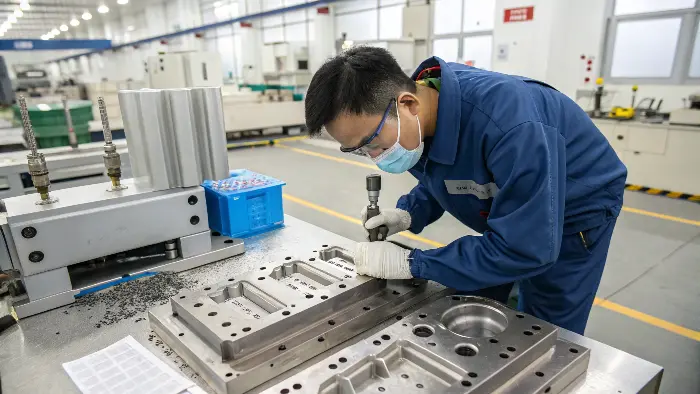
After machining, the mold surfaces that will form your part are meticulously polished by hand. The level of polish determines the finish of your plastic part, from a matte texture to a mirror-like shine. Then, our toolmakers assemble all the dozens, sometimes hundreds, of components—the core, cavity, ejector system, sliders, cooling lines—into a single, functional unit. It’s like assembling a high-performance engine.
Step 5: Mold Trial and Refinement
This is the moment of truth. We mount the finished mold into an injection molding machine for the first trial, called the T1 test. We inject plastic and produce the first batch of sample parts. We carefully measure these parts against your original specifications. Almost always, minor adjustments are needed. We might tweak the injection parameters or make small modifications to the steel itself. This process continues until the mold produces perfect parts, every single time.
| Stage | Key Activity | Primary Goal |
|---|---|---|
| 1. DFM | Part design analysis and feedback. | Optimize the part for efficient and defect-free molding. |
| 2. Mold Design | Create 3D model of the mold; run flow analysis. | Design a reliable and efficient tool for mass production. |
| 3. Machining | Use CNC and EDM to cut steel. | Create the physical core and cavity components accurately. |
| 4. Assembly | Polish surfaces; fit all components together. | Build a functional, high-precision mold tool. |
| 5. Trial (T1) | Inject plastic to create first sample parts. | Test, verify, and refine the mold until it meets all specs. |
How are prototype molds made differently from production molds?
You have a great idea, but you are not ready to commit to a $50,000 production mold. You just need a few hundred parts for a trade show, investor meeting, or beta test. Using a production-grade mold for this is overkill and would burn through your development budget. This is where designers get stuck, thinking they can’t get real injection-molded parts without a huge investment. But there is a better way for low-volume needs.
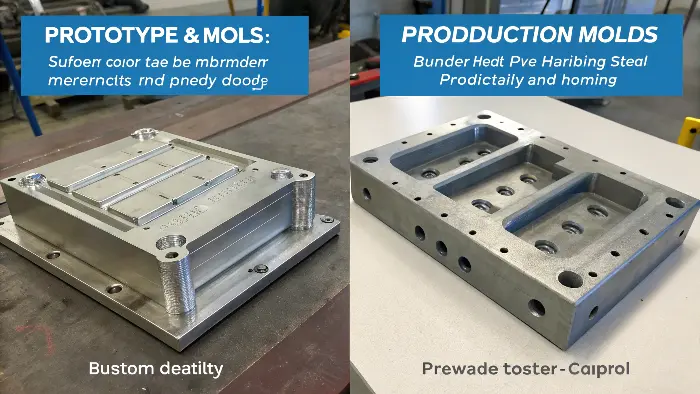
Prototype molds, also called rapid tooling, are made differently to prioritize speed and cost-effectiveness over longevity. Instead of using hardened P20 or H13 steel, they are often machined from softer materials like aluminum or pre-hardened steel. This allows for much faster machining times and lower costs. The trade-off is durability; a prototype mold might last for 500 to 10,000 shots, whereas a full production mold is built to last for a million shots or more. This makes them ideal for validation and short-run production.

Thinking about prototype molds requires a shift in mindset. You’re not building a tool to last for years; you’re building one to get you to the next stage of development. I remember a startup client who had a revolutionary new consumer gadget. They needed 1,000 units for a Kickstarter campaign fulfillment. They didn’t have the capital for a full steel production mold. We recommended an aluminum mold. We were able to make the mold and produce their 1,000 parts in just three weeks. Their campaign was a huge success, and the profits from it funded the steel production mold for their mass-market launch. Using the right tool for the job saved their company.
The Goal is Speed and Validation
The primary purpose of a prototype mold is not mass production. It’s about getting real, injection-molded parts in your hand as quickly and cheaply as possible. These parts are made from the actual production plastic you plan to use, so you can perform real-world testing. Does it fit with other components? Can it withstand stress tests? Does the texture feel right to customers? A prototype mold answers these questions with physical evidence, not just simulations. This de-risks your project before you invest in expensive production tooling.
Common Materials for Rapid Tooling
The choice of material is the biggest differentiator. While production molds use robust, hardened tool steels that are difficult and slow to machine, rapid tooling takes a different approach.
- Aluminum (e.g., 7075-T6): This is the most common choice. Aluminum is much softer than steel, which means our CNC machines can cut it 3-4 times faster. The downside is that it wears out more quickly, especially with abrasive plastics like glass-filled nylon.
- Pre-Hardened Steel (e.g., P20): This is a middle ground. It’s tougher than aluminum but not as hard as fully hardened tool steel. It offers better durability than aluminum, making it a good choice for runs of 10,000 to 50,000 parts, while still being faster to machine than high-grade tool steel.
The Speed vs. Durability Trade-Off
You simply cannot have it all. The decision between a prototype and production mold comes down to a clear trade-off. By choosing a softer material, you gain incredible speed and cost savings on the front end. However, you sacrifice the tool’s lifespan. An aluminum mold might start to show wear and tear after a few thousand cycles, leading to part quality degradation. A hardened steel production mold is a long-term asset designed for hundreds of thousands or even millions of cycles without losing precision. Understanding this trade-off is key for product designers like you to manage your budget and project timeline effectively.
| Feature | Prototype Mold (Rapid Tooling) | Production Mold |
|---|---|---|
| Primary Material | Aluminum, Pre-Hardened Steel | Hardened Tool Steel (H13, S136) |
| Typical Lifespan | 500 – 10,000+ parts | 500,000 – 1,000,000+ parts |
| Lead Time | 2-5 weeks | 6-12+ weeks |
| Cost | Low ($2,000 – $10,000) | High ($15,000 – $100,000+) |
| Best Use Case | Prototyping, validation, short-run production | Mass production, long-term supply |
How does a plastic part actually form inside the finished mold?
You can have the most precisely machined mold in the world, but if the molding process itself is not managed correctly, you’ll still end up with bad parts. It’s a dynamic process involving immense pressure, heat, and precise timing. Many designers overlook this stage, thinking the hard work is done once the mold is made. This can lead to confusion when defects appear, as they can’t trace the problem back to a specific part of the cycle.
A plastic part is formed inside a mold through the injection molding cycle, a four-stage process. First, the two halves of the mold are clamped together with immense force (Clamping). Second, molten plastic is injected under high pressure into the mold cavity (Injection). Third, the plastic is held under pressure and cooled by water channels running through the mold until it solidifies (Cooling). Finally, the mold opens, and an ejector system pushes the finished part out (Ejection). This cycle repeats every 30 to 90 seconds.

I spend a lot of time on the production floor, right next to the molding machines. Watching the cycle is mesmerizing, but it’s also where the real troubleshooting happens. I once had a project for an automotive client where we saw tiny "flow lines" on the surface of a visible dashboard component. The mold was perfect. The material was correct. But the parts weren’t acceptable. By analyzing the process, we realized the injection speed was slightly too slow. This caused the plastic front to cool just enough to create a visible pattern as it filled the mold. A tiny adjustment to the machine’s settings, a few percent increase in speed, solved the problem instantly. Understanding this cycle is not just for production technicians; it’s for designers too.
Stage 1: Clamping
Before any plastic can be introduced, the two halves of the mold—the core and the cavity—must be securely closed. The injection molding machine’s clamping unit provides the force needed to hold the mold shut against the extreme pressure of the injection stage. This force, known as clamp tonnage, is massive, often hundreds of tons. If the clamp force is insufficient, the injection pressure can push the mold halves apart slightly, causing plastic to leak out and create "flash" around the edges of the part.
Stage 2: Injection
This is where the magic happens. Plastic pellets are melted in a barrel and then forced into the mold cavity by a large reciprocating screw. This stage is a balancing act of three key parameters: pressure, speed, and temperature. The pressure must be high enough to pack the cavity completely. The speed must be right to avoid defects like flow lines or short shots (incomplete parts). The temperature of the molten plastic must be perfectly controlled for the specific material being used. This phase is usually very fast, often lasting only a few seconds.
Stage 3: Cooling
This is typically the longest part of the cycle. Once the cavity is filled, the plastic needs to cool and solidify into its final shape. The mold has a network of channels drilled through it, and cool water is constantly circulated through them to draw heat away from the plastic part. The cooling time is critical. If it’s too short, the part will be too soft and may warp when ejected. If it’s too long, it wastes time and increases the cost of each part. The wall thickness of your part is the biggest factor determining the required cooling time.
Stage 4: Ejection
After the part has cooled enough, the mold opens. The part will naturally stick to one half of the mold (usually the core). A system of ejector pins, sleeves, or plates then pushes forward to gently knock the part out of the mold, where it falls into a collection bin or is removed by a robotic arm. The ejector system then retracts, the mold closes, and the entire cycle begins again. The placement of these ejector pins is crucial and was determined back in the mold design phase to avoid leaving marks on cosmetically important surfaces.
| Stage | Purpose | Key Parameters to Control |
|---|---|---|
| Clamping | Securely close the mold. | Clamp Tonnage |
| Injection | Fill the mold cavity with molten plastic. | Injection Pressure, Injection Speed, Melt Temperature |
| Cooling | Solidify the plastic part. | Cooling Time, Coolant Temperature |
| Ejection | Remove the finished part from the mold. | Ejector Speed, Ejector Stroke |
Conclusion
From a digital concept to a physical, mass-produced reality, the creation of a plastic mold is a testament to precision engineering. It’s a multi-stage process that blends advanced design, powerful machining like CNC and EDM, and meticulous hands-on craftsmanship. Understanding this journey empowers you, the designer, to create parts that are not just innovative but truly manufacturable. This knowledge is the bridge between a great idea and a successful product.
