Struggling with defects in your TPU parts? The unique nature of TPU demands more than standard mold designs. I know how frustrating poor quality parts can be.
Specialized mold design for TPU, focusing on gates, runners, and venting systems, is crucial. This approach ensures optimal material flow, minimizes defects, and produces high-quality, consistent TPU components.
Thermoplastic Polyurethane, or TPU, is a fantastic material – flexible, durable, and abrasion-resistant. But I’ve seen many designers and molders, like Jacky, struggle when they first work with it. Its elasticity and viscosity mean you can’t just use the same mold design you’d use for ABS or polypropylene. I learned this the hard way early in my career. We had a project requiring a soft, grippy TPU handle, and our initial attempts were plagued with issues. It took a deep dive into how TPU behaves in the mold to get it right. The key, as I’ve often found, lies in paying close attention to the fundamentals: how the material enters, flows through, and fills the cavity, and how air escapes.
Can You Actually Injection Mold TPU Successfully?
Wondering if TPU’s flexible nature makes it impossible for injection molding? Its unique properties can seem daunting for this process. I’m here to tell you it’s very doable.
Yes, TPU can be effectively injection molded. Success requires specific considerations in mold design, material handling, and processing parameters due to its elastomeric properties and sensitivity to shear.
When I first encountered TPU, I admit I had my doubts about how well it would perform in a standard injection molding setup. It’s so different from rigid plastics. But with the right knowledge and adjustments, TPU is an excellent candidate for injection molding, producing parts with unique and valuable characteristics. Many of my clients have achieved great success with TPU once we fine-tuned their molds and processes. It’s all about understanding the material’s personality.
Understanding TPU for Successful Molding
To truly master TPU injection molding, you need to appreciate its distinct characteristics and how they influence the process.
- TPU’s Nature: TPU is an elastomer, meaning it’s rubber-like. It has a wide range of hardness levels, from very soft and flexible (like a rubber band) to relatively firm (like a skateboard wheel). This variability, along with its higher viscosity compared to many rigid plastics, means it flows differently and is more sensitive to shear heating. Proper drying is also critical, as TPU is hygroscopic (absorbs moisture), and undried material will lead to splay marks and degradation.
- Key Advantages of Molding TPU: Why go through the trouble? Because molded TPU offers:
- Excellent abrasion resistance: Great for parts that experience wear and tear.
- Good elasticity and flexibility: Ideal for seals, gaskets, soft-touch grips, and vibration dampeners.
- High tensile and tear strength: It’s a tough material.
- Good chemical resistance: Stands up to oils and greases.
- Common Applications: You see injection-molded TPU everywhere: shoe soles, caster wheels, phone cases, power tool handles, automotive components like grommets and seals, and various industrial parts. The versatility is immense. I’ve helped clients develop TPU parts for all sorts of innovative applications.
What Is the Difference Between a Gate and a Runner in Injection Molding?
Confused by terms like "gate" and "runner" in mold design? Understanding these basic components is fundamental before diving into TPU specifics. Let me clarify their roles for you.
The runner is the channel system that guides molten plastic from the machine’s nozzle (via the sprue) towards the part cavity. The gate is the specific, smaller opening where the plastic actually enters the cavity.
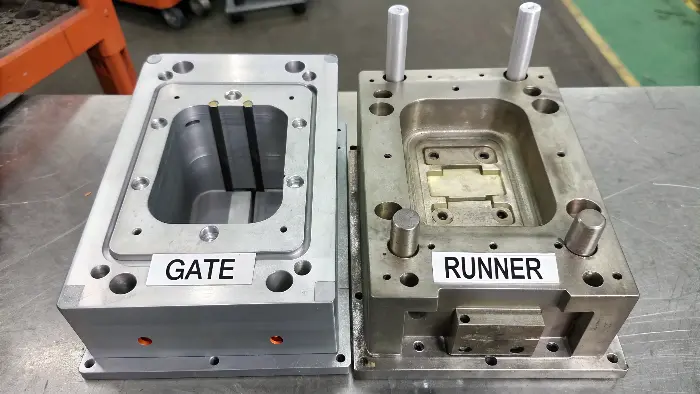
I often explain mold components using analogies. Think of the runner system as the network of highways and main roads leading to a city. The gate, then, is like the specific exit ramp or driveway that takes you to your final destination – the part cavity. Both are essential for getting the molten plastic where it needs to go efficiently and in the right condition. When I was starting out, grasping this flow path was a key "aha!" moment in understanding mold design.
Detailing the Roles of Runners and Gates
| A clear understanding of how runners and gates function individually and together is vital for any injection molding project, especially with materials like TPU. | Feature | Runner System | Gate |
|---|---|---|---|
| Primary Role | Transport molten plastic from sprue to gate(s). | Control flow into the cavity; allow for easy part separation; freeze off to prevent backflow. | |
| Design Focus | Balanced flow to all cavities (if multi-cavity); minimize pressure drop; minimize shear heating; efficient material use. | Optimal location for filling pattern; appropriate size for material and part; type suitable for part aesthetics and material. | |
| Impact on TPU | Sensitive to shear, so smooth, full-round runners are best. Pressure drop management is critical due to higher viscosity. | Gate design significantly affects fill, surface finish, and potential defects like jetting or stringing in TPU. |
Essentially, the runner delivers the plastic, and the gate is the controlled entry point. For TPU, both need to be designed with its specific flow characteristics in mind to avoid issues like excessive shear (which can degrade TPU) or premature freeze-off.
How Does Gate Design Specifically Impact TPU Part Quality?
Getting defects like flow marks or voids near the gate in your TPU parts? The gate design is often the first place I look. Its impact on TPU is huge.
Gate design for TPU is critical. It directly influences the filling pattern, prevents defects like jetting or voids, and affects post-molding cosmetics. Proper gate type, size, and location are essential for TPU’s unique flow behavior.

I remember a project with a client who was molding TPU seals. They were getting inconsistent filling and some surface blemishes right at the gate area. We found their gate was too small and in a location that caused the TPU to "jet" into the cavity, creating flow problems. For TPU, because it can be quite viscous and also prone to stringing, the gate design needs careful thought. It’s not just about getting material into the part; it’s about how it gets in. My insight has always been that gates must be strategically placed, considering the part’s geometry and thickness to achieve the best material flow.
Optimizing Gate Design for TPU
Selecting the right gate type and positioning it correctly are paramount for successful TPU molding.
- Choosing the Right Gate Type for TPU:
- Tab gates: Often a good choice for TPU, especially for flat or larger parts. They provide a wide flow front, reducing shear and improving packing. I’ve used these successfully on many TPU applications.
- Fan gates: Similar to tab gates, they spread the flow over a wider area, good for thin, flat sections.
- Pinpoint gates (pin gates): Can be used for smaller TPU parts, but they need to be sized carefully to avoid excessive shear or freeze-off. Often used in multi-cavity molds.
- Submarine (tunnel/sub) gates: Useful for automatic de-gating. For TPU, they need a robust design to prevent breakage and ensure clean separation.
- Optimal Gate Location Strategies:
- Gate into the thickest section of the part if possible. This helps with packing and reduces voids.
- Avoid gating where high cosmetic appearance is required, as the gate vestige can be more noticeable with softer TPUs.
- Consider gating to direct flow along the longest path, or in a way that avoids trapping air.
- Sizing Gates for TPU:
- Gates for TPU generally need to be larger than for rigid plastics like ABS or PP to accommodate its higher viscosity and reduce shear.
- A general rule of thumb I follow is to start with a gate thickness of 50-75% of the part wall thickness and adjust based on trials.
- The land length (the short distance of the gate itself) should be kept minimal, typically 0.5mm to 1.0mm, to reduce pressure drop and facilitate freeze-off.
Proper gate design is a cornerstone of good TPU mold design. It’s where the material first meets the part cavity, so it has to be right.Why is Runner System Design Crucial for TPU Injection Molding?
Experiencing uneven filling, pressure loss, or material degradation with TPU? Your runner system could be the culprit. Its design is more critical for TPU than many realize.
A well-designed runner system for TPU ensures balanced material flow to all cavities, minimizes pressure drop, and crucially, reduces shear heating. Full round or modified trapezoidal runners are often preferred for TPU.
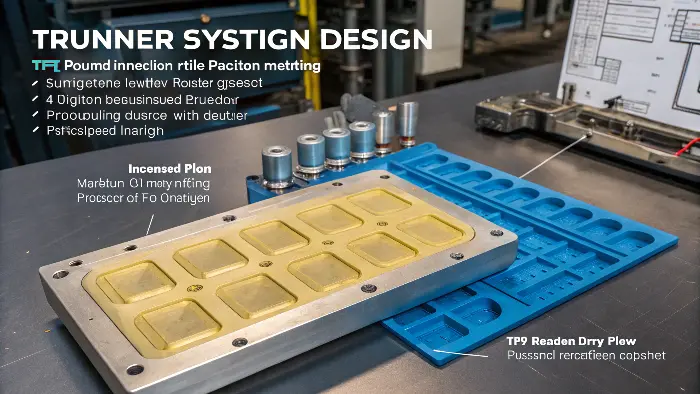
When dealing with TPU, especially in multi-cavity molds, the runner system is not just a pathway; it’s a critical control element. I’ve seen situations where an imbalanced runner led to some cavities getting short shots while others flashed, all because the TPU wasn’t reaching each cavity at the same time and pressure. My insight here aligns with making sure the runner dimensions and layout achieve balanced filling and minimize pressure drop. For TPU, which can be shear-sensitive, the shape of the runner also matters a lot.
Key Considerations for TPU Runner Systems
To ensure consistent part quality and efficient processing of TPU, the runner system must be optimized.
- Balancing Flow in TPU Runners:
- For multi-cavity molds, a naturally balanced runner layout (e.g., H-pattern) is essential. This ensures each cavity fills at the same rate and pressure.
- Runner dimensions should be consistent for balanced paths. I always double-check this in the design phase.
- Runner Sizing and Profile for TPU:
- Full round runners are generally best for TPU. They offer the least resistance to flow and minimize surface area-to-volume ratio, which helps maintain melt temperature and reduce shear.
- If full round isn’t feasible, modified trapezoidal runners (with generous radii) are a good alternative. Avoid rectangular runners as they have high shear corners.
- Runner diameters should be generous enough to prevent premature freeze-off and excessive pressure drop, but not so large as to waste material or excessively prolong cycle times.
- Minimizing Shear and Pressure Loss:
- Smooth, polished runner surfaces are important to reduce friction and shear.
- Avoid sharp turns or abrupt changes in runner diameter; use gradual transitions and large radii. This is critical for preventing TPU degradation due to high shear.
- Keep runner lengths as short as practically possible.
A well-designed runner system acts like a well-engineered delivery network, ensuring the TPU arrives at each gate in the best possible condition.How Critical is Venting for Successful TPU Injection Molding?
Seeing burn marks, voids, or incomplete filling in your TPU parts? Trapped air due to poor venting is often the villain. Effective venting is non-negotiable for TPU.
Effective venting in TPU molds is vital. It allows air and any gases generated from the melt to escape the cavity, preventing defects like porosity, burn marks, and short shots. Proper vent size and location are key.
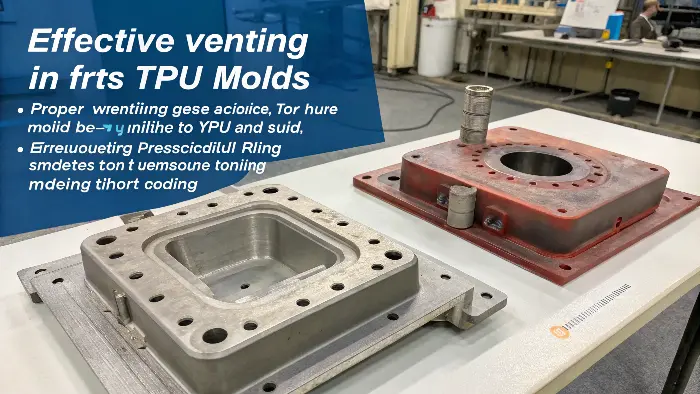
I can’t stress enough how important venting is, especially for a material like TPU. Because TPU can be quite viscous, it tends to push air ahead of it, and if that air has nowhere to go, it gets compressed, heats up, and can cause burn marks. Or, it simply prevents the TPU from filling the cavity completely, leading to short shots or voids. My insight is that a robust venting system is absolutely essential to expel these trapped gases and prevent porosity and related defects. I’ve solved many "mystery" TPU molding problems by simply improving the mold’s venting.
Designing Effective Venting Systems for TPU
| Proper venting ensures that the cavity can be completely filled with TPU without interference from trapped gases. | Aspect | Recommendation for TPU | Rationale |
|---|---|---|---|
| Vent Location | At the last point of fill; along the parting line; around inserts, cores, and ribs; wherever air traps are likely. | Air is pushed to these locations by the advancing melt front. | |
| Vent Depth | Typically very shallow for TPU: 0.015mm to 0.03mm (0.0006" to 0.0012"). | TPU’s flexibility allows it to flash easily if vents are too deep. Start shallow and increase slightly only if necessary. | |
| Vent Width | Can be generous, e.g., 5mm to 12mm or more. | Wider vents allow more air to escape. | |
| Vent Land Length | Short initial land (approx. 1mm-2.5mm at full depth), then open to a deeper channel (0.5mm-1.5mm deep) leading to atmosphere. | The short land prevents TPU from easily flowing into the deeper escape channel, while the deeper channel ensures air can get out. | |
| Surface Finish | Vents should be polished in the direction of flow. | Facilitates air escape and helps prevent clogging. | |
| Maintenance | Vents must be kept clean and checked regularly. | TPU residue or outgassing deposits can clog vents over time, rendering them ineffective. I always include this in maintenance schedules. |
Don’t underestimate the power of good venting. For TPU, it’s often the difference between a perfect part and a reject.
What Wall Thickness is Ideal for TPU Injection Molding?
Struggling to decide on the right wall thickness for your TPU parts? Too thin causes filling problems, too thick causes sinks or long cycles. Finding that sweet spot is crucial.
Ideal wall thickness for TPU injection molding typically ranges from 1.0mm to 3.0mm (0.040" to 0.120"), but can vary. Uniformity is paramount to prevent defects and ensure consistent material properties.
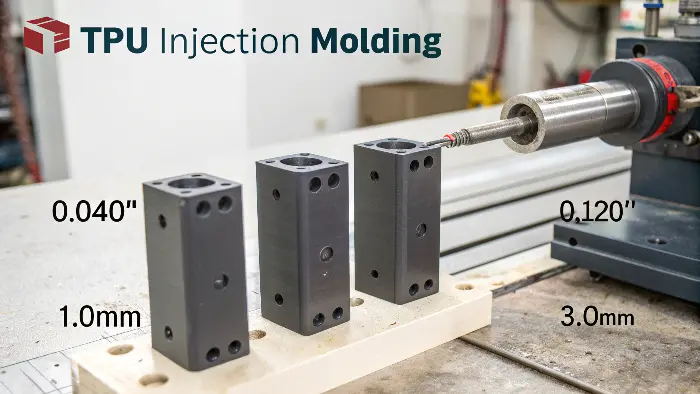
When designing parts for TPU, wall thickness is a key parameter that Jacky and other designers often ask about. Unlike rigid plastics where you might push for very thin walls to save material and cycle time, TPU’s flow characteristics and flexibility introduce different considerations. I’ve seen designs with walls so thin that the TPU couldn’t flow properly, leading to short shots, even with high pressures. Conversely, overly thick sections can lead to sink marks (though less pronounced than in rigid plastics) and unnecessarily long cooling times.
Guiding Principles for TPU Wall Thickness
Achieving the right balance in wall thickness is key for manufacturability and part performance.
- Recommended Thickness Ranges:
- While 1.0mm to 3.0mm is a general guideline, some softer TPUs can be molded thinner, perhaps down to 0.5mm in some cases, but this requires careful mold design and process control.
- Harder TPU grades can sometimes accommodate slightly thicker walls, but always be mindful of cooling and potential sink.
- Importance of Uniform Wall Thickness:
- This is a golden rule in plastic part design, and it’s especially important for TPU. Non-uniform walls lead to differential cooling and shrinkage, which can cause warpage, even in flexible parts.
- If thickness variations are unavoidable, make transitions gradual. Avoid abrupt changes from thin to thick sections. I always advise designers to use generous radii for these transitions.
- Designing for TPU’s Flexibility:
- The desired flexibility of the final part heavily influences wall thickness. A thinner wall will naturally be more flexible.
- Consider how the part will be used. If it needs to bend or stretch, the wall thickness must allow for this without tearing or overstressing the material.
- Sometimes, ribs can be used to add stiffness to certain areas without making the overall wall too thick, but rib design for TPU also needs care to avoid sink.
Always consult the TPU material supplier’s datasheet, as they often provide specific recommendations for their grades.What is the Typical Injection Pressure for TPU Molding?
Uncertain about the correct injection pressure settings for your TPU material? Incorrect pressure is a common source of molding defects or even mold damage. I’ll help you understand the range.
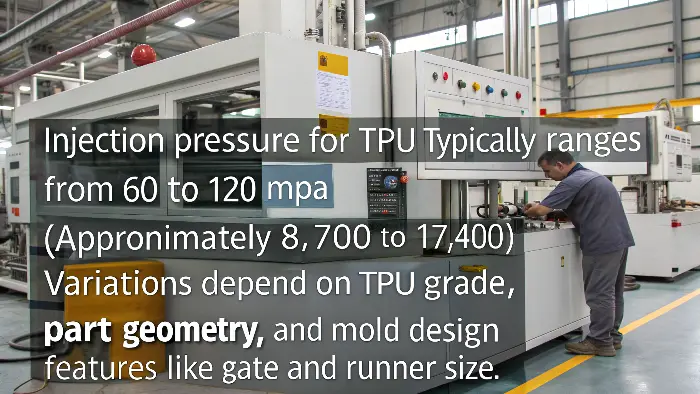
Injection pressure for TPU typically ranges from 60 to 120 MPa (approximately 8,700 to 17,400 psi). However, this varies significantly based on TPU grade, part geometry, and mold design features like gate and runner size.
Setting the right injection pressure for TPU is a balancing act. I’ve seen operators new to TPU either use too little pressure, resulting in short shots, or too much, leading to flash or even stressing the mold components. Unlike some very fluid plastics, TPU generally requires moderate to high pressures to ensure complete cavity filling, especially with its inherent viscosity and the often complex geometries it’s used for. It’s not a one-size-fits-all parameter.
Factors and Optimization for TPU Injection Pressure
| Understanding what influences pressure requirements and how to optimize them is key. | Factor | Influence on Injection Pressure | My Advice |
|---|---|---|---|
| TPU Hardness (Shore) | Softer TPUs (lower Shore A) are generally more viscous and may require higher pressures to fill, or slower injection speeds. Harder TPUs (higher Shore D) might flow easier. | Always check the material datasheet. Some soft grades are designed for lower pressure flow. | |
| Part Wall Thickness | Thinner walls require higher pressure to fill compared to thicker walls. | Balance wall thickness with feasible injection pressures. | |
| Flow Length | Longer flow paths from the gate to the end of fill require higher pressure. | Optimize gate location to minimize flow length if pressure is a concern. | |
| Gate and Runner Size | Smaller gates and runners create more restriction and thus require higher pressure. | Design gates and runners appropriately for TPU to reduce excessive pressure requirements. | |
| Melt & Mold Temperature | Higher melt or mold temperatures can reduce TPU viscosity, potentially lowering the required injection pressure. | Operate within recommended temperature ranges to avoid material degradation. | |
| Setting & Optimizing | Start with a lower pressure and gradually increase until the cavity fills completely without flash. Observe the part quality. | Use a systematic approach. Make small adjustments and monitor the results. Profile injection if possible. | |
| Consequences of Incorrect Pressure | Too low: Short shots, sink marks, poor surface finish. Too high: Flash, part sticking, mold damage, material degradation. | Finding the "sweet spot" is crucial for both part quality and process stability. |
I always recommend a process development approach: start with the material supplier’s recommendations and then fine-tune based on actual molding trials.
Conclusion
Specialized mold design for TPU is key. Proper gates, runners, and venting, tailored to TPU’s unique properties, ensure high-quality parts. My experience confirms this leads to molding success.
