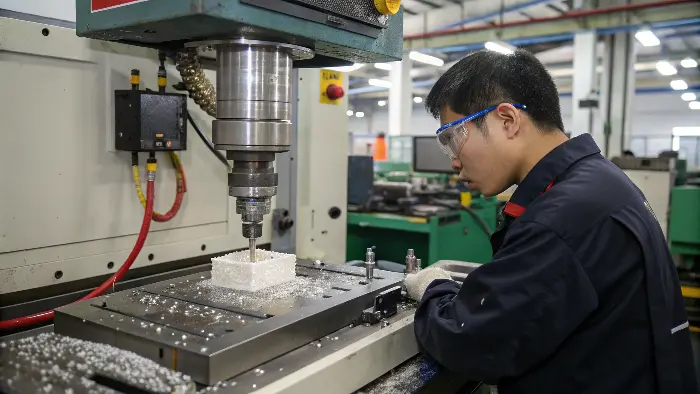
Struggling with glass-filled nylon? This material offers incredible strength, but it can be a nightmare to process. Warping, surface defects, and rapid tool wear can quickly derail your project, costing you time and money. You’re tired of failed parts and the endless trial-and-error that puts your deadlines and budget at risk. But what if you could finally get it right, every single time?
To master injection molding with glass-filled nylon (PA+GF), you must focus on three critical areas. First, use a mold made from wear-resistant steel and ensure your machine has a hardened screw and barrel. Second, you must properly dry the material to a moisture content below 0.2%. Finally, carefully control your processing parameters, especially melt temperature (270-320°C), a high mold temperature (80-120°C), and injection pressure. These steps are essential for managing the material’s challenging properties.

Glass-filled nylon is a fantastic material, but I’ve seen many designers and engineers get frustrated with it. They choose it for its strength and then spend weeks trying to figure out why their parts are warping or why their surface finish looks terrible. The truth is, you can’t treat PA+GF like any other standard plastic. It has its own set of rules. Once you learn those rules, you can unlock its true potential. In this guide, I’m going to walk you through everything I’ve learned over the years, from material properties to mold design and troubleshooting. Let’s get started.
What Are the Real Benefits and Drawbacks of Using Glass-Filled Nylon?
You’ve heard that PA+GF is the go-to material for strong, durable plastic parts. But you’re also worried about the hidden challenges. Will it be too abrasive for your tools? Will it be too difficult to process correctly? Choosing a material without understanding the full picture can lead to unexpected costs and major production headaches. I’ll break down the pros and cons so you can decide with confidence if PA+GF is right for your project.
The main benefit of glass-filled nylon is its significantly increased strength, stiffness, and heat resistance compared to unfilled nylon. However, its primary drawbacks are its abrasive nature, which causes rapid wear on molds and machine components, and its tendency to warp. This warping is caused by uneven shrinkage as the glass fibers align during flow. It also results in a less appealing surface finish. Understanding this trade-off is the first step to successful molding.

When a client comes to me asking for a "strong plastic," glass-filled nylon is one of the first materials that comes to mind. But my next question is always, "Are you prepared for it?" The benefits are huge, but you have to be ready for the challenges. I remember a project for an automotive client. They needed a bracket that could withstand high engine temperatures and constant vibration. Unfilled nylon just wasn’t cutting it. We switched them to a 30% glass-filled PA66, but we had to walk them through the entire process.
The Upside: Why We Love PA+GF
The addition of glass fibers transforms standard nylon into a high-performance engineering material. The fibers act like rebar in concrete, providing a rigid skeleton within the polymer matrix. This leads to dramatic improvements in mechanical properties. You get higher tensile strength, which means the part can resist being pulled apart. You also get much higher flexural modulus, meaning the part is much stiffer and less likely to bend under load. This is why it’s so popular for housings, brackets, and structural components that replace metal. The heat deflection temperature (HDT) also shoots up, allowing parts to maintain their shape and strength at much higher temperatures.
The Downside: What to Watch Out For
The biggest challenge with PA+GF is its abrasive nature. Those strong glass fibers will wear down standard tool steels surprisingly quickly. If your mold isn’t made from a hardened, wear-resistant steel, you’ll start to see gates and parting lines degrade, leading to flash and dimensional instability. The material is also famous for warping. This happens because as the molten plastic flows into the mold, the long glass fibers tend to align themselves in the direction of flow. The plastic shrinks less in the direction of the fibers and more in the direction perpendicular to them. This difference, called anisotropic shrinkage, is what causes parts to twist and warp. Finally, you will almost never get a glossy, smooth surface finish. The fibers tend to show on the surface, creating a dull, textured look.
Here is a simple table to show the difference.
| Property | Unfilled PA66 | PA66 + 30% Glass Fiber | Why it Matters |
|---|---|---|---|
| Tensile Strength | ~80 MPa | ~180 MPa | Part is over twice as strong against pulling forces. |
| Flexural Modulus | ~2.8 GPa | ~9.0 GPa | Part is over three times stiffer and more rigid. |
| Heat Deflection Temp | ~70 °C | ~250 °C | Part can survive in much hotter environments. |
| Shrinkage | Isotropic (~1.5%) | Anisotropic (Flow: ~0.4%, Cross-flow: ~0.9%) | This difference is the primary cause of warping. |
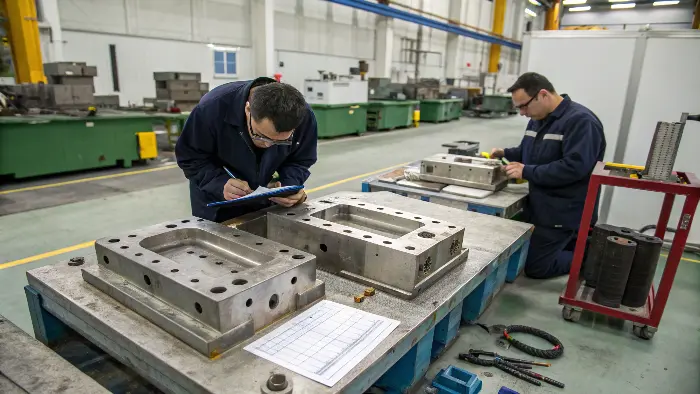
Why is Your Mold Design So Critical for Glass-Filled Nylon?
You’ve designed a perfect part in CAD, but when it’s molded with PA+GF, it warps and cracks. The problem might not be your processing settings, but the mold itself. Ignoring the unique needs of glass-filled materials during the mold design stage leads to endless troubleshooting and expensive tool modifications later on. Let’s talk about how to design a mold that works with the material, not against it.
Mold design is critical for PA+GF because the glass fibers introduce unique challenges. You must use wear-resistant tool steel (like hardened H13 or S136) to fight abrasion. Gates must be larger than normal to reduce shear stress that can break the fibers and weaken the part. The gate location is key to controlling how the fibers orient, which directly impacts warping. Finally, you need robust cooling and venting to manage shrinkage and prevent gas traps.

I can’t stress this enough: your success with glass-filled nylon begins with the mold design. I once had a customer who brought me a mold that was designed for ABS. They wanted to run PA+GF in it to make a stronger version of their product. It was a disaster. The gate was too small, causing the fibers to break and the parts to be brittle. The cooling was uneven, making the warping even worse. We ended up having to do major modifications to the tool. It would have been much cheaper and faster to design it correctly from the start.
Material Selection for the Mold
Don’t cheap out on your tool steel. Standard P20 steel is great for many applications, but it’s too soft for glass-filled materials. The glass fibers will erode the cavity surfaces and, more importantly, the gate and parting line areas. You should start with a higher quality, pre-hardened steel like H13. For very high-volume production or highly abrasive grades (e.g., 50% GF), I recommend using a through-hardened steel like S136 or applying a wear-resistant coating like Titanium Nitride (TiN) to critical areas. This initial investment in better steel will save you a fortune in mold maintenance and repair down the road.
Gating Strategy: The Key to Controlling Warp
The gate is where the molten plastic enters the part cavity, and its design and location are the most powerful tools you have to control the material.
- Gate Type and Size: Use large, simple gates like a tab gate or a direct sprue gate whenever possible. Avoid pin gates or other restrictive gates that create high shear. High shear can physically break the glass fibers, reducing the mechanical properties of the final part. A larger gate reduces this shear and allows the material to flow in more gently.
- Gate Location: This is where the real art is. You want to place the gate in a way that the material flows in a single, uniform direction across the part. If you have a long, flat part, gating at one end and letting it flow to the other is ideal. Gating in the center will cause the material to flow radially outwards, leading to complex fiber orientation and unpredictable warping. You want to control the flow to control the shrinkage.
Cooling and Venting Considerations
Because of the high processing temperatures, effective cooling is essential. You need to design cooling channels that follow the shape of the part to ensure uniform temperature across the mold surface. Any hot spots will cause differential shrinkage and lead to warping. Venting is also more critical with PA+GF. The material flows quickly and can trap air and gas, leading to burn marks and weak weld lines. Make sure you have deep enough vents (around 0.02-0.03 mm) along the parting line and at the end of the flow path to let these gases escape.
How Do You Set Up Your Machine for Perfect PA+GF Parts?
Setting your machine parameters for PA+GF can feel like a guessing game. The wrong temperature or pressure can lead to weak parts, flash, or short shots. You’re frustrated with inconsistent results and the time it takes to dial in the process for every new job. I’m going to give you the specific, field-tested settings that I use as a starting point for every PA+GF project, which will help you get to a good part much faster.
For perfect PA+GF parts, start with meticulous material drying for 4-6 hours at 80-90°C. Set your melt temperature between 270-320°C and a high mold temperature of 80-120°C to improve surface finish and reduce internal stress. Use a high injection speed to prevent premature freezing and ensure proper fiber alignment, but then switch to a controlled holding pressure to minimize sink marks and warping. A slower screw speed during plasticizing also helps reduce fiber breakage.

The first thing I check when a team is having trouble with PA+GF is their drying setup. Nylon is hygroscopic, meaning it loves to absorb moisture from the air. Glass-filled nylon is no different. If you try to mold it wet, the water turns to steam at processing temperatures, which breaks down the polymer chains and makes the part extremely brittle. You can have the best mold and the best machine in the world, but if your material isn’t bone dry, you will fail.
Step 1: Material Preparation is Non-Negotiable
As I said, drying is everything. You need a good desiccant dryer capable of holding a steady temperature. Don’t just use a hot air oven, as it won’t remove the moisture effectively.
- Drying Temperature: 80-90°C (175-195°F)
- Drying Time: 4-6 hours is a good starting point. For very humid environments or material that has been open for a long time, you might need longer.
- Target Moisture: You must get the moisture content below 0.2%, and ideally below 0.1%. A moisture analyzer is a great tool to verify this.
Step 2: Temperature Control is Everything
Temperature is your next key variable. You need high temperatures for both the material and the mold.
- Melt Temperature: This will vary depending on the specific grade, but a range of 270-320°C (520-610°F) is typical. Running too hot can degrade the material and break fibers, while running too cold will result in poor flow and weak weld lines.
- Mold Temperature: This is a critical and often overlooked parameter. You need a hot mold, typically between 80-120°C (175-250°F). A cold mold will cause the material to freeze instantly at the surface, trapping the fibers in a random orientation and creating a terrible surface finish. A hot mold allows the surface to stay molten a little longer, improving the finish and allowing the polymer to pack out properly, which reduces internal stress and warping.
Step 3: Pressures and Speeds
Finally, you need to manage your pressures and speeds to fill the part correctly without damaging the material.
| Parameter | Recommended Setting | Reason |
|---|---|---|
| Injection Speed | High | Fills the cavity quickly before the material freezes. Helps align fibers for predictable shrinkage. |
| Holding Pressure | Medium to High | Packs out the part to compensate for shrinkage and minimize sink marks. |
| Back Pressure | Low | High back pressure creates too much shear and can break the glass fibers. |
| Screw Speed (RPM) | Low to Medium | A slower screw rotation is gentler on the fibers during the plasticizing stage. |
Start with these settings and adjust based on the specific part you are molding. Every part is different, but these principles will give you a solid foundation for success.
What Are the Most Common Defects with PA+GF and How Do You Fix Them?
Your PA+GF parts are coming out of the mold with ugly surface marks, severe warping, or unexpected brittleness. You’re stuck trying to figure out the cause, wasting expensive material and valuable machine time. It’s incredibly frustrating when you can’t pinpoint the root of the problem. I’ve seen every possible defect with this material, and I’ll share a simple troubleshooting guide to help you fix the most common issues fast.
The most common defects with glass-filled nylon are warping, poor surface finish (visible fibers), and brittleness. To fix warping, check for uniform mold temperature and adjust holding pressure. To improve surface finish, increase both the mold temperature and the injection speed. Brittleness is often caused by either moisture in the material or polymer degradation from excessive heat. Check your drying process first, then consider lowering the melt temperature.

Troubleshooting is a process of elimination. When I see a bad part, I don’t just start changing random settings. I think about the material and the process. Is the material prepared correctly? Are the temperatures in the right range? Is the pressure and speed profile logical? 90% of the time, the problem lies in one of these core areas. I once spent half a day helping a team solve a brittleness issue. They swore their dryer was working. We finally tested the pellets right before they went into the machine, and the moisture content was way too high. A faulty dryer was the culprit. Always check the simple things first.
Here is a quick guide to help you diagnose and solve common problems.
| Defect | Potential Cause(s) | How to Fix It |
|---|---|---|
| Warping | 1. Differential shrinkage (fiber orientation). 2. Non-uniform mold temperature. 3. Inadequate holding pressure or time. |
1. Relocate the gate to control flow direction. 2. Check cooling channels for blockages; verify mold surface temp. 3. Increase holding pressure or time. |
| Floating Fibers / Poor Surface | 1. Mold temperature is too low. 2. Injection speed is too slow. 3. Low melt temperature. |
1. Increase mold temperature (to 80-120°C). This is the most effective solution. 2. Increase injection speed. 3. Slightly increase melt temperature. |
| Brittleness / Weak Weld Lines | 1. Moisture in the material. 2. Material degradation (melt temp too high or residence time too long). 3. Low melt or mold temperature. |
1. Verify your drying process! Check time, temp, and moisture content. 2. Lower the melt temperature; use a smaller shot size if possible. 3. Increase melt and mold temperatures to help weld lines fuse better. |
| Flash | 1. Clamping force is too low. 2. Injection pressure or speed is too high. 3. Mold parting line is worn out (due to abrasion). |
1. Increase clamp tonnage. 2. Reduce injection pressure or speed. 3. Inspect and repair the mold. This is common with PA+GF in soft tools. |
| Burn Marks | 1. Vents are clogged or too small. 2. Injection speed is too high. |
1. Clean and check the size of your mold vents. 2. Reduce injection speed, especially at the end of the fill. |
This table covers the most frequent issues. Remember to change only one parameter at a time and observe the result. This systematic approach will help you solve problems faster and truly understand how each setting affects your final part.
Conclusion
Mastering glass-filled nylon isn’t about a single secret trick. It’s about respecting the material’s unique properties. By focusing on wear-resistant mold design, meticulous material drying, and precise control over temperatures and pressures, you can overcome its challenges. This approach will allow you to consistently produce strong, reliable parts and unlock the full engineering potential of PA+GF for your most demanding projects.
