Are you struggling with a high scrap rate from scratches on your plastic parts? It feels frustrating when you’ve invested in a new mold, only to see profits disappear with every rejected unit. You know there’s a solution, but your current supplier can’t seem to find it, causing delays and costing you money. This exact problem can turn a promising project into a major headache.
The key to eliminating persistent scratches in deep-cavity parts lies in a systematic approach that addresses mold design, processing parameters, and material choice. It often involves improving the ejection system with more balanced pin placement, increasing draft angles even slightly, enhancing core surface polishing, and using strategic air vents to break vacuum seals. Fine-tuning injection temperature and pressure also plays a crucial role in reducing internal stress, which prevents the part from sticking to the mold upon ejection.
This problem is more common than you might think, especially with modern product designs that feature deep ribs and minimal drafts. I remember a client, let’s call him Michael, who came to us with this exact issue. He was on the verge of losing a major contract because of cosmetic defects on a new electronics housing. His previous mold maker tried a few quick fixes, but the scratches kept appearing. Michael was losing time, money, and sleep. We love a good challenge, and this case was a perfect opportunity to show how a deeper understanding of mold mechanics can solve even the most stubborn problems. Let’s dive into how we tackled it.
What Were the Symptoms of This Persistent Scratching Problem?
Are you seeing consistent, ugly drag marks on the same spot of every other part? This is a classic sign of a deeper issue. For Michael, the problem was maddeningly specific. His production line was experiencing a reject rate of nearly 30%, which was simply unsustainable. The project was falling behind schedule, and the costs were adding up fast. He was under immense pressure to deliver, but the parts just weren’t good enough.
The persistent scratching appeared as fine, vertical drag marks on the inner walls of the deep-cavity electronics housing. These defects were consistently located on one side, indicating a problem with the part’s release from the mold core during the ejection phase. The scratches were deep enough to be a cosmetic failure, making the parts unusable for the final product assembly. This pointed directly to an issue with friction, adhesion, or vacuum during the ejection cycle, rather than a random material or contamination problem.
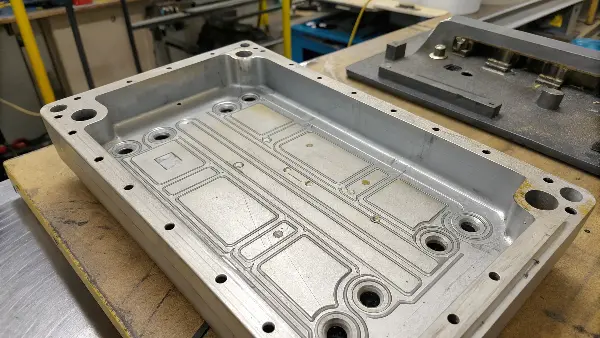
When we first received the sample parts from Michael, the problem was immediately clear. The scratches weren’t random. They followed a clear pattern, a "footprint" of the part being torn away from the mold steel instead of being gently pushed off. This told me it wasn’t a material contamination issue, which would cause random specks or splotches. It was a mechanical problem, a story of a battle between the part and the mold during every single cycle.
The Initial Assessment
The part was a sleek ABS housing, about 100mm deep with a wall thickness of only 2mm. The design was beautiful, but from a molding perspective, it was challenging. There were minimal draft angles to maintain the straight, clean lines the designer wanted. During our first meeting, Michael explained, "We’ve polished the mold twice, we’ve played with the temperatures, but nothing works. The lines just won’t go away."
Business Impact
For Michael’s company, a 30% scrap rate was more than just a number.
- Financial Loss: It meant 30% of his material costs, machine time, and labor were being thrown away.
- Production Delays: The high reject rate meant they couldn’t produce parts fast enough to meet their deadlines.
- Reputation Risk: Most importantly, he was at risk of damaging his relationship with his end customer.
This wasn’t just a technical problem; it was a business crisis. We knew we had to look beyond the surface-level fixes and find the true root cause.
How Did We Identify the Root Cause of the Scratches?
Have you ever fixed one problem only to have another pop up? It’s often because the real root cause was never found. Quick fixes like adjusting temperatures or pressures can sometimes help, but they often just mask the underlying issue. We knew that to provide Michael with a permanent solution, we had to dig deep and understand exactly why the part was sticking to the mold. Guesswork wasn’t an option when his business was on the line.
We identified the root cause by conducting a comprehensive Design for Manufacturability (DFM) analysis on the part and a detailed inspection of the existing mold. Our team discovered a combination of three critical flaws: insufficient draft angles (less than 0.5 degrees), an unbalanced ejection system that caused the part to tilt, and a lack of proper venting at the bottom of the deep cavity. This created a strong vacuum effect, essentially sucking the part onto the mold core, while the uneven ejection force caused it to drag and scratch upon release.
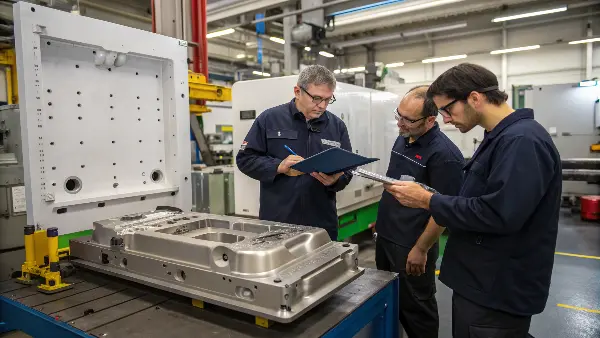
Our process began by treating the problem like a detective story. The scratches were the clues, and the mold was the crime scene. We didn’t just look at the mold; we simulated the entire injection process using sophisticated software. This allowed us to "see" inside the mold as the plastic was injected, cooled, and ejected. The simulation immediately highlighted high-stress areas on the inner walls, exactly where the scratches were appearing. This confirmed our suspicion that the part was under immense stress during ejection.
Step 1: Mold Teardown and Measurement
We then carefully disassembled the existing mold. Using precision measurement tools, we checked every critical dimension.
- Draft Angles: The design called for 0.5 degrees of draft, but we found areas that were closer to 0.3 degrees. On a 100mm deep core, this tiny difference is massive.
- Surface Finish: The core had been polished, but not in the direction of ejection. The microscopic polishing lines were running horizontal, acting like tiny barbs that increased friction.
- Ejector Pin Layout: The ejector pins were not placed symmetrically. They were pushing harder on one side, causing the part to skew or "rock" as it was being ejected, leading to scraping on the opposite side.
Step 2: The Vacuum Effect Theory
The deepest part of the core had no venting. As the part cooled and shrank, it gripped the core tightly. When the ejector pins started pushing, no air could get in between the part and the steel. This created a powerful vacuum seal. Imagine trying to pull a suction cup off a flat surface—that’s the force we were fighting against. The ejection system was literally fighting a vacuum, and the part was tearing in the process.
| Analysis Area | Finding | Implication |
|---|---|---|
| Draft Angle | Measured at 0.3° in some areas | Insufficient release, high friction |
| Ejection System | Asymmetrical pin placement | Tilting of part during ejection |
| Venting | No vents at the base of the core | Strong vacuum seal formation |
| Surface Polish | Cross-hatch polish (not directional) | Increased surface friction |
This detailed diagnosis gave us a clear roadmap. We weren’t just guessing anymore. We knew exactly which elements of the mold had to be changed to give Michael the perfect parts he needed.
What Specific Mold Design Changes Solved the Ejection Scratches?
Once you know the why, figuring out the how becomes much clearer. The solution wasn’t a single magic fix, but a series of precise, complementary modifications. It’s like tuning an engine; several small adjustments working together create a huge performance improvement. For Michael’s mold, we had to re-engineer the way the part was released, turning a violent tearing process into a smooth, effortless push. This is where decades of experience really make a difference.
To solve the scratching, we implemented three key mold design changes. First, we increased the draft angle to a uniform 1 degree on all deep-cavity walls. Second, we re-engineered the ejection system by adding four extra ejector pins for balanced force distribution and replacing two standard pins with blade ejectors on the thinnest ribs. Finally, we machined subtle air poppet valves into the base of the core to actively break the vacuum seal the moment ejection began. These changes worked together to ensure a smooth, parallel part release.
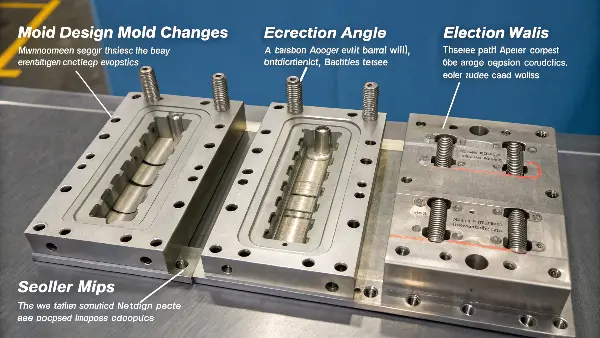
Each modification targeted a specific failure point we had identified in our diagnosis. It wasn’t about over-engineering; it was about precision engineering. We explained every change to Michael so he understood the value and logic behind the investment in the mold rework.
Tactic 1: Optimizing Draft and Polish
The first and most impactful change was increasing the draft. We had a frank conversation with Michael and his product designer. We explained that adding just another half a degree of draft would be invisible to the end-user but would dramatically reduce the friction during ejection. They agreed. We then re-machined the core and polished it properly, with all polish lines running vertically in the direction of ejection. This created a much smoother "exit path" for the part.
Tactic 2: A Rebalanced Ejection System
The original ejection system was like trying to push a car with two people on one side—it’s going to turn. We redesigned the layout completely.
- We added four new 3mm ejector pins in the corners.
- We placed two thin blade ejectors along a weak, internal rib to provide support and prevent warping.
- We ensured the entire system was balanced, so the force was applied evenly across the part’s base. This ensured the part moved straight off the core, not at an angle.
Tactic 3: Breaking the Vacuum Seal
This was the clever part. To defeat the vacuum, we strategically installed two small air poppet valves. These are spring-loaded valves that sit flush with the mold surface. As soon as the ejector pins move forward, they trigger the valves, which allow a small burst of air to enter between the core and the part. This instantly breaks the vacuum seal, releasing the part’s grip. The difference is like day and night; the part practically falls off the core.
| Modification | Before CKMOLD | After CKMOLD | Result |
|---|---|---|---|
| Draft Angle | ~0.3 – 0.5 degrees | Uniform 1.0 degree | Drastically reduced friction |
| Ejection Pins | 6 pins, unbalanced | 10 pins + 2 blades, balanced | Eliminated part tilting |
| Venting | None at core base | 2 Air Poppet Valves | Broke vacuum seal instantly |
These three changes transformed the mold from a source of problems into a reliable production asset.
How Did Material Choice and Injection Parameters Factor In?
Is fixing the mold always the complete solution? Not always. The mold, the material, and the machine settings are three legs of a stool. If one is off, the stool is wobbly. Even with our perfectly modified mold, we knew that using the right material and dialing in the processing parameters was essential to guarantee a stable, scratch-free production run for Michael. It’s the final 10% of the job that ensures 100% success.
While mold design was the primary cause, we also optimized material and processing. We recommended a switch to a grade of ABS with a higher melt flow index and an internal lubricant. This reduced the viscosity of the plastic, allowing it to fill the cavity with less pressure. We then fine-tuned the injection process by lowering the packing pressure and increasing the cooling time slightly. This minimized internal stresses in the part, reducing its tendency to shrink tightly onto the core, and making ejection even easier.
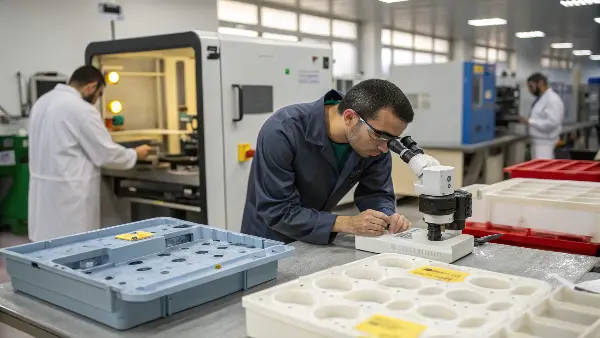
Think of it this way: the mold modifications opened the door for the part to exit. The material and process changes were about politely encouraging the part to walk through that door without being forced. We ran a series of tests on our own machines before shipping the modified mold back to Michael. This is a standard part of our service; we don’t just fix molds, we deliver a proven, working process.
Optimizing the Material
The original material was a standard-grade ABS. It was strong, but also quite "sticky." After consulting with our material science partners, we suggested an alternative grade.
- Higher Melt Flow: This means the plastic flows more easily, like water instead of honey. It requires less injection pressure to fill the mold, which reduces the stress locked into the part.
- Internal Lubricant: Some modern polymers include microscopic additives that migrate to the surface of the part as it cools. This creates a very thin, slippery layer between the plastic and the steel, acting as a built-in mold release agent. It’s a small change in material spec that can have a huge impact on cycle time and part quality.
Fine-Tuning the Process
With the new material and modified mold, we established a new set of "recipes" for the injection molding machine. The goal was to find the sweet spot that produced perfect parts with the fastest possible cycle time.
- Melt Temperature: We slightly increased the melt temperature to further improve flow.
- Packing Pressure: We significantly reduced the packing pressure. Since the part was filling easier, we didn’t need to force as much material in, which is a major cause of part stress.
- Cooling Time: We added two seconds to the cooling time. This ensured the part was fully rigid and stable before ejection, preventing any minor warping or deformation.
| Parameter | Original Setting | Optimized Setting | Reason for Change |
|---|---|---|---|
| Material Grade | Standard ABS | High-Flow ABS + Lubricant | Reduce friction and stress |
| Packing Pressure | 1000 bar | 750 bar | Minimize internal part stress |
| Cooling Time | 18 seconds | 20 seconds | Ensure part rigidity before ejection |
By providing Michael not just a modified tool, but a complete, optimized process, we gave him a turnkey solution that started working from the very first cycle.
What Can You Learn from This Case to Avoid Similar Mold Issues?
Are you thinking about your next big product launch? The planning stage is the most critical. This whole expensive, time-consuming ordeal for Michael could have been avoided from the very beginning. His story is a powerful lesson for any business owner who relies on injection molding. Taking a few proactive steps early on can save you immense trouble, time, and money down the road.
The most crucial lesson from this case is the importance of a thorough Design for Manufacturability (DFM) analysis before any steel is cut. Partnering with an experienced mold maker who will challenge your design for the sake of better moldability is invaluable. Specifically, pay close attention to draft angles, planned ejection strategies, and venting for deep-cavity parts. A small design tweak on paper costs nothing, but fixing hard steel is always expensive and causes significant delays.
I always tell my clients, including those like Michael who are now long-term partners, that the best time to fix a problem is before it exists. A mold is not just a tool; it’s a long-term manufacturing asset. Investing a little extra time and resources upfront is the single best way to ensure it performs reliably for hundreds of thousands, or even millions, of cycles.
Key Takeaway 1: Prioritize DFM
Don’t fall in love with a design that is impossible to manufacture efficiently. Your mold maker should be your partner, not just a supplier. They should provide a detailed DFM report that highlights potential issues.
- Challenge Your Designer: Ask them, "Can we add another half-degree of draft here?"
- Simulate First: Request a mold flow simulation. It can predict filling issues, weld lines, and high-stress areas before they become real problems.
Key Takeaway 2: Don’t Skimp on the Ejection System
Ejection is one of the most common sources of mold problems. For complex parts, a simple grid of ejector pins is not enough.
- Ask about the Ejection Strategy: How will the part be supported? Are there thin ribs that need blade ejectors?
- Consider Advanced Solutions: For deep cavities or high-gloss surfaces, ask about solutions like air poppets or lifters. They might add a small percentage to the mold cost but can save enormous amounts in scrap and cycle time.
Key Takeaway 3: View Mold Making as a Partnership
The cheapest quote is often the most expensive in the long run. Michael learned this the hard way. His first supplier built the mold exactly to the print, ignoring the clear manufacturing risks. A true partner will collaborate with you to optimize the design. They will point out problems and suggest solutions. They are invested in your success because your production success means more business for them in the future.
The goal is to build a reliable process. By focusing on these principles, you can avoid the fire-fighting that plagued Michael’s project and move forward with confidence.
Conclusion
In the end, we delivered a comprehensive solution that went beyond just fixing a mold. We identified the root causes of the scratching, re-engineered key elements of the tool, and optimized the entire molding process. By focusing on fundamentals like draft, ejection, and venting, we turned a failing project into a success story. Michael’s production line is now running smoothly with a scrap rate of less than 1%, and his business is back on track.
