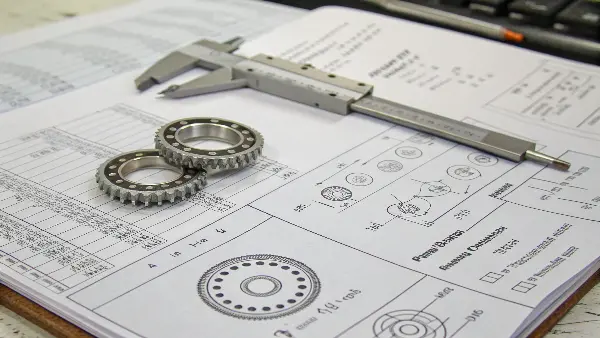
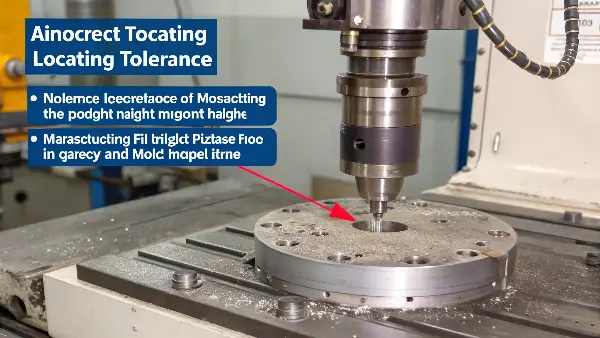
Think a slightly off locating ring doesn’t matter? That tiny inaccuracy can cause nozzle leaks, damage expensive molds, and lead to inconsistent parts. Understanding tolerances isn’t just academic; it’s essential for quality.
Locating ring tolerances1, especially for the Outer Diameter (OD) and Height, are critical for precise mold alignment. Tight tolerances ensure the ring fits snugly in the platen, centers the mold accurately under the nozzle, and guarantees consistent nozzle sealing, directly impacting part quality and process stability.
Precision is everything in mold making, and the locating ring is ground zero for aligning the mold to the machine. I’ve seen firsthand how overlooking tolerance specs leads to problems that ripple through the entire production process. It might seem small, but its dimensional accuracy2 is foundational. Let’s get into why these tolerances are so critical.
Why Are Tight Tolerances Crucial for Locating Rings?
A loose or incorrectly sized locating ring seems like a minor inconvenience during setup. But this sloppiness translates directly into alignment errors, causing nozzle leaks, premature wear on mold components, and frustratingly inconsistent part quality.
Tight tolerances are crucial because they ensure repeatable, precise centering of the mold relative to the machine nozzle. This guarantees proper sealing, prevents impact damage during closure, minimizes component wear, and is fundamental for producing consistent, high-quality parts shot after shot.
!
Think about the forces involved in injection molding – high pressures, rapid movements. There’s no room for guesswork or sloppy fits, especially at the critical interface between the mold and the machine. For designers like Jacky, specifying the correct tolerances isn’t just about meeting a standard; it’s about ensuring the mold functions reliably and efficiently for its entire intended lifespan. Here’s a deeper look:
- ### Ensuring Precise Centering: The primary job of the locating ring’s Outer Diameter (OD) is to fit into the machine platen recess. A tight, accurate tolerance (typically a close slip fit) guarantees the mold’s centerline aligns perfectly with the machine nozzle centerline. Even a few thousandths of an inch off can cause problems.
- ### Guaranteeing Proper Nozzle Sealing: The ring’s Height tolerance controls the engagement between the machine nozzle and the sprue bushing. Correct height ensures the nozzle seals firmly against the bushing radius, preventing plastic leakage. Too high, and you risk damaging the nozzle or bushing; too low, and leaks are almost certain.
- ### Preventing Component Wear and Damage: A poorly fitting ring (loose OD) allows slight mold shifting during clamping or injection. This can lead to peening or galling on the locating ring itself, the platen recess, and potentially wear on leader pins and bushings as they fight the misalignment. A ring that’s too tall can create excessive force on the nozzle/sprue bushing interface.
-
### Achieving Process Repeatability: Consistent alignment is key to a stable injection process. If the mold’s position varies slightly each time it’s mounted due to loose tolerances, parameters like filling pressure and pattern can change, leading to inconsistent part dimensions, flash, or short shots. Tight tolerances ensure the mold is always in the exact same spot. Tolerance Aspect Loose Tolerance Consequence Tight Tolerance Benefit OD Fit Mold shifting, platen wear, inconsistent centering Precise, repeatable centering, reduced wear Height Nozzle leaks (too low), damage (too high) Optimal nozzle seal, prevents damage Overall Process instability, part defects, difficult setup Stable process, consistent parts, easy setup Investing in locating rings manufactured to tight, appropriate tolerances pays off significantly in reduced downtime, lower scrap rates, and longer mold life.
What Are the Standard Tolerances for Locating Ring Dimensions?
Knowing tolerances are important is one thing, but designing or inspecting requires actual numbers. Assuming "standard" means perfect is a mistake; standard components have defined tolerance ranges that need to be understood for proper application.
Standard tolerances for locating rings typically involve an OD slightly undersized (e.g., -0.001" to -0.003" or -0.02mm to -0.05mm) relative to the nominal platen bore for a slip fit. Height tolerances are often tighter (e.g., +/- 0.001" or +/- 0.02mm) to ensure proper nozzle contact.

When specifying or buying locating rings, relying solely on the nominal size (like "4-inch ring") isn’t enough. You need to be aware of the manufacturing tolerances allowed by the standard (e.g., DME, HASCO) or the supplier. These tolerances directly impact the fit and function. Jacky, when reviewing mold designs or incoming components, would need to verify these specific tolerance values. Let’s look at the key dimensions: - ### Outer Diameter (OD) Tolerance:
- Purpose: To ensure a close slip fit into the machine platen recess. It needs to locate accurately without binding.
- Typical Range: Generally manufactured slightly under the nominal platen bore size. For a 4.000" platen bore, a DME ring OD might be specified as 3.990" / 3.988". For a 100mm platen bore, a HASCO ring OD might be 99.95mm / 99.93mm. The exact range depends on the standard and size.
- Importance: Too loose, and centering is compromised. Too tight (or oversized), and installation/removal becomes difficult or impossible, potentially damaging the ring or platen.
- ### Height Tolerance:
- Purpose: To control the critical distance for nozzle sealing against the sprue bushing.
- Typical Range: Often held tighter than the OD tolerance, for example, +/- 0.001" (+/- 0.025mm) or even +/- 0.0005" (+/- 0.013mm) on the specified height.
- Importance: Directly affects nozzle seal integrity. Small variations here can make the difference between a clean run and a messy, leaky process.
- ### Concentricity:
- Purpose: Ensures the OD is centered relative to the mounting screw holes and, critically, the sprue bushing bore if it passes through the ring’s center.
- Typical Range: Often specified as a Total Indicated Runout (TIR) value, ensuring the central axis is truly central.
- Importance: Poor concentricity can negate the benefit of a tight OD tolerance, leading to off-center alignment.
- ### Surface Finish and Hardness:
-
While not strictly tolerances, these are specified properties crucial for function and wear life. Surfaces need to be smooth to prevent galling, and the material (usually hardened steel) needs to resist deformation and wear. Dimension Typical Tolerance Goal Example (Inch) Example (Metric) Reason Outer Diameter Close Slip Fit (Undersize) 3.990" / 3.988" 99.95mm / 99.93mm Accurate centering without binding Height Tight +/- Tolerance +/- 0.001" +/- 0.025mm Precise nozzle contact / sealing Concentricity Low TIR < 0.002" TIR < 0.05mm TIR Ensures OD centers the sprue bore location Always refer to the specific supplier catalog (DME, HASCO, etc.) for the exact tolerances applicable to the part number you are using.
What Problems Arise from Incorrect Locating Ring Tolerances?
Using a locating ring that’s out of spec isn’t just a minor fit issue. It actively causes problems that cost time and money, potentially leading to damaged equipment and poor-quality parts that need to be scrapped.
-
Incorrect tolerances lead directly to nozzle leakage (improper height or centering), damage to the mold or machine platen (galling from poor fit, impact from height issues), inconsistent part quality (flash, shorts due to shifting), and increased mold setup difficulty and time.

I remember a situation early in my career where we chased intermittent flash on a part for days. We checked clamping tonnage, processing parameters, everything. Finally, someone measured the locating ring – its OD was worn undersize. Replacing it solved the problem instantly. It taught me that fundamental alignment, governed by tolerances, is critical. These aren’t just theoretical issues; they have tangible consequences:
- ### Nozzle Leakage:
- Cause: Incorrect height (usually too low) prevents the nozzle from sealing properly against the sprue bushing radius. A significantly off-center condition due to poor OD tolerance can also contribute.
- Result: Molten plastic leaks around the sprue bushing, creating waste, mess, potential burns, and inconsistent shot volumes.
- ### Mold/Machine Damage:
- Cause: OD too loose allows movement and impact, causing wear (peening, galling) on the ring and platen recess. OD too tight requires excessive force for installation/removal, potentially damaging both components. Height too tall causes excessive force on the nozzle tip and sprue bushing during sealing.
- Result: Costly repairs to the mold or machine platen, damaged sprue bushings or nozzles.
- ### Inconsistent Part Quality:
- Cause: If the mold shifts slightly due to a loose OD fit, the cavity alignment relative to the nozzle changes subtly. This affects filling dynamics.
- Result: Variations in part weight, dimensions, flash appearing intermittently, or occasional short shots, leading to higher scrap rates.
- ### Increased Setup Time and Difficulty:
- Cause: A ring with an OD that’s too tight or galled will bind in the platen, making mold installation and removal difficult and time-consuming. A loose ring might allow the mold to shift slightly during clamping, requiring extra checks.
- Result: Longer changeover times, increased operator frustration, potential for minor damage during difficult setups.
- ### Reduced Tool Life:
- Cause: The cumulative effect of minor impacts, wear, and stresses caused by misalignment puts extra strain on other mold components like leader pins, bushings, and interlocks.
-
Result: Components wear out faster, requiring more frequent maintenance and potentially shortening the overall life of the mold. Problem Primary Tolerance Issue(s) Consequence Nozzle Leakage Height (Low), OD (Off-center) Material waste, mess, inconsistent shots Mold/Platen Damage OD (Loose/Tight), Height (High) Wear, galling, impact damage, repair costs Part Inconsistency OD (Loose) Flash, short shots, dimensional variation Difficult Setup OD (Tight/Galled) Longer changeover times, potential damage Reduced Tool Life OD (Loose), Height (High/Low) Premature wear of mold components Paying attention to locating ring tolerances during design, purchasing, and inspection is a fundamental step in avoiding these costly problems.
How Does Locating Ring Wear Affect Tolerances and Performance?
Even a perfectly manufactured locating ring won’t stay that way forever. Normal use causes wear, gradually degrading its precision. Ignoring this wear brings back the very problems that tight tolerances initially solved, impacting production quality.
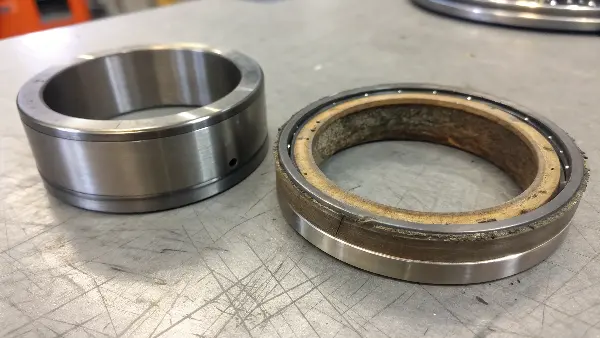
Wear primarily affects the locating ring’s OD (making it smaller/looser) and potentially its height face. This degradation of tolerances leads to reduced centering accuracy, potential nozzle sealing issues, increased risk of component damage, and ultimately, a decline in process stability and part quality.

Locating rings are wear items, plain and simple. They endure clamping forces, the stress of repeated mounting and dismounting, and thermal cycling. Over thousands of cycles, this takes a toll. I always recommend periodic inspection as part of preventative maintenance. Catching a worn ring before it causes major issues saves headaches down the line. Let’s consider how wear impacts performance:
- ### Wear Mechanisms:
- Abrasion: Rubbing against the platen recess during installation/removal and minor shifts during operation gradually removes material from the OD.
- Impact/Peening: If there’s clearance (due to initial tolerance or wear), slight impacts during clamping can deform the OD or height face.
- Galling: If lubrication is poor or there’s contamination, friction can cause material transfer and roughening of the surfaces.
- ### Critical Wear Areas:
- Outer Diameter (OD): This usually sees the most wear, leading to an increase in clearance within the platen recess.
- Height Face: The surface that contacts the platen or defines the sprue bushing position can wear down, reducing the effective height.
- Mounting Holes: Can become distorted if screws are repeatedly over-torqued or if the ring shifts.
- ### Consequences of Wear:
- Essentially, wear causes the ring to go "out of tolerance." A worn OD leads to the same issues as a poorly toleranced new ring: inconsistent centering, potential for mold shifting, increased wear on other components.
- A worn height face can lead to nozzle leaks if material is removed.
- ### Inspection and Replacement:
- Regular visual inspection for signs of galling, heavy scratching, or deformation.
- Periodic measurement using calibrated tools (micrometers for OD, depth micrometer or height gauge for height). Compare measurements against the original specified tolerances.
-
Establish a replacement threshold. For example, if the OD wears more than 0.005" (0.13mm) below the minimum specified dimension, it’s likely time for replacement. The exact threshold depends on the application’s criticality. Wear Aspect Detection Method Consequence of Excessive Wear Preventative Action OD Reduction Micrometer Measurement Poor centering, mold shift, platen wear Regular Inspection, Lubrication Height Reduction Depth Mic./Height Gauge Nozzle leakage Regular Inspection Galling/Peening Visual Inspection Binding, difficult setup, further wear Cleanliness, Lubrication Treating the locating ring as a consumable component requiring periodic checks and replacement is crucial for maintaining long-term molding quality and efficiency.
Conclusion
Locating ring tolerances are not just numbers on a drawing; they directly impact mold alignment, nozzle sealing, and part quality. Understanding standard tolerances, inspecting for wear, and using precisely manufactured rings are essential steps for efficient, trouble-free injection molding.
