Worried about inconsistent part quality derailing your production and damaging your brand’s reputation? Without robust QA, defects can slip through, leading to costly rework and customer dissatisfaction.
A comprehensive QA protocol for precision injection molded parts involves meticulous visual and dimensional inspections, rigorous functional testing, and thorough safety checks at various production stages.
You know, Alex, I’ve been in this game for a long time, and if there’s one thing I’ve learned, it’s that quality isn’t just a department; it’s a mindset. It has to be baked into every step, from the moment we look at your CAD files to when those finished parts are packed and shipped. It’s about preventing problems, not just catching them. For the kind of precision work we do for your components, cutting corners on QA? That’s just not an option. So, let’s talk about how we make sure what you designed is what you get – and it’s perfect.
What’s the First Line of Defense in Catching Nasty Imperfections in Molded Parts?
Are subtle visual flaws like sink marks or flash causing headaches in assembly or affecting your product’s aesthetics? These issues can easily go unnoticed without keen eyes.
Meticulous visual inspection, often aided by magnification and specific lighting, is the initial critical step to identify surface defects, color inconsistencies, and other visible imperfections.
Dive deeper Paragraph:
You’d be surprised, Alex, what the trained human eye can pick up! Our first stop in the QA journey, and honestly one of the most important, is a thorough visual inspection. This isn’t just a quick glance; it’s a detailed examination of each part, or a statistically significant sample, depending on the project requirements and part criticality. Our inspectors are trained to be defect detectives. They’re looking for all those little things that can make a big difference in your final product. Think about it: a tiny bit of flash might prevent a seal from forming, or a sink mark on a visible surface of a consumer electronic device can scream "low quality."
We equip our team with good lighting – because you can’t find what you can’t see – and often magnifying lenses or even microscopes for really tiny features or critical surface finishes. They’re checking for a whole catalog of potential issues:
- Flash: That thin extra sliver of plastic along the parting line.
- Sink Marks: Depressions on the surface, usually over thicker sections like ribs or bosses.
- Short Shots: Incomplete parts where the plastic didn’t fill the entire cavity.
- Weld Lines: Visible lines where two or more flow fronts of plastic met. Sometimes unavoidable, but they need to be in acceptable locations and not structurally weak.
- Burn Marks: Discoloration from trapped, overheated air or gas.
- Contamination: Any foreign particles embedded in the plastic.
- Color Variations: Ensuring the color is consistent with the master sample.
We establish clear "appearance standards" right at the start of a project, often using approved "golden samples" as a reference. This way, everyone’s on the same page about what’s acceptable and what’s a reject. It’s pretty hands-on, but it’s incredibly effective for catching a wide range of common molding problems before they go any further.How Absolutely Critical is Nailing the Dimensions for Precision Components, and How Do We Measure Up?
Are your parts failing to assemble smoothly, or are critical tolerances being missed? Inconsistent dimensions can halt production lines and lead to complete product failure.
Dimensional inspection using precision metrology tools like calipers, CMMs, and custom gauges is vital to ensure every critical feature of the part meets the specified tolerances.
Dive deeper Paragraph:
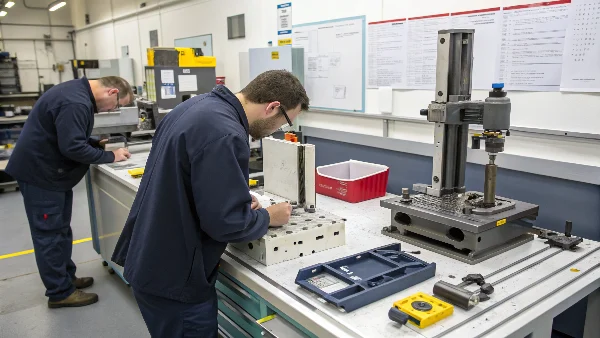
Alright, so the part looks good. Great! But for your precision electronic components, Alex, looking good is only half the battle. Does it fit? Are all those critical dimensions, the ones you spent hours perfecting in your CAD model, actually being held in the molded part? This is where dimensional inspection comes in, and it’s where we get really, really meticulous. At CAVITYMOLD, we live and breathe tolerances.
We’re talking about measurements down to microns sometimes! To do this, we use a whole arsenal of metrology equipment:
- Digital Calipers and Micrometers: For quick and accurate checks of basic dimensions like lengths, diameters, and thicknesses. These are our workhorses for on-the-floor checks.
- Coordinate Measuring Machines (CMMs): These are the big guns. A CMM can automatically measure complex 3D geometries with incredible accuracy. We program it directly from your CAD data, and it can check hundreds of points on a part, comparing them to the nominal dimensions and tolerances. For parts with complex curves or tight GD&T (Geometric Dimensioning and Tolerancing) callouts, CMMs are indispensable. I’ve seen CMM reports highlight a tiny deviation that a manual check might have missed, saving a whole batch of parts from being slightly out of spec for a critical assembly.
- Optical Comparators/Vision Systems: These project a magnified silhouette of the part or use cameras to measure features, great for checking profiles, radii, and angles that are hard to get with contact probes.
- Go/No-Go Gauges: Custom-made gauges for quick checks of specific critical features. If the "go" side fits and the "no-go" side doesn’t, the feature is within tolerance. Super efficient for high-volume production.
We don’t just measure one part and call it a day. We implement statistical process control (SPC) techniques. This means regularly sampling parts during the production run, measuring critical dimensions, and plotting the data. This helps us monitor trends and catch any drift out of tolerance before we make a bunch of bad parts. It’s all about proactive control.Beyond Looks and Size, How Do We Ensure Molded Parts Actually Work as Intended?
Do your components pass visual and dimensional checks but still fail in real-world application or assembly? This indicates a gap where functional performance isn’t being verified.
Functional testing, including assembly trials with mating parts and operational checks under simulated use conditions, validates that the component performs its intended role correctly.

Dive deeper Paragraph:
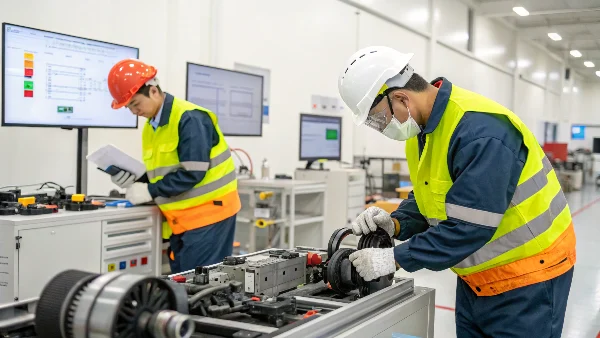
Okay, Alex, so our parts are visually perfect, and all the dimensions are spot-on according to the CMM report. We’re almost there! But there’s one more crucial hurdle: do the parts actually work? This is where functional testing comes into play, and it’s something we take very seriously, especially for components that are part of a larger assembly, like in your consumer electronics. It’s about verifying fit, form, and, most importantly, function.
Your insight about assembly and operation tests is exactly right. Here’s how we often approach it:
- Assembly Tests: If your part needs to snap onto another component, slide into a housing, or mate with other parts, we’ll perform trial assemblies. We might use actual mating parts you provide or 3D-printed facsimiles if the real ones aren’t available yet. We check for ease of assembly, proper engagement of snap-fits, absence of interference or excessive play. I remember one project – a small latch mechanism. Dimensionally, it was perfect. Visually, perfect. But when we tried to assemble it, the snap-fit was just a hair too stiff. A tiny tweak to the mold, almost imperceptible, made all the difference. That’s the kind of thing functional testing uncovers.
- Operational Checks: If the part has a dynamic function – say, it’s a button, a lever, a gear, or part of a hinge – we’ll try to simulate its operation. Does it move smoothly? Does it actuate correctly? Does it withstand expected forces?
- Custom Test Jigs and Fixtures: For more complex functional tests or high-volume checks, we often design and build custom test jigs. These fixtures can help us consistently apply specific loads, check for range of motion, or test for things like wear or durability under simulated use conditions. This makes the testing repeatable and reliable.
- Real-World Simulation: Sometimes, especially for critical components, we try to mimic the end-use environment as closely as possible. This could involve temperature cycling, vibration tests, or other specific conditions relevant to your product’s life.
This step really bridges the gap between a "good part" and a "good product." It ensures that all our careful work on material selection, mold design, and process control translates into a component that performs flawlessly in your application.When Safety and Reliability are Non-Negotiable, What Extra Rigorous Checks Do We Implement?
Are you concerned about product recalls or liability issues due to component failure under stress or non-compliance with safety standards? Standard checks might not be enough.
For critical applications, safety checks involve rigorous testing for material compliance, structural integrity under stress, and adherence to specific industry or regulatory standards.

Dive deeper Paragraph:
This is a big one, Alex, especially in consumer electronics where user safety and product reliability are absolutely paramount. Beyond the visual, dimensional, and basic functional checks, there’s often a need for more specialized and rigorous safety and reliability testing. Your insight about "strict testing" is spot on – this is where we go the extra mile to ensure parts not only work but are also safe and durable.
What this involves can vary a lot depending on the specific part and its application, but here are some common areas we address at CAVITYMOLD:
- Material Certification and Compliance: We ensure that the plastic resin used meets all required specifications, which might include things like RoHS (Restriction of Hazardous Substances), REACH compliance for chemicals, or FDA compliance for food-contact applications (though less common for electronics, the principle applies). We maintain traceability of materials right from the supplier.
- Structural Integrity Tests: If a part is subjected to mechanical stress in its application – like a casing that might be dropped, a clip that’s repeatedly flexed, or a load-bearing internal support – we might perform specific mechanical tests. This could include:
- Tensile tests: To check material strength.
- Impact tests: Like Izod or Charpy tests, to see how it withstands sudden shocks.
- Flexural tests: For parts that bend.
- Drop tests: For enclosures or entire assemblies.
- Environmental Stress Testing: We might subject parts to extreme temperatures (hot and cold), humidity, or UV exposure to see how they hold up and if their properties change over time. This is crucial for products used outdoors or in challenging environments.
- Flammability Testing: For many electronic enclosures, materials need to meet specific flammability ratings (like UL94 V-0, V-1, V-2). We ensure the material chosen meets these, and sometimes perform tests on actual parts.
- Electrical Properties Testing: If the plastic part serves an insulating function or is near electrical components, we might check its dielectric strength or surface resistivity.
These tests aren’t always done on 100% of parts but are often part of initial product qualification (First Article Inspection) and then periodically audited. The goal is to build confidence that the parts will not only function correctly out of the box but will continue to do so safely and reliably throughout the product’s expected lifespan. It’s about peace of mind for you, and for the end-user.Conclusion
Robust QA, encompassing visual, dimensional, functional, and safety checks, is non-negotiable for delivering consistently high-quality, reliable precision molded components that meet every critical specification.
