Have you ever observed a pair of plastic related items which you are sure are the same ones and one is impeccable and the other one is flawed? It is usually a small mistake with the injection molding cycle. A couple of degrees or hundredth of a second is the difference. To be able to master quality control and make a perfect part every time, it is important to grasp both stages of this cycle.
A repeated series of events is known as injection molding cycle that involves the making of a plastic part. It begins with the mold shutting (clamping). Afterward, plastic that is in molten state is injected into the cavity of the mold. As it cools the plastic is packed/held under pressure. Lastly, the mold opens and the complete portion is ejected (ejection). The whole procedure is repeated endlessly so as to generate a thousand or even millions of the same parts thus this is a very efficient way of manufacturing.

This may appear to be plain and simple on the face of it but the details are what make it magic. I have been associated with the mold industry all my career, and believe me, the very best designers and engineers know what is going on at any given moment inside that machine. Bringing things up and down is not all of it, it is controlling a complicated multi-speed job.
I will break it down with you. Unless you know inside and out this process, you are not going to have your parts right without costly mistakes.
What is the overall process cycle of injection molding?
Use of time in production is vital to the budget of your project as well as the deadlines. When your cycle times are erratic or longer than necessary then your costs increase and your delivery dates begin to fall behind schedule. Having the knowledge to analyze and maximize the injection molding cycle puts direct control in your hands that will affect your production efficiencies and, most importantly, your bottom line. It is an art that distinguishes the average designer with the great ones.
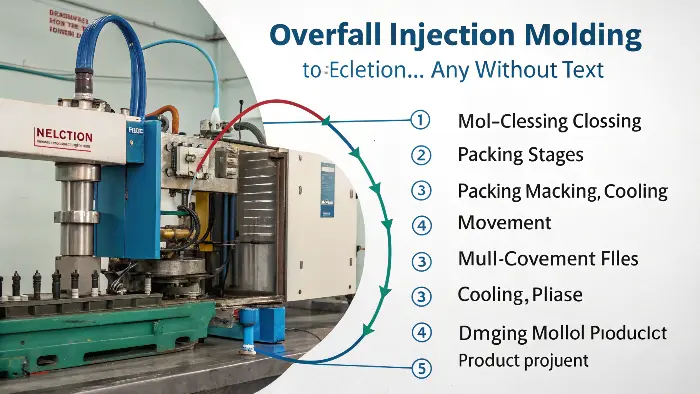
The total time it takes to run one complete sequence beginning when the mold is closed and making first shot is called the overall process cycle. It is a decisive parameter since it directly identifies the output of production and cost per piece. The primary elements of the cycle time work as follows: filling, packing, cooling and the moving of a mold with the release of a part. The most important step is the cooling phase which normally takes more than half that total amount of time.

When we speak of the "cycle" we speak of time. Otherwise, time, in manufacturing, is money. Reduced cycle time implies an increased number of parts per hour decreasing the cost of a piece. I can recall doing some work with a client that manufactured small electronic housings. They had initially 22 seconds. With a closer examination of the steps, we were able to note that one of the steps could be shortened, the cooling. We proposed a minor alteration to reduce an internal, non-critical wall to make it thinner. The refinement to the cooling channels on the mold coupled with this change saved 3 seconds on the cycle time. There is not much to it, but in a one million part run it saved them hundreds of hours of machine time and tens of thousands of dollars.
The total cycle time is the sum of several distinct periods:
- Mold Close Time: The time it takes for the machine to close the mold halves.
- Injection Time (Filling): The time it takes to push the molten plastic into the mold cavity.
- Packing/Holding Time: The time pressure is maintained to compensate for shrinkage.
- Cooling Time: The time the part solidifies in the mold. This often overlaps with the screw recovery (plasticizing) time.
- Mold Open Time: The time it takes for the machine to open the mold.
- Ejection/Part Removal Time: The time it takes to push the part out and for it to be removed.
Here is a typical breakdown of how these stages contribute to the total cycle time.
| Stage | Percentage of Total Cycle Time (Approx.) | Key Factors |
|---|---|---|
| Mold Movement (Close/Open) | 10-15% | Machine speed, mold size |
| Injection (Filling) | 5-10% | Part volume, injection speed |
| Packing & Holding | 5-10% | Material type, part thickness |
| Cooling | 50-70% | Wall thickness, material, mold temp |
| Ejection & Part Removal | 5-10% | Ejector speed, robot/manual removal |
As we can see, there is the predominance of cooling. The one thing you as a designer can do to affect the cycle time the most is the wall thickness of the part. A wall of more thickness has exponentially longer cooling. It is, therefore, the reason why we have constantly advocated simple and constant wall thickness in part design.
What is the leading injection molding company that manufactures products for various industries?
The injection molding of a particular component should be carried out using sufficient and quality materials and much attention should be given to the design of the whole process. Nevertheless, it is also crucial to understand the various cycles involved in the process of injection molding in order to understand how to make the most out of the process. It is where the specialists of CK Mold shine. They possess the required knowledge of all the individual components of the process of injection molding and have sufficient experience in producing sufficient parts and components.
CK Mold has over twenty-five years experience in manufacturing various components using plastic and ceramic injection molding. Our mission is to provide our clients with a wide range of components tailored to their specific needs. We listen to what our clients need, we listen to their input, and we deliver to them a final product that they can use to their best benefit.
What are the main stages of the injection molding process?
One can become overwhelmed by all the technicality and parameters of injection molding. Standing in front of a machine with dozens of settings can be daunting, when you are at it. The selection of incorrect parameters may result in time wasting and frustrating defects. You can streamline your thoughts and problemsolving and concentrate your troubleshooting efforts where they will be most effective by logically breaking the process down into four major steps.
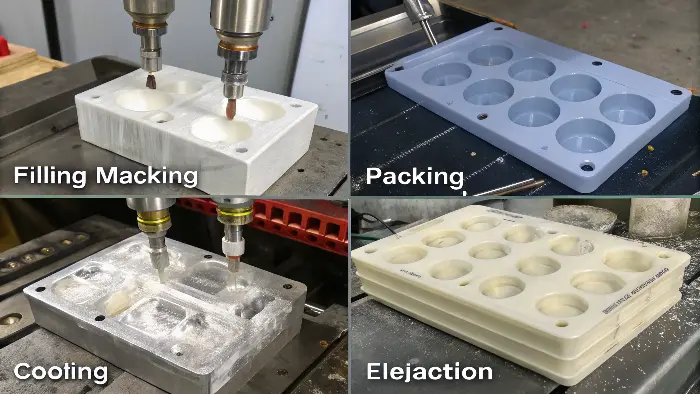
Injection molding is basically reduced to four main steps, including Filling, Packing (or Holding), Cooling, and Ejection. The Filling stage involves filling of the mold cavity with molten plastic. The Packing stage is fulfilling a shrinkage capability of the plastic material cooling with pressure. The Cooling stage enables the part to solidify to the fullest. The last stage is Ejection, which removes the completed part out of a mold. These four stages are important towards diagnosis and resolution of problems related to production.

Thinking out this in these four stages will help you to organize the thing in your mind. When a component is produced with a defect you can even pose yourself a question like the following: In which phase did this issue probably happen? As an example, a part that is not completed (a so-called short shot) has a virtually 100 percent chance of having an issue in the Filling stage. In case the sink marks are present, you need to look specifically at the Packing stage. The first and strongest diagnostic tool at hand is this framework.
Let’s dive deeper into what each stage accomplishes.
Stage 1: Filling (Injection)
This is when the process comes into view. The screw in the injection unit works like a plunger, pushing the melted plastic out of the barrel and into the encapsulated mold. The aim is to fill the cavity completely with plastic as quickly as possible without creating flaws. How quickly this injection is executed is a critical consideration. Too slowly, and the plastic would cure and solidify before the mold is finished. Too quick, and you have issues like "jetting" or scorch marks from held-in air. You, as a designer, influence this process by designing parts with smoothly flowing paths and avoiding drastic changes in wall thickness.
Stage 2: Packing (Holding)
As the cavity fills to the 95-99% mark, the operation shifts from the high-speed "filling" mode to the high-pressure "packing" mode. The screw continues to advance, but now its role is to pack more material into the cavity to counteract the shrinkage of the material as it cools. Without having this step, you would end up with sink marks and voids in your finished parts, especially in thicker sections. The packing pressure and time are controlled up to the gate—the small plastic opening through which plastic is inserted into the cavity—freezes hard. Once the gate has frozen, the packing stage is finished because no further material can be forced in.
Stage 3: Cooling
As I’ve described previously, this is the longest phase. The part is cooled while it is clamped in the closed mold by cooling lines (tubes filled with circulating water or oil) within the mold steel that siphon heat from the plastic. The part needs to cool to a point where it solidifies and becomes stable so it may be ejected without distorting. Cooling time depends significantly on the thickest part of the component, type of plastic, and efficiency of the cooling system in the mold. The screw of the injection machine is also active at this time. It rotates and moves back, pulling fresh plastic pellets from the hopper and warming them in preparation for the next shot. This is known as "screw recovery" or "plasticizing."
Stage 4: Ejection
Once cooling time is sufficient, the machine opens the mold. Opening it up, the solidified part is removed from the cavity by a system of ejector pins or sleeves or plates that push it out. This should be manipulated with caution in order not to damage the part or leave marks on the part. The piece is then deposited into a collection receptacle, or a robotic arm to remove it. As soon as the part becomes obvious the machine is ready to shut the mold and re-run the whole cycle.
Can we break down the injection molding sequence step-by-step?
You know the general steps, but what is the machine doing step by step, minute by minute? It’s similar to knowing the chapters of a book versus reading every word. If you do not know exactly the step-by-step process, you cannot properly prepare a machine or properly solve a process when it goes awry. Let’s walk through the step-by-step, minute-by-minute detail that transforms a plastic component into reality from the machine’s perspective.
The cycle begins with detail, with Clamping, where the halves of the mold are closed firmly with extreme pressure. It is then succeeded by Injection, where the screw pushes molten plastic into the cavity of the mold. Then there is Packing/Holding, exerting pressure as the plastic hardens. In this step, the screw moves back and plasticizes new material. The part continues to Cool until solidified. Finally, the mold Opens, and the part is Ejected**. This specific order guarantees consistency from part to part.

Each of these steps possess certain parameters which are charted into the molding machine. A good process technician sets these parameters to produce a stable and repeatable process. Your decisions as a designer have a direct effect of making this process easy or difficult to establish. Now, how about some of the mech steps.
Step 1: Mold Clamping
To dispense with any plastic, the two sections of the mold tool have to be pushed together and immensely clamped down. This clamping pressure is required to prevent opening of the mold by the force of the injecting plastic. In case the clamp force is insufficient, the plastic pressure can displace the mold halves a little which has resulted in a thin layer of plastic creeping through at the parting line. The flaw is referred to as flash. In case clamp force is excessive, the clamp force might wear out the mold or consume unnecessary energy. This potent yet delicate action can be attributed to the machine clamp unit which is either a hydraulic or an all-electric system.
Step 2: Injection (Filling)
The mold clamps are then covered, the injection unit advances, its nozzle against the sprue bushing of the mold to form the seal. The screw then heats up and pumps the shot of molten plastic that was being prepared in the last cycle forward quickly. The speed of the forward movement of the screw (injection speed) as well as the pressure behind it is controlled by the machine. This is aimed at having the mold cavity filled in a short time and consistently.
Step 3: Packing and Holding
As the cavity fills, the process switches from velocity control to pressure control. The screw’s forward motion slows down, but it continues to apply pressure. This is the packing or holding phase. It forces a little more plastic into the cavity to make up for the volume loss as the plastic cools and shrinks. This step is critical for achieving good surface finish and dimensional accuracy.
Step 4: Cooling and Plasticizing
This is two-fold process that occurs simultaneously. The portion is left in the closed mold and cools until it is able to be ejected using its rigidity. As it does so, there is movement of an injection screw which starts to rotate. Such a rotation performs two functions, to draw fresh plastic pellets into the hopper and to push them forward along the screw. The pellets trip forward; heater bands on the barrel and the shears effect of the screw then melts them to a uniform molten consistency. This lumps the precise quantity of plastic that should be used in the next shot.
Step 5: Mold Opening
Once the programmed cooling time is over, the clamp unit retracts and opens the mold. The rate and distance of the opening stroke are controlled to avoid damaging the part and the mold. The molded part will typically stay on the moving half of the mold (ejector side).
Step 6: Ejection
The ejector system of the machine gets into action when the mold is open. The machine pushes an ejector plate in the mold with rods. There occurs extension to the ejector pins which push directly on the part dislodging it out of the cavity. Then the part is left free or torn off by a robot. The ejector system then shrinks back and the mold closes again initiating the entire cycle once more.
| Sequence Step | Machine Action | Key Parameters |
|---|---|---|
| 1. Clamping | Mold halves close and lock. | Clamp Tonnage |
| 2. Injection | Screw moves forward, fills cavity. | Injection Speed, Injection Pressure |
| 3. Packing | Screw maintains pressure on melt. | Packing Pressure, Packing Time |
| 4. Cooling | Part solidifies; screw rotates to melt new plastic. | Cooling Time, Screw Speed, Back Pressure |
| 5. Opening | Mold halves separate. | Opening Stroke, Opening Speed |
| 6. Ejection | Ejector pins push part out. | Ejector Stroke, Ejector Speed |
Conclusion
Injection molding is an accurate, highly reproducible cycle. Fundamentally, it consists of six important stages, namely, clamping, injecting, packing, cooling, opening and ejecting. All of these stages are crucial to master and any designer or engineer aspiring to produce high quality plastic parts as cheaply and efficiently as possible should do that. It brought to me the knowledge of good design of parts and profitable manufacturing, which will guide you to put your imaginings into reality, the proper way.
FAQs
Below are some regularly asked questions (FAQs) regarding the process cycle for injection molding:
What are the major stages of the injection molding cycle?
The principal phases are clamping, injection, dwelling (packing/holding), cooling, mold opening, and ejection. These phases are repeated over and over again to obtain parts.
How long will each injection molding cycle last?
Cycle time varies with part complexity, material, as well as mold setup. Injection,cooling (-largest segment), dwelling, ejection, and mold opening/-closure sum up.
What parameters affect the injection molding cycle?
Critical parameters are temperature, pressure, injection speed, time, and controls for the measurements to ensure part quality and reproducibility.
Why is the cooling time critical in the cycle?
Cooling solidifies the molten plastic into the part shape and affects dimensional stability and cycle efficiency. Optimizing cooling channels and temperatures can reduce cycle time.
How is the screw involved in the injection molding cycle?
It injects molten plastic material into the mold, fuses plastic pellets, and rotates when it cools to prepare the next shot of plastic.
What comes next after the part is ejected?
Upon ejection, the mold re-closes to begin the next injection cycle, allowing for continuous operation.
