Struggling with imperfect part finishes or difficult mold release? Poor polishing could be costing you time and money. Let’s fix that.
Mold polishing is a critical finishing process that creates the desired surface texture on a mold, directly impacting part appearance, release, and mold longevity. It involves systematically removing material using progressively finer abrasives to achieve specific smoothness levels, often defined by SPI standards. This ensures high-quality parts and efficient production.
Getting the right polish on your injection molds isn’t just about making parts look pretty – though that’s a big part of it! It’s a fundamental aspect of mold making that affects everything from part quality to production efficiency. I’ve seen firsthand how a well-polished mold can be the difference between a smooth-running operation and a series of headaches. If you’re looking to really understand how to get the best out of your molds, you’re in the right place. We’re going to dive deep into the world of mold polishing, and I promise, by the end, you’ll have a much clearer picture. So, let’s get started, shall we?
Why is Surface Finish So Crucial in Injection Molding?
Ever pulled a plastic part from a mold and thought, "Hmm, this looks a bit cheap or feels rough?" Often, the culprit is the mold’s surface finish. It’s more than just aesthetics; it hits your operational efficiency and even part functionality.
A top-notch surface finish on your injection mold is absolutely vital. It ensures your molded parts not only look professional and appealing but also release easily from the mold cavity, reducing cycle times and preventing damage. Moreover, specific finishes can be critical for functional requirements like sealing surfaces or low-friction applications.
When we talk about surface finish, it’s a multi-faceted diamond, really. I want to break this down so you can see why it’s something we at CKMOLD take so seriously.
The Aesthetic Appeal – First Impressions Matter
Think about consumer electronics, like the ones Michael’s company produces. The look and feel are paramount. A high-gloss, smooth finish screams quality, while a dull or scratched surface can make even the best-designed product look subpar. I remember a client who was launching a new casing for a handheld device. They initially skimped on the final polish to save a bit of cash. Big mistake! The pre-production samples looked… well, sad. We convinced them to go for an SPI A-2 finish, and the difference was night and day. Sales actually exceeded their projections, and they attributed a good part of that to the premium feel of the product. That’s the power of a good polish.
Smooth Sailing: Part Ejection and Cycle Times
This is where the practical benefits really shine. A properly polished mold, especially in the direction of draw, allows parts to pop out cleanly and easily. If the surface is too rough, or if polish lines run perpendicular to the ejection, parts can stick, drag, or even get damaged. This means higher scrap rates, slower cycle times (because operators might have to manually assist ejection), and increased wear on ejector pins. I’ve seen situations where improving the mold polish from a B-2 to an A-3 literally shaved seconds off the cycle time. Over millions of parts, that’s a huge saving!
Functionality and Durability
For some parts, the surface finish is a direct functional requirement. Think about o-ring grooves or surfaces that need to create a seal. Any imperfection can lead to leaks. For parts that slide against each other, a smoother finish can mean less friction and longer wear life. Conversely, sometimes a specific textured finish (like an SPI C-grade) is needed for better paint adhesion or a certain tactile feel. It’s not always about being shiny! The key is appropriate finish.
Getting this right means understanding the interplay between mold steel, the plastic being molded, and the desired outcome. It’s a craft, and one that good mold makers and polishers have honed over years. Trust me, investing in good polishing pays dividends down the line.
What are the Basic Principles of Mold Polishing?
Feeling a bit lost in all the talk about grits, stones, and diamond paste? Don’t worry, mold polishing might seem complex, but the basic ideas behind it are pretty straightforward. Getting these fundamentals right is more than half the battle.
The core principle of mold polishing is the systematic removal of microscopic layers of mold steel using a sequence of progressively finer abrasives. This process smooths out machining marks and imperfections to achieve the desired surface texture, always working from coarse to fine, ensuring cleanliness between steps, and applying consistent pressure.
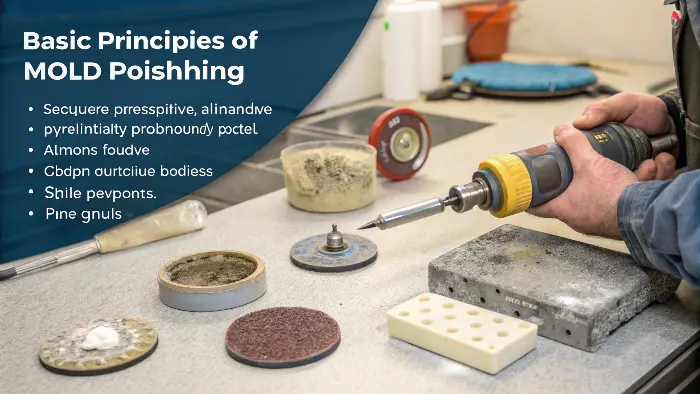
Let’s break down what "systematic removal" really means in practice. It’s not just rubbing a stone on steel until it looks shiny – oh no, there’s a method to the madness!
Starting Coarse, Finishing Fine – The Golden Rule
Imagine you’re sanding a rough piece of wood. You wouldn’t start with super-fine sandpaper, right? You’d begin with a coarser grit to remove the big imperfections and then gradually move to finer grits to smooth it out. Mold polishing is exactly the same concept, just with much harder materials and much finer tolerances.
We typically start with abrasive stones (often called stoning) to remove the EDM scale or machine tool marks. These stones come in various grit sizes. The goal of each step is to remove the scratches left by the previous, coarser step. If you jump grits, say from a 220 grit stone to an 800 grit paper, you’ll leave deeper scratches behind that the finer abrasive just can’t remove effectively. It’s a patient process. I always tell my team, "Don’t rush the grits!"
The Direction of Polish Matters
Especially for parts that need to be ejected, the direction of the final polish strokes is critical. You generally want the polish lines to run parallel to the direction of ejection. This creates microscopic "channels" that help the part release smoothly. If your polish lines are perpendicular, they can act like tiny speed bumps, making ejection harder. For very high-gloss finishes, you’ll often use a random orbital motion in the final stages with diamond paste to eliminate any directional lines and achieve that perfect mirror look.
Cleanliness is Next to Godliness (in Polishing)
This is a big one, and often overlooked by beginners. After each abrasive step, the mold surface and surrounding area MUST be meticulously cleaned. Why? Because any leftover abrasive particles from a coarser grit will get dragged around by the next, finer abrasive, creating new scratches. It’s like trying to clean a window with a muddy rag. We use solvents, clean cloths, and sometimes even ultrasonic cleaners between stages. I’ve seen polishers who are almost obsessive about cleanliness – and they’re usually the ones producing the best finishes.
Consistency is Key
Applying even pressure and maintaining a consistent stroke pattern helps to achieve a uniform finish across the entire mold surface. Uneven pressure can lead to dips or high spots, which will definitely show up on the molded part. This takes skill and feel, especially with manual polishing. Experienced polishers develop a real sense for this. It’s one of those things that’s hard to teach from a book; you really have to get your hands dirty. Well, not literally dirty, because of the cleanliness point!
These principles are the bedrock of good mold polishing. Whether you’re aiming for a basic matte finish or a flawless mirror shine, these rules always apply.
What are the Different SPI Finish Standards I Should Know?
Heard terms like "SPI A-1" or "B-2" thrown around and wondered what on earth they mean for your mold and parts? Understanding these SPI (Society of the Plastics Industry) finish standards is super important for clear communication with your mold maker.
SPI finish standards are a set of guidelines that define specific mold surface textures, ranging from rough matte (D-grades) to high-gloss mirror finishes (A-grades). These grades ensure everyone – from designer to molder – is on the same page about the expected appearance and feel of the final plastic part.
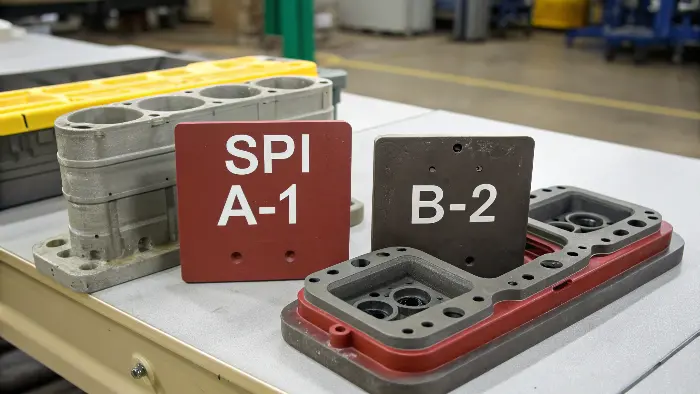
When I first got into the mold business, figuring out these SPI standards felt like learning a new language. But once you get the hang of them, they make life so much easier. It’s all about setting clear expectations. Imagine telling a mold maker you want a "shiny finish." My shiny might be very different from your shiny! SPI standards take out the guesswork. Let’s break them down. The standards are broadly categorized into four main grades: A, B, C, and D.
The "A" Team: Mirror Finishes
These are the top dogs, the crème de la crème of mold finishes.
- A-1 (Grade #3 Diamond Buff): This is your flawless, true mirror polish. Achieved with fine diamond powder buffing on hardened tool steels (like S136 or H13, often 48-52 HRC or higher). Think optical lenses, high-end cosmetic packaging. It’s expensive and time-consuming, requiring incredible skill.
- A-2 (Grade #6 Diamond Buff): Still a very high gloss, but might show some super-fine buffing marks. Achieved with a slightly coarser diamond buff. Excellent for high-quality appearance parts.
- A-3 (Grade #15 Diamond Buff): A good gloss finish, typically achieved with a #15 diamond buff or fine emery paper. You might see some fine sanding marks.
The "B" Brigade: Semi-Gloss
These are achieved with fine abrasive papers.
- B-1 (600 Grit Paper): A smooth, semi-gloss finish. Good for many appearance parts where a mirror shine isn’t needed.
- B-2 (400 Grit Paper): A slightly duller semi-gloss. Common for industrial parts.
- B-3 (320 Grit Paper): Even less gloss, with noticeable sanding marks. Often a good base if a secondary texture is to be applied.
The "C" Crew: Matte Finishes
These are typically achieved with fine stone abrasives, leaving a matte surface.
- C-1 (600 Stone): A fine matte finish, no shine.
- C-2 (400 Stone): A medium matte finish.
- C-3 (320 Stone): A coarser matte finish. These are good for parts that will be painted or where a non-reflective surface is desired.
The "D" Division: Textured/Rough Finishes
These are generally achieved by processes other than direct polishing, or with very coarse stones.
- D-1 (Dry Blast #11 Glass Bead): A satin, non-reflective finish.
- D-2 (Dry Blast #240 Oxide): A dull, rougher texture. Good for hiding sink marks or for industrial parts where appearance is not critical.
-
D-3 (Dry Blast #24 Oxide): A very rough texture.
Here’s a quick table to summarize:SPI Grade Polishing Method Resulting Finish Typical Application A-1 Diamond Buff (Grade #3) Mirror, No Scratches Optical parts, high-end cosmetics A-2 Diamond Buff (Grade #6) High Gloss, Few Marks Premium appearance parts A-3 Diamond Buff (Grade #15) Good Gloss, Fine Marks Quality appearance parts B-1 600 Grit Paper Semi-Gloss, Smooth Many appearance parts B-2 400 Grit Paper Medium Semi-Gloss Industrial parts, less critical appearance B-3 320 Grit Paper Low Semi-Gloss, Visible Marks Pre-texture, some industrial parts C-1 600 Stone Fine Matte, No Shine Parts to be painted, non-reflective needs C-2 400 Stone Medium Matte Industrial parts, low gloss requirement C-3 320 Stone Coarse Matte Non-critical surfaces, utility parts D-1 Dry Blast Glass Bead #11 Satin Texture Concealing imperfections, functional grip D-2 Dry Blast Oxide #240 Dull Texture Industrial parts, non-aesthetic D-3 Dry Blast Oxide #24 Rough Texture Heavy-duty parts, grip surfaces When Michael, our business owner friend, specifies a mold, he needs to be crystal clear about the SPI finish required for each surface. It impacts cost, lead time, and the final product quality. Getting this right from the RFQ stage saves a lot of headaches later. It’s a language we all need to speak fluently in this industry!
How Do You Choose the Right Polishing Method for Your Mold?
Alright, so you know why polishing is important and you understand the SPI grades. But with so many tools and techniques out there, how do you actually pick the right way to polish your specific mold? It can feel a bit overwhelming.
Choosing the right polishing method depends heavily on the required SPI finish, the type of mold steel, the complexity of the part geometry, and, of course, budget and time constraints. There’s no one-size-fits-all; it’s about matching the technique to the job’s specific demands for optimal results.
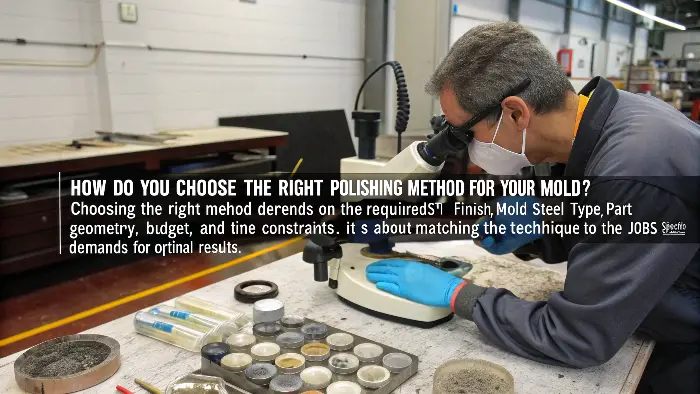
Selecting the right polishing pathway is a bit like a chef choosing the right knife for a specific cut. You wouldn’t use a meat cleaver for fine dicing, right? Same idea here. Let’s explore the factors that guide this decision.1. The Target SPI Finish: Your North Star
This is usually the primary driver.
- SPI D & C Grades (Matte/Stone Finish): These often involve stoning as the primary method, possibly followed by a light abrasive blast for D-grades. Manual stoning is common, but for larger, simpler surfaces, lapping machines or power tools with stone holders can be used. The goal isn’t shine, but a consistent, specific roughness.
- SPI B Grades (Semi-Gloss/Paper Finish): After initial stoning to remove machine marks, you’ll move to abrasive papers (emery paper, silicon carbide paper). This is often done manually for control, especially on contoured surfaces. Power sanders or reciprocating profilers can be used on flatter areas to speed things up, but care is needed to avoid unevenness.
- SPI A Grades (High-Gloss/Diamond Finish): This is where the real artistry comes in. After meticulous stoning and papering (often going up to 1200 grit paper or finer), the final polish is achieved with diamond compounds. These compounds, with diamond particles suspended in a paste or slurry, are applied using felt bobs, wooden sticks, or cloth on rotary or reciprocating tools, and sometimes by hand. Achieving an A-1 requires multiple stages of progressively finer diamond paste, extreme cleanliness, and often specialized mold steels.
2. Mold Steel Type: The Canvas
Different steels polish differently.
- Pre-Hardened Steels (e.g., P20, NAK80): These are generally easier to polish to good B-grade finishes. NAK80, for instance, is known for taking an excellent polish with relative ease up to A-2 or A-3.
- Hardened Tool Steels (e.g., H13, S136, 420SS): These are tougher and harder, making them more challenging and time-consuming to polish. However, they are essential for high-wear molds and can achieve the best A-1 mirror finishes, especially stainless steels like S136 which are favored for optical and medical parts due to their purity and ability to take an exceptional polish. I remember working on a lens mold made from S136; the polishing process was intense, taking days, but the clarity of the resulting lenses was just phenomenal.
3. Part Geometry: The Terrain
Complex shapes, deep ribs, sharp corners, and intricate details all influence the choice of tools and techniques.
- Flat, Open Surfaces: These are the easiest and can often benefit from machine-assisted polishing to save time and ensure consistency.
- Curved or Contoured Surfaces: Often require more manual work, using shaped tools (e.g., custom-shaped wooden laps) and flexible abrasive materials to follow the contours without altering the shape.
- Ribs, Bosses, and Tight Corners: These are tricky! Specialized tools like small felt tips, abrasive cords, or even ultrasonic polishers (more on those later) might be needed to reach these areas effectively. It’s very easy to over-polish edges or dub corners if you’re not careful.
4. Budget and Time: The Real-World Constraints
Let’s be honest, achieving an SPI A-1 finish is significantly more expensive and time-consuming than a C-3. The labor hours involved in high-gloss polishing are substantial. So, it’s always a balance between the "ideal" finish and what’s practical and necessary for the application. This is where good communication with the client, like Michael, is key to ensure the chosen finish aligns with their budget and product requirements. Sometimes, a B-2 is perfectly adequate and saves a lot of money compared to an A-2, if the application doesn’t demand extreme gloss.
Choosing the right method is a skill honed through experience. It involves looking at the mold, understanding the requirements, and then planning the most efficient and effective route to get there.What Advanced Polishing Techniques Can Achieve Mirror Finishes?
So, you’re aiming for that absolutely flawless, glass-like A-1 mirror finish on your molds, maybe for optical lenses or super high-end consumer products? Standard manual polishing, even with diamond paste, might hit a limit. This is where advanced techniques come into play.
Advanced polishing techniques like ultrasonic polishing, magnetic abrasive finishing, or specialized lapping systems are employed to achieve ultra-smooth, defect-free mirror finishes (SPI A-1/A-2). These methods offer greater precision and consistency, especially on complex geometries or very hard mold steels, pushing beyond what’s typically feasible with conventional methods.
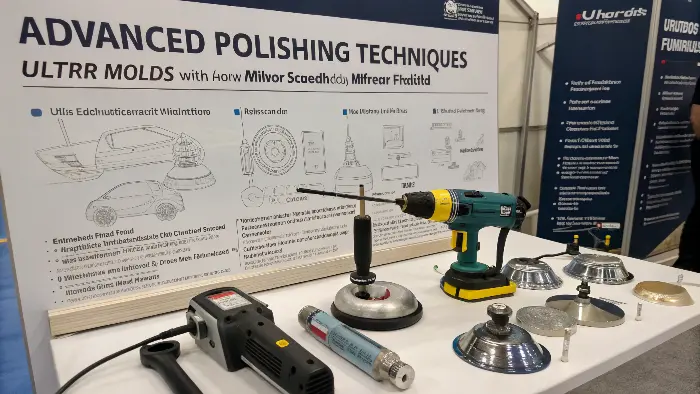
When we’re talking about pushing the boundaries of surface smoothness, getting into the nanometer-level Ra values, we need to look beyond the traditional hand tools and felt bobs for that final, critical touch. Let me shed some light on a few of these higher-tech approaches. These aren’t everyday tools for every mold shop, but for those specializing in high-precision, high-finish molds, they are game-changers.Ultrasonic Polishing: The Precision Artist
This is a really cool one. Ultrasonic polishers use a handpiece that vibrates at very high frequencies (typically 20,000-30,000 Hz). Tiny ceramic fiber stones or diamond-plated files are attached to this handpiece. The rapid, short strokes are incredibly effective at:
- Reaching Tight Spots: Think deep, narrow ribs or intricate details where a rotary tool or even hand movement is restricted. The fine tips can get in there and do their work.
- Consistent Material Removal: The controlled vibration helps in achieving a very even finish, especially on difficult-to-reach areas.
- Hard Materials: It’s particularly good on hardened tool steels where manual polishing can be slow and laborious.
I’ve seen ultrasonic polishing transform the finishing of complex core pins and detailed inserts. It allows for a level of detail and consistency in tricky spots that’s hard to match. It still requires skill, but it gives the polisher a much more precise instrument.Magnetic Abrasive Finishing (MAF): The Gentle Giant
This is a more specialized technique, but fascinating. MAF uses a magnetic field to energize fine magnetic abrasive particles (a mix of ferromagnetic particles and abrasive grains like diamond or CBN) in a slurry. These energized particles act like a flexible "brush" that conforms to the workpiece surface.
- Complex Geometries: Because the "brush" is flexible and magnetically guided, it can effectively polish complex 3D surfaces, internal channels, and intricate shapes without distorting them.
- Uniformity: It tends to produce a very uniform finish over the entire surface it contacts.
- Automation Potential: MAF processes can often be automated, which is great for consistency in higher volume applications of specific components.
While not as common for entire large mold cavities, it’s brilliant for certain types of inserts or components requiring an exceptionally fine and uniform internal or external finish.Specialized Lapping and Buffing Systems: The Big Guns
For very large flat surfaces or cylindrical components that require an A-1 type finish, automated lapping machines using diamond slurries on precision platens can achieve incredible flatness and smoothness. Similarly, robotic buffing cells can be programmed to apply consistent pressure and motion for high-volume polishing of specific mold components. These systems take a lot of the human variability out of the equation for those super-critical, large-scale jobs. It’s an investment, for sure, but for the right application, the consistency and speed can be worth it.
A Note on Environment and Steel
It’s worth repeating: achieving these ultra-high finishes isn’t just about the tool. The mold steel itself must be high quality (e.g., ESR S136, STAVAX) with minimal inclusions. And the environment? It needs to be spotlessly clean, often temperature-controlled, to prevent any stray dust particles from marring that perfect surface. It’s a holistic approach. When I visited a facility that specialized in optical molds, their polishing room looked more like a cleanroom lab – that’s the level of dedication required for true A-1 work.
These advanced techniques represent the cutting edge of mold finishing. They require specialized knowledge, equipment, and often a significant investment, but for applications demanding the utmost in surface perfection, they are indispensable.What Common Mistakes Should I Avoid During Mold Polishing?
You’ve got the tools, you understand the theory, but are you still finding your mold finishes aren’t quite hitting the mark? It’s very possible some common, sneaky mistakes are tripping you up. Avoiding these pitfalls is key to a great polish.
Crucial mold polishing mistakes to sidestep include rushing by skipping abrasive grits, applying uneven pressure, over-polishing (especially edges), failing to clean meticulously between stages, and neglecting the details in corners or complex features. These errors lead to poor surface quality, visible defects, and can even damage the mold.
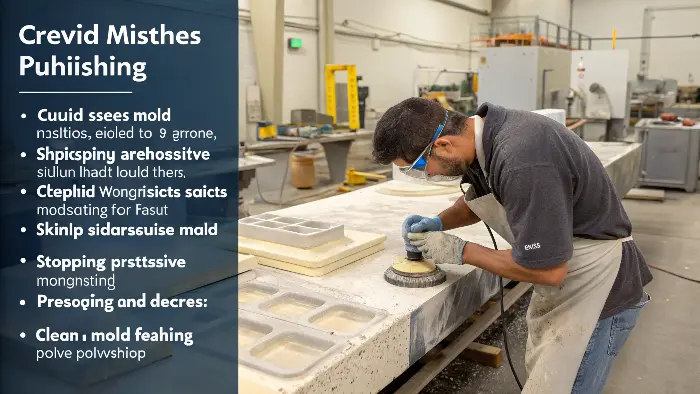
I’ve seen my share of polishing jobs go sideways over the years, often due to a few recurring blunders. It’s easy to fall into these traps, especially when you’re under pressure. Let me walk you through some of the big ones so you can steer clear. Think of this as learning from others’ (and sometimes my own past!) oops moments.Mistake #1: Rushing the Process (The "Grit Skipper")
This is probably the most common one. You’re trying to save time, so you jump from a coarse stone (say, 220 grit) directly to a much finer paper (like 800 grit) or even a diamond paste.
- The Problem: The fine abrasive simply can’t remove the deep scratches left by the coarse one. It’ll polish the "peaks" but leave the "valleys" (the coarse scratches) untouched. You end up with a surface that might look shiny from a distance, but up close, it’s a mess of underlying deep scratches.
- The Fix: Patience, my friend! Follow the sequence. Each grit is designed to remove the scratches from the previous grit. Don’t skip steps. It might feel slower, but it’s faster in the long run than having to go back and fix it.
Mistake #2: Uneven Pressure and Inconsistent Strokes
Applying more pressure in some areas than others, or changing your polishing direction haphazardly.
- The Problem: This leads to an uneven surface – dips, waves, or low spots. It can also cause "dubbing" or rounding of sharp edges and corners, which might be critical for part design.
- The Fix: Strive for consistent, light to moderate pressure. Let the abrasive do the work. Maintain a consistent stroke pattern, and for critical flat surfaces, use a lapping plate or a good straight edge to check for flatness regularly. For manual polishing, this takes practice and developing a "feel."
Mistake #3: The Peril of Over-Polishing
Yes, you can have too much of a good thing! This often happens when trying to remove a stubborn scratch or when focusing too much on one area.
- The Problem: Over-polishing can remove too much steel, altering the mold dimensions. This is especially critical in tight tolerance areas or on parting lines. It can also, ironically, sometimes make the surface look worse by creating a "dished out" effect.
- The Fix: Polish systematically across the surface. If you have a deep isolated scratch, try to spot-work it carefully, then blend the area with the surrounding surface. Measure critical dimensions frequently if you’re doing significant material removal.
Mistake #4: Ignoring Cleanliness Between Stages (The "Contaminator")
Not thoroughly cleaning the mold surface, your tools, and your hands when moving from a coarser to a finer abrasive.
- The Problem: Those leftover coarse abrasive particles will act like rogue agents, getting dragged around by your finer tool and creating new, unwanted scratches. It’s like taking one step forward and two steps back.
- The Fix: Be meticulous about cleaning. Use appropriate solvents, clean rags (microfiber is great), and compressed air. Some top polishers even use different sets of tools for different grit ranges to avoid cross-contamination. As I said before, cleanliness is paramount!
Mistake #5: Neglecting Edges, Corners, and Complex Geometries
Focusing all the effort on the easy-to-reach flat or gently curved surfaces and giving less attention to the tricky bits.
- The Problem: Inconsistent finish. The main surfaces might look great, but edges are still rough, or corners have visible machining marks. This affects both aesthetics and potentially part release or fit.
- The Fix: Use appropriate tools for these areas – small shaped stones, abrasive cords, felt tips for diamond paste, or even ultrasonic polishers. Pay special attention to maintaining sharp edges if they are part of the design. It requires patience and often more delicate work.
Avoiding these common mistakes will dramatically improve the quality and consistency of your mold polishing. It’s all about being methodical, patient, and paying attention to the details. Trust me, a little extra care here goes a very long way!Conclusion
Mastering mold polishing, from basic stoning to advanced diamond work, is essential for part quality and production. Understand SPI standards and avoid common mistakes to achieve truly professional results.
