Struggling with complex over-molding projects can be a nightmare. You face high scrap rates, poor adhesion, and endless delays, which hurt your bottom line and reputation. What if you could turn these challenging projects into a success story? Our team at CKMOLD faced a similar challenge with a critical automotive component, and we found a way to not just fix it, but to perfect it, delivering exceptional quality and reliability for our client.
To solve complex TPU over-molding challenges, we implement a four-step process. First, we conduct a thorough Design for Manufacturability (DFM) analysis to identify and correct design flaws. Next, we use advanced Mold Flow Analysis to simulate the injection process and optimize material flow. Then, we engineer the mold with precise gating, venting, and cooling systems. Finally, we establish strict process controls during production to ensure consistent adhesion, dimensional accuracy, and flawless surface finish, guaranteeing a reliable final product.
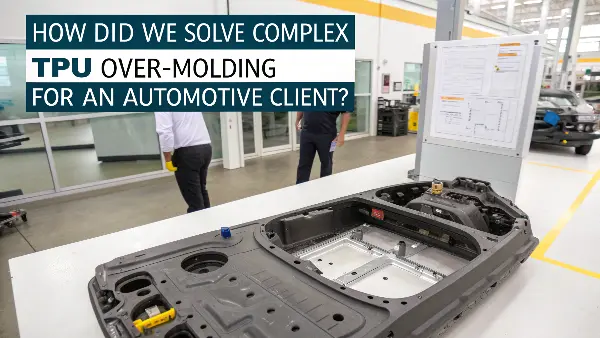
This might sound straightforward, but the devil is always in the details. A client came to us with an automotive component that was failing spectacularly. Their previous supplier couldn’t get the soft TPU to bond properly with the rigid substrate, leading to parts that would literally fall apart. They were behind schedule and over budget. This was a classic high-stakes problem that required more than just standard mold-making; it needed deep expertise. Let me walk you through exactly how we tackled this challenge, step by step.
What Were the Initial Design Flaws in the Automotive Part?
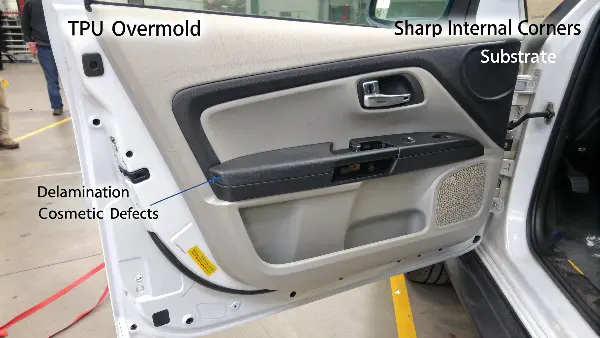
Have you ever received a part design that looked great on screen but was impossible to manufacture reliably? This is a common problem. The client was trying to produce an interior door grab handle, and their initial design had several issues causing delamination and cosmetic defects. They were frustrated and losing money with every failed production run. It was a situation that needed a fresh pair of eyes to find the root cause of the failures.
The primary design flaws were inconsistent wall thickness in the TPU overmold, sharp internal corners on the substrate, and the selection of chemically incompatible plastics. These issues created uneven cooling, stress concentration points, and poor molecular bonding between the TPU and the substrate. Correcting these fundamental design problems was the essential first step before we could even begin designing the mold. By addressing these flaws, we laid the groundwork for a successful and repeatable manufacturing process.
When we first looked at the client’s CAD files, we immediately noticed a few red flags. The journey from a digital model to a physical product is filled with potential pitfalls, and our job is to navigate them before any steel is cut. We started with a comprehensive Design for Manufacturability (DFM) analysis.
Identifying the Core Problems
Our analysis focused on three main areas. First, wall thickness. The TPU layer varied from 1.5mm to 4mm. This variation is a major problem for injection molding. Thicker sections cool much slower than thinner sections, which causes internal stress, warping, and sink marks on the surface. Second, we identified sharp corners where the TPU met the hard plastic substrate. Sharp corners create stress points where cracks and peeling can start. Think of it like trying to fold a piece of paper; it always tears at the sharpest crease. We recommended adding a gentle radius to these corners to distribute the stress evenly.
Material Compatibility Check
The final, and most critical, issue was material selection. The client was using a standard grade of Polycarbonate (PC) for the substrate and a generic TPU. While they are sometimes compatible, achieving a strong chemical bond without a primer requires very specific grades. We cross-referenced the material data sheets and confirmed they were a poor match. This lack of chemical affinity was the main reason the TPU was peeling off so easily. We proposed a specific grade of PC with a surface energy more receptive to a specialized, adhesion-optimized TPU grade.
| Design Flaw Identified | Consequence | Our Recommended Solution |
|---|---|---|
| Inconsistent Wall Thickness | Warping & Sink Marks | Redesign part for uniform 2.5mm thickness |
| Sharp Internal Corners | Stress Concentration & Peeling | Add a 0.5mm radius to all internal corners |
| Material Incompatibility | Poor Adhesion / Delamination | Switch to adhesion-optimized PC and TPU grades |
This initial DFM phase was crucial. By fixing these design issues upfront, we prevented future headaches and saved the client a significant amount of money in scrapped parts and mold rework. It’s a perfect example of why I always say, "measure twice, cut once."
How Did Material Selection and Mold Flow Analysis Prevent Errors?
Once the part design was fixed, the next big question was how to ensure the plastic would flow correctly inside the mold. Just guessing where to inject the plastic can lead to disaster. You might get air traps, weld lines in visible spots, or incomplete parts. These are costly and time-consuming errors. How could we be certain our injection strategy would work perfectly before we even started building the tool? This is where technology gives us a huge advantage.
We prevented costly errors by using advanced Mold Flow Analysis (MFA) software. This simulation allowed us to test various gate locations and injection parameters virtually. The MFA predicted how the TPU would flow over the substrate, identified potential air traps, and helped us optimize the filling pattern for a strong chemical bond. This data-driven approach replaced guesswork with certainty, ensuring the mold design was right the first time and guaranteeing a flawless part.
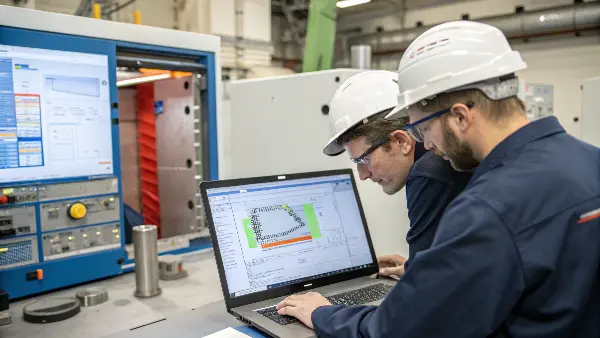
After finalizing the part design and selecting the right materials, we moved on to the digital prototyping stage. Mold Flow Analysis is like having a crystal ball for injection molding. It’s a computer simulation that shows us exactly how the molten plastic will behave as it’s injected into the mold cavity. For a complex overmolding project like this, MFA is not just helpful; it’s absolutely essential.
Simulating the Injection Process
We loaded the 3D models of the substrate and the overmold into the software. Then, we input the specific properties of the adhesion-optimized TPU we had chosen—its viscosity, melting temperature, and cooling rate. The simulation’s goal was to find the perfect way to inject the TPU onto the already-molded PC substrate. We tested several scenarios. We experimented with different numbers of injection points, or "gates," and placed them in various locations.
The simulation produced color-coded maps showing us critical information. We could see the fill time, pinpointing the last areas to fill and identifying where weld lines would form. More importantly, it showed us the pressure and temperature distribution across the part. For TPU overmolding, maintaining an ideal melt temperature at the interface with the substrate is key to achieving a strong chemical bond. The simulation confirmed that our proposed gate location would maintain this temperature, promoting excellent adhesion.
Optimizing for a Perfect Finish
The analysis also highlighted a few potential trouble spots. One simulation predicted a small air trap in a hard-to-reach corner. If air gets trapped, it prevents the plastic from filling that area completely, resulting in a "short shot" or a bubble. Based on this insight, we knew exactly where to add a small vent in the mold to let that air escape.
Here’s a simplified breakdown of our MFA process:
- Step 1: Define Inputs: We input the part geometry, selected TPU material properties, and initial processing parameters (injection speed, temperature).
- Step 2: Run Simulation: The software calculates the plastic flow, pressure, temperature, and cooling dynamics.
- Step 3: Analyze Results: We studied the visual outputs to identify issues like weld lines, air traps, and uneven filling.
- Step 4: Refine and Repeat: We adjusted the gate location and process parameters and reran the simulation until we achieved the optimal result.
This process took a few days, but it saved us weeks of potential physical trial-and-error. It gave us, and our client, the confidence that our mold design was built on a solid, data-driven foundation.
Why is Precision Gating and Cooling So Crucial for Success?
Even with a perfect part design and a flawless simulation, the project can still fail if the physical mold isn’t built correctly. The mold is the heart of the operation. You can have the best plan in the world, but if the execution is poor, you get poor results. For TPU overmolding, controlling the flow of plastic and heat is everything. How do you design a mold that can manage these forces with extreme precision, cycle after cycle?
Precision gating and cooling are crucial because they directly control the quality of the final part. The gate’s location and size determine how the TPU fills the cavity, preventing cosmetic defects and ensuring a strong bond. The cooling channels regulate the temperature of the mold, allowing the part to solidify uniformly. This prevents warpage, controls shrinkage, and ensures the part holds its exact dimensions, which is critical for automotive fit and finish.
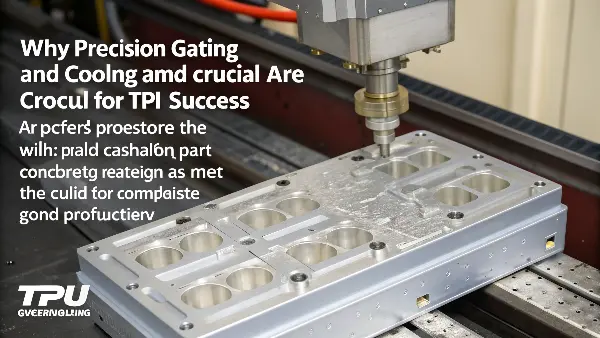
Armed with the insights from our Mold Flow Analysis, we began the detailed design of the two-shot mold. This is where engineering artistry meets science. A mold is not just a hollowed-out piece of steel; it’s a complex machine with many interconnected systems. For this project, we focused intensely on two of the most critical systems: gating and cooling.
Designing the Gating System
The "gate" is the opening where molten plastic enters the part cavity. Its design is one of the most important decisions in mold making. Our MFA showed that a "tab gate" placed on a non-cosmetic edge of the part would provide the best results.
- Gate Location: We placed it in a thick area of the part as indicated by the simulation. This ensures the part fills from thick to thin, reducing the chance of sink marks. The location was also on a surface that would be hidden after assembly, so the small remnant left after trimming the gate wouldn’t be visible.
- Gate Size: We carefully calculated the gate’s dimensions. If it’s too small, the plastic has to be injected under extremely high pressure, which can degrade the material and cause cosmetic issues like "jetting." If it’s too large, it will take too long to freeze, extending the cycle time and leaving a large, ugly mark on the part. We settled on a size that balanced a fast, gentle fill with a quick freeze-off time.
Engineering the Cooling System
Cooling is just as important as filling. The cooling channels in a mold act like a car’s radiator, removing heat from the plastic so it can solidify. For this project, we needed what’s called "conformal cooling." Instead of just drilling straight lines through the mold steel, we designed cooling channels that followed the exact contours of the part. This ensures that every area of the part, whether thick or thin, cools at the same rate. Uniform cooling is the secret to preventing warpage and maintaining tight dimensional tolerances.
| Mold System | Design Choice | Reason for Choice |
|---|---|---|
| Gating System | Tab Gate on a non-cosmetic edge | Provides a balanced fill without affecting part appearance. Easy to de-gate. |
| Venting System | Micro-vents at last-fill points | Allows trapped air to escape, preventing short shots and burn marks. |
| Cooling System | Conformal Cooling Channels | Ensures uniform temperature control across the entire part, minimizing warpage. |
Building a mold with this level of precision requires advanced CNC machining and skilled mold makers. It costs more upfront than a simple mold, but the payoff is huge: faster cycle times, lower scrap rates, and parts that are perfect every time.
How Did We Overcome Adhesion and Warpage Issues During Prototyping?
Theory is one thing, but reality is another. No matter how much planning and simulation you do, the first physical parts off the machine are the moment of truth. We had a solid plan, but we were still prepared to fine-tune the process. When the first prototype parts were molded, we saw minor issues with adhesion in one area and a slight warp. How do you solve these final, stubborn problems on the shop floor?
We overcame these final issues through methodical, data-driven process optimization. For adhesion, we fine-tuned the substrate pre-heating temperature and the TPU injection speed to ensure an ideal melt interface. For warpage, we precisely adjusted the cooling time and holding pressure based on measurements from the first trial parts. This systematic, iterative approach of "test, measure, adjust" allowed us to dial in the perfect parameters for a stable and repeatable production process.
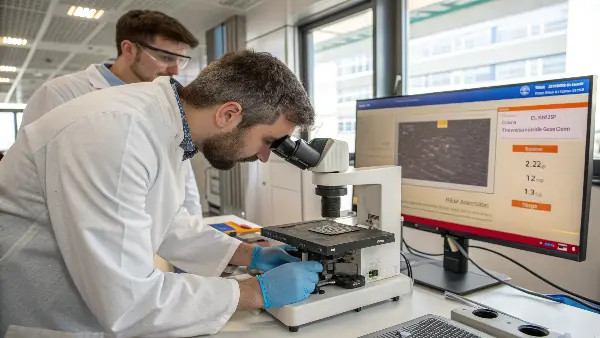
The prototyping and mold trial phase is where our experience really shines. This is when we transition from computer models to real-world production. We mounted the newly built mold into one of our injection molding machines and began the first trial, known as the T1 trial. As expected, the parts were about 95% perfect, but there were two small problems to solve: a small patch of weak adhesion near the gate and a very slight twist, or warp, in the part after it cooled.
Solving the Adhesion Problem
The weak adhesion was puzzling at first, as our material selection was correct. We suspected it was a processing issue. The key to a strong bond in overmolding is to inject the second material (TPU) while the first material (the PC substrate) is still at a specific, elevated temperature. If the substrate cools too much, the two materials won’t form a strong chemical link.
We placed a thermal camera inside the machine to monitor the substrate’s surface temperature right before the TPU injection. We discovered that the area near the gate was cooling slightly faster than the rest of the part. Our solution was twofold:
- We increased the temperature of the mold half holding the substrate by just 5°C.
- We slightly decreased the time delay between the first and second shots.
These small adjustments kept the substrate at the optimal temperature, and on the next run, the adhesion was perfect across the entire part.
Eliminating Warpage
The slight warp was a classic cooling problem. Even with our conformal cooling design, tiny differences in steel temperature or plastic pressure can cause a part to bow. We used a CMM (Coordinate Measuring Machine) to precisely measure the T1 part and quantify the warp. The data showed the part was shrinking unevenly along its length.
The fix was in the "holding pressure" phase of the injection cycle. This is a phase after the mold is filled, where pressure is maintained to pack more material in as the part shrinks. We incrementally adjusted two parameters:
| Parameter | Initial Setting | Adjusted Setting | Result |
|---|---|---|---|
| Holding Pressure | 80% of Injection Pressure | 75% of Injection Pressure | Reduced internal stress |
| Holding Time | 3.0 seconds | 3.5 seconds | Allowed more uniform packing |
By slightly reducing the pressure but holding it for a bit longer, we allowed the internal stresses in the part to relax and settle before it was ejected. After a few more trial shots, the CMM confirmed the parts were now dimensionally perfect, well within the client’s tight tolerance requirements. This meticulous fine-tuning process is what separates an average molder from a great one.
What Were the Final Results and Long-Term Benefits for the Client?
In the end, what truly matters is the result we deliver to the client. After all the analysis, design, and fine-tuning, did we solve their problem? Did we meet their goals for quality, cost, and delivery? The client was initially under pressure, facing production halts and a frustrated end customer. They needed more than just parts; they needed a reliable partner. What did success ultimately look like for them?
The final result was a flawless automotive component with zero adhesion failures and perfect dimensional stability. We achieved a production scrap rate of less than 1%, a massive improvement from their previous supplier. The long-term benefits for the client were significant: they secured their contract with the automaker, reduced their overall manufacturing costs, and restored their reputation for delivering high-quality products. They gained a reliable supply chain partner they could trust for future complex projects.
The conclusion of this project was a huge success, not just for us, but more importantly, for our client. The difference between the parts they were getting before and the parts we delivered was night and day. We provided them with a complete solution that went far beyond just manufacturing a mold.
Quantifiable Success Metrics
When we handed over the final production-ready mold and the initial batch of approved parts, the client was thrilled. The parts passed every single one of their rigorous quality control tests, including peel tests for adhesion and long-term durability tests. But the real success can be seen in the numbers.
- Scrap Rate Reduction: The client’s previous supplier had a scrap rate of over 20% on this part. Our optimized process brought the scrap rate down to under 1%. This translated directly into significant cost savings on material and machine time.
- Cycle Time Improvement: Our mold design, particularly the conformal cooling, allowed for a faster, more efficient production cycle. We reduced the cycle time per part by 4 seconds, which adds up to thousands of extra parts per week in mass production.
- Zero Field Failures: Most importantly, since launching the part into full production, the client has reported zero field failures related to the grab handle. The strong bond and dimensional stability mean the part performs reliably in the final vehicle, protecting their relationship with their own customer, the car manufacturer.
The Long-Term Partnership
This project was a turning point for the client. They had been struggling with unreliable suppliers and were starting to believe this part was simply too difficult to make. By working with us, they not only solved their immediate problem but also learned the value of a deeply technical and collaborative partnership. They saw how investing in proper engineering upfront—from DFM and Mold Flow to precision mold manufacturing—pays for itself many times over.
We are now their go-to partner for all their complex injection molding projects. This case study is a perfect example of our philosophy at CKMOLD: we don’t just make molds; we provide engineering solutions that help our clients succeed.
Conclusion
This automotive over-molding project highlights our comprehensive approach. By starting with a deep analysis of the part design, using advanced simulation tools, engineering a precision mold, and meticulously optimizing the production process, we turned a failing project into a major success. This systematic method minimizes risk, reduces costs, and ensures the delivery of high-quality components every time. It’s how we help our partners master their molding challenges.
