
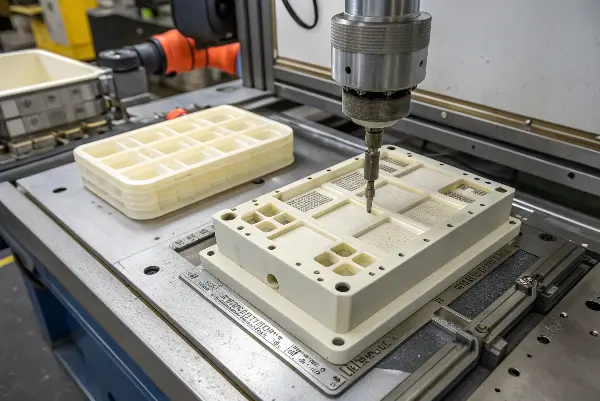
Are you tired of prototypes that don’t truly represent your final product’s look and feel? It’s frustrating when you spend time and money on a model, only for it to have rough surfaces and poor details, making it hard to get accurate feedback or stakeholder approval. This disconnect can slow down your entire development cycle. Stereolithography (SLA) prototyping is the solution, offering a path to creating stunningly smooth and detailed parts that rival the quality of injection molding.
High-resolution SLA can produce sharp visual prototypes and smooth surfaces, but an injection-mold-like appearance depends on orientation, layer strategy, resin, support placement, washing, post-cure, sanding, coating and inspection. A smooth model may still differ from an injection-molded part in gloss, color, toughness, heat resistance, shrinkage and long-term stability. Define whether the prototype is for appearance, fit or function before judging it.
Related engineering resources: prototype injection molding | mold design | mold testing and validation
Yes, you can absolutely achieve an injection mold-like surface finish with SLA prototyping. The technology’s core process, which uses a laser to cure liquid resin layer by layer, is inherently precise and produces very smooth surfaces right out of the printer. By combining this high initial quality with standard post-processing techniques like fine sanding, polishing, and applying a clear coat, you can create prototypes that are virtually indistinguishable from final production parts. This makes SLA suitable for visual models, marketing materials, and form-and-fit testing.
What Exactly is SLA in Rapid Prototyping?
Have you ever found yourself lost in a sea of technical acronyms like FDM, SLS, and SLA? It can be overwhelming when you’re just trying to figure out the best way to create a high-quality prototype for your project. Choosing the wrong technology can lead to wasted budget and time, resulting in a model that doesn’t meet your aesthetic or functional needs. Let’s clear up the confusion and focus on SLA, a powerful tool for creating beautiful, detailed parts.
SLA, which stands for Stereolithography, is a 3D printing process that builds objects from a liquid plastic resin. It works by using an ultraviolet (UV) laser to draw a cross-section of your design onto the surface of the resin, curing and solidifying it. The build platform then lowers slightly, and a new layer of liquid resin sweeps over the top. The laser draws the next layer, fusing it to the one below. This process repeats, layer by tiny layer, until your highly detailed, solid part is complete.
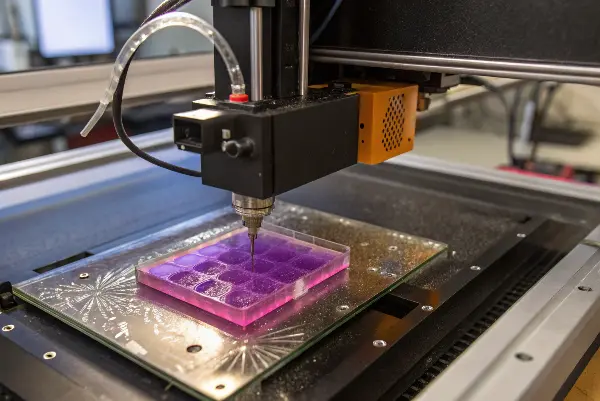
The magic of SLA lies in its precision. The laser’s very fine point and the nature of the liquid resin allow for the creation of incredibly thin layers, sometimes as small as 25 microns.
The Core SLA Process
| Step | Description | Why It Matters for Quality |
|---|---|---|
| 1. Design & Prep | Your 3D CAD model is sliced into thousands of thin horizontal layers by specialized software. | The slicing software optimizes the print orientation to minimize support structures and maximize surface quality. |
| 2. Printing | A UV laser traces each layer onto a vat of liquid photopolymer resin, hardening it precisely. | The laser’s accuracy ensures that even the smallest details, like text or fine textures, are captured reliably. |
| 3. Build & Form | The build platform lowers, a fresh layer of resin is applied, and the process repeats. | Building layer by layer allows for complex geometries and internal features that are impossible with other methods. |
| 4. Post-Curing | After printing, the part is washed in a solvent to remove excess resin and then cured in a UV chamber. | This final curing step fully hardens the part, locking in its mechanical properties and ensuring dimensional stability. |
Understanding these steps helps you appreciate why SLA is not just another 3D printing method. It’s a sophisticated manufacturing process designed for precision. It’s the go-to choice when you need a prototype that doesn’t just work, but also impresses.
What is the Difference Between an SLA and an SLS Finish?
You’re ready to create a prototype, but you’re faced with a choice: SLA or SLS? Both are powerful technologies, but they produce very different results, especially when it comes to the surface finish. Choosing incorrectly can mean getting a part that feels grainy and rough when you needed something smooth and ready for a tradeshow. This mistake can cost you both time and the opportunity to make a great first impression. Let’s compare them so you can make the right call every time.
The main difference between SLA and SLS finishes is that SLA produces a very smooth, non-porous surface, while SLS creates a slightly rough, grainy, and porous finish. This is due to their fundamental processes. SLA cures liquid resin with a laser, resulting in a solid, glass-like surface ideal for visual prototypes. In contrast, SLS sinters powdered material together, leaving a matte, sandpaper-like texture. If your priority is a beautiful, injection-mold-like finish, SLA is the clear winner.
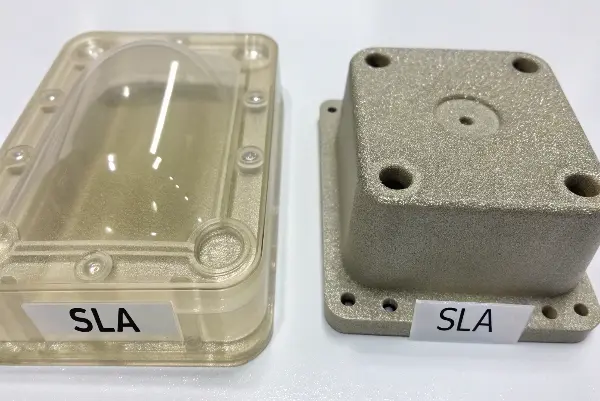
This is a common scenario. The technology you choose directly impacts how your product is perceived. To make an informed decision, it’s helpful to see a direct comparison of their characteristics and best use cases.
SLA vs. SLS: A Head-to-Head Comparison
| Feature | Stereolithography (SLA) | Selective Laser Sintering (SLS) |
|---|---|---|
| Core Process | Cures liquid resin with a UV laser. | Fuses powdered material with a high-power laser. |
| Surface Finish | Very smooth, non-porous, similar to injection molding. | Grainy, matte, slightly porous, like fine sandpaper. |
| Level of Detail | Excellent. Can capture very fine features and sharp edges. | Good, but fine details can be lost due to powder grain size. |
| Material Properties | Can be brittle, but options exist for tough, flexible materials. | Strong and durable, often using nylons. Excellent for functional parts. |
| Post-Processing | Requires washing, support removal, and UV curing. Can be easily sanded, polished, and painted. | Requires de-powdering (bead blasting). Can be dyed, but smoothing requires more effort (tumbling). |
| Ideal For | Visual prototypes, form/fit testing, patterns for casting, parts requiring high detail and a smooth finish. | Functional prototypes, complex geometries without supports, parts needing good mechanical strength and durability. |
Ultimately, the choice depends on your primary goal. If you need to test the strength of a living hinge or a snap-fit that will be used thousands of times, the durability of SLS might be a better fit. But if you need to create a prototype that will wow investors, test the ergonomics of a design, or serve as a master pattern for vacuum casting, the superior surface finish and detail of SLA are unmatched.
How Can You Best Finish SLA Prints?
So, you’ve printed your part with SLA, and it already looks great. But you want to take it from “great” to “suitable”—a finish so clean it looks like it came from a production tool. It can be daunting to think about post-processing, worrying that you might ruin the part by sanding too much or applying a finish incorrectly. This fear can prevent you from achieving that truly professional look. Don’t worry, finishing SLA prints is a straightforward process that anyone can master with the right steps.
To achieve the best finish on an SLA print, follow a multi-step process. Start by carefully removing the support structures with flush cutters and sanding the contact points smooth. Next, use progressively finer grits of sandpaper, starting around 220 and moving up to 1000 or higher, to eliminate layer lines. For a glossy finish, apply a high-quality 2K automotive clear coat spray. This not only creates a brilliant shine but also provides a durable, UV-resistant protective layer, making the part look and feel like a final product.
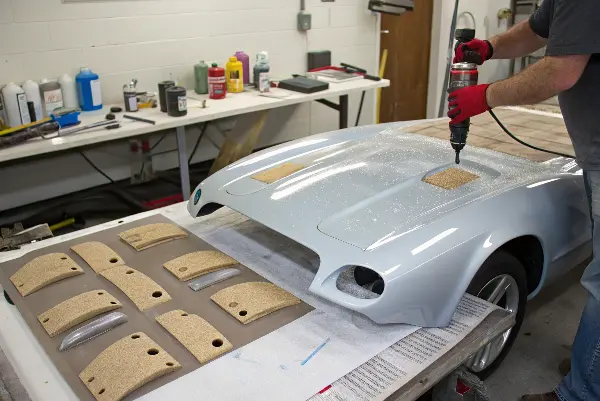
It’s all about being methodical. Rushing the process is the most common mistake. Taking your time, especially during the sanding stages, is the key to a professional outcome. Here is a more detailed breakdown of the steps Consider for a consistent finish.
A Step-by-Step Guide to a Suitable SLA Finish
The goal here is to methodically remove any imperfections, like support marks or faint layer lines, to create a reliably uniform surface before applying a final coating.
-
Support Removal:
- What to do: Use a sharp pair of flush cutters to snip the support structures as close to the model as possible. Do this before the final UV cure if possible, as the material is slightly softer.
- Why it’s important: Clean removal minimizes the amount of sanding needed later and reduces the risk of damaging the part’s surface.
-
Initial Sanding:
- What to do: Use a medium-grit sandpaper (around 220-400 grit) to carefully sand down the small nubs left from the supports. Use a small sanding block for flat surfaces to keep them even.
- Why it’s important: This step creates a level foundation for the rest of the finishing process.
-
Wet Sanding for Smoothness:
- What to do: Begin wet sanding the entire part with progressively finer grits of sandpaper. I typically move from 400 to 600, then to 800, and finish with 1000 or 1500 grit. Keep the sandpaper and the part wet to prevent dust buildup and create a smoother finish.
- Why it’s important: Wet sanding removes the microscopic scratches left by the previous grit, methodically smoothing the surface until all layer lines are gone.
-
Painting or Clear Coating:
- What to do: After cleaning and drying the part, apply a primer if you plan to paint it a solid color. For a natural, glossy look, apply a 2K clear coat. This is a two-part automotive spray that provides a much harder and more professional finish than standard spray paint. Apply several light coats in a dust-free environment.
- Why it’s important: This final step not only provides the desired aesthetic (matte, satin, or gloss) but also protects the part from UV degradation and scratches, enhancing its longevity.
By following these steps, you can consistently turn your high-resolution SLA prints into professional-grade models that truly stand out.
What is an SLA Mold?
You’re familiar with using SLA for prototypes, but what if you could use it to bridge the gap between prototyping and full-scale production? Many business owners struggle when they need a small batch of parts—more than a few prototypes, but not enough to justify the huge cost of a traditional steel injection mold. This gap can stall projects or force you into expensive, low-volume production methods. This is where creating a mold directly with SLA can be a material change.
An SLA mold, also known as a 3D-printed injection mold, is a tool created using Stereolithography that can be used for short-run injection molding. Instead of machining a mold from aluminum or steel, you 3D print the mold cavity and core using a specialized high-temperature, rigid SLA resin. This printed mold can then be placed into a standard mold base and used on an injection molding machine to produce dozens or even hundreds of real, production-grade thermoplastic parts. It’s an incredibly fast and cost-effective method for low-volume production.
This approach combines the speed and flexibility of 3D printing with the quality and material variety of injection molding. It’s a powerful tool for agile product development, allowing you to get real production parts in your hands faster than ever before.
When to Use an SLA Mold
SLA molds are not a replacement for traditional steel tooling for high-volume production, but they excel in specific scenarios. Understanding their strengths and limitations is key to using them effectively.
| Use Case | Why an SLA Mold is a Great Fit | Key Considerations |
|---|---|---|
| Bridge Tooling | You need parts now while your steel production tool is being made. SLA molds fill the manufacturing gap, which can be several weeks long. | The mold will have a limited lifespan (e.g., 50-200 shots depending on material and geometry), so it’s a temporary solution. |
| Low-Volume Production | Your product has a niche market, and you only ever plan to produce a few hundred units. An SLA mold avoids a huge tooling investment. | Part complexity and the type of thermoplastic being injected will affect mold life. Abrasive materials like glass-filled nylon will wear the mold faster. |
| Design Validation | You need to test your design with the actual production material (e.g., Polycarbonate, ABS) before committing to expensive steel tooling. | This allows you to find and fix potential design flaws, like weak points or sink marks, at a very low cost. |
| Material Testing | You want to compare how different thermoplastics perform in your final part design without making multiple expensive tools. | You can use the same SLA mold to inject several different materials, providing invaluable data for your final production. |
Using SLA to create injection molds is one of the most exciting advancements in manufacturing. It dramatically lowers the barrier to entry for creating high-quality plastic parts, giving businesses more flexibility and speed. If you need a small batch of production-quality parts quickly and affordably, it’s a solution you should seriously consider.
Choose Orientation From Surface and Support Risk
Orient the part to place supports on hidden areas and control stair-stepping on visible curves. Large flat or glossy surfaces can show peel, layer or post-processing artifacts. A high-resolution setting does not eliminate the need for a surface strategy.
Separate As-Printed From Finished Surface
Washing, support removal, sanding, priming, coating and polishing can improve appearance but may change dimensions and edge sharpness. Define the target surface and measurement state. A coated prototype should not be compared directly with raw molded resin without a clear purpose.
Understand Resin and Post-Cure Behavior
SLA resins differ in toughness, flexibility, heat resistance, clarity and chemical response. Post-curing can change stiffness, color and dimensions. Record resin lot, exposure, cure schedule and age, especially when the prototype is used for snap fits or environmental tests.
Protect Thin Features and Interfaces
Fine walls, clips, threads, living hinges and press fits can be brittle or direction-sensitive. Add appropriate thickness, radii and clearance for the resin and support method. Use separate hardware or a tougher process when the interface must survive repeated assembly.
State What ‘Mold-Like’ Means
For appearance, compare gloss, texture, color, witness marks and viewing conditions. For function, compare stiffness, impact, heat, chemicals and aging. SLA can be excellent for visual decisions while remaining unsuitable for a production-equivalent durability conclusion.
High-Resolution SLA Prototypes: Buyer Review Checklist
- Select orientation from visible surface, support, stair-step and dimensional risk.
- Define raw, washed, post-cured, sanded or coated inspection state.
- Record resin, exposure, cure, age and conditioning for functional evaluation.
- Review thin walls, clips, threads, hinges, clearances and repeated assembly.
- Separate appearance similarity from molded material and durability equivalence.
Frequently Asked Questions
Can SLA make a surface identical to injection molding?
It can approach a smooth visual finish after suitable orientation and post-processing, but gloss, texture, color, shrinkage and material behavior may still differ.
Why can a smooth SLA part fail a snap-fit test?
SLA resin, post-cure, layer or support effects can produce brittleness or different flex behavior from the intended injection-molded resin.
Conclusion
In short, SLA prototyping is an incredibly powerful tool for creating parts with a surface finish and level of detail that truly rival traditional injection molding. By understanding the core technology and applying methodical post-processing techniques, you can produce prototypes that are not just functional, but also visually stunning. This allows you to validate your designs with confidence, impress stakeholders, and ultimately bring better products to market faster.