Struggling with part defects? Imperfect mold surfaces cost you money and time. Discover the essential polishing tools to achieve flawless finishes and boost your production quality.
Essential polishing tools for injection mold makers include hand stones, abrasive papers, diamond compounds, and power-assisted grinders/polishers. Choosing the right tools involves considering the mold material, desired finish (e.g., SPI A1, B2), complexity of the mold cavity, and the specific polishing stage. Proper selection ensures high-quality parts and efficient production.
Getting that mirror shine or a specific texture on a mold isn’t just for show; it’s absolutely critical for the final plastic part’s quality and performance. I’ve seen firsthand how the right polish can make or break a project. So, let’s dig a bit deeper into why this matters so much, and then we’ll get into the nitty-gritty of the tools themselves. Trust me, understanding this will save you headaches down the line.
Why is Mold Polishing So Darn Important for Quality Parts?
Facing part rejections or customer complaints? A poorly polished mold surface is often the culprit, leading to visual defects and functional issues. Understanding why polishing is key can directly improve your part quality and reputation.
Mold polishing is crucial because it directly impacts the final part’s surface finish, ease of ejection, and overall aesthetic appeal. A well-polished mold minimizes defects like flow lines or haze, reduces friction for smoother part release, and ensures the part meets precise visual and functional specifications, ultimately enhancing product quality.
You know, when I first started in the mold factory, I didn’t fully grasp how critical polishing was. I thought, "It’s just making it shiny, right?" Boy, was I wrong! It’s so much more than that. Think about it – that mold surface is what your plastic part is going to copy. If there are tiny scratches or imperfections on the mold, guess what? They’re going to show up on every single part you produce. This isn’t just about looks; it affects functionality too.
The Ripple Effect of Mold Surface Finish
A smooth, well-polished mold surface does several key things:
- Better Part Ejection: A polished surface means less friction. Parts pop out easier, reducing stress on the part and the mold. This also means faster cycle times – and for Michael, a business owner, faster cycles mean better efficiency! I’ve seen molds where poor polish led to parts sticking, causing delays and even damage.
- Improved Material Flow: Especially for complex parts or certain plastics, a smooth surface helps the molten plastic flow evenly into all the nooks and crannies. This prevents issues like short shots or weld lines. Imagine trying to fill a detailed design; a rough surface can act like a roadblock.
- Enhanced Part Aesthetics: For consumer products, looks matter a great deal. A high gloss (like an SPI A-1 finish) or a specific matte texture can only be achieved with meticulous polishing. This is often the first thing a customer notices.
- Reduced Wear and Tear (on the mold): While it might seem counterintuitive, a properly polished surface can sometimes be more resistant to certain types of wear or corrosion, depending on the material and application. It creates a more uniform and stable surface.
I remember one project where we were making clear plastic casings for a high-end audio device. The client was super picky about optical clarity – absolutely no haze or flow marks. We spent extra time, probably an additional 20%, just on the final polishing stages, getting the mold to an almost flawless SPI A-1 finish using progressively finer diamond pastes. The result? Crystal clear parts, a very happy client, and a repeat order that was quite substantial. That’s the power of good polishing. It’s not just a final step; it’s an integral part of making high-quality injection molded parts that make customers happy and keep them coming back.What Basic Hand Polishing Tools Should Be in Every Mold Maker’s Kit?
Feeling overwhelmed by the variety of polishing tools? Starting with the basics is key. These foundational hand tools are the workhorses for achieving precision finishes, even before you think about complex machinery. They offer unparalleled control.
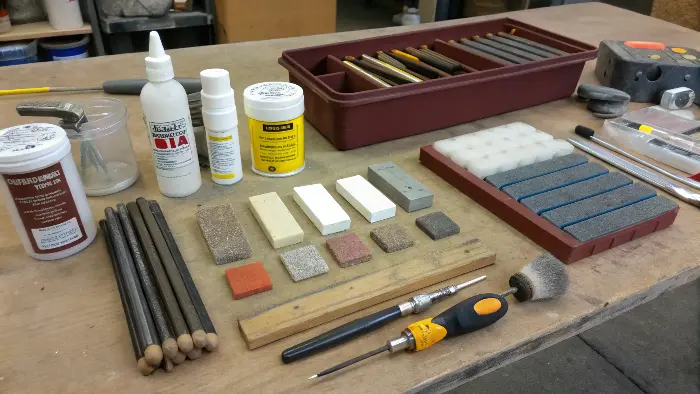
Every mold maker’s basic hand polishing kit should include abrasive stones (India, Arkansas, ceramic), emery/sandpaper in various grits, polishing sticks/holders, lapping compounds (diamond paste), and cleaning supplies like cotton swabs and solvents. These tools allow for controlled material removal and progressive finishing to achieve the desired surface.

Alright, let’s talk about the real hands-on stuff. Even with all the fancy power tools available today, you absolutely cannot skip the fundamentals of hand polishing. It’s where the skill and artistry really come into play. For those intricate details or achieving that perfect feel, hand tools are your best friends. I still find myself reaching for my favorite set of ceramic fiber stones for certain jobs – there’s a level of control you just can’t replicate with a power tool, especially in tight corners or delicate features.Essential Hand Polishing Arsenal
Here’s a breakdown of what you’ll typically find in a well-stocked hand polishing toolkit. Think of this as your starting lineup: Tool Type Description & Use Key Considerations for Selection My Two Cents Abrasive Stones (e.g., India, Arkansas, Ceramic Fiber, Boride) Used for initial material removal, shaping, and smoothing out machine marks. Come in various grits and shapes. Grit size, hardness, shape for access. Ceramic fiber stones are amazing for ribs and slots! Abrasive Paper/Cloth (e.g., Emery, Silicon Carbide, Aluminum Oxide) Used for progressive smoothing. Available in sheets, rolls, or discs. Backed with adhesive or plain. Grit sequence, backing material, flexibility. Don’t cheap out; good paper cuts faster and lasts longer. Polishing Sticks & Holders Wood (like balsa or hardwood), plastic, or metal holders for abrasive paper or small stones. Allows for better control and access to tight spots. Material, shape, comfort, rigidity. I often make custom wooden sticks for specific profiles. It really helps. Lapping Compounds (e.g., Diamond Paste) Fine abrasive particles in a carrier (oil or water-based). Used for final high-gloss polishing. Applied with felt bobs, wood, or cloth. Diamond concentration, grit size, carrier. Start with a lower concentration diamond paste if you’re new to it. Files & Rifflers For deburring, shaping, and reaching into intricate details like lettering or sharp internal corners. Various cuts (bastard, second-cut, smooth) and shapes. Cut type, shape, size. A good set of Swiss pattern files is an investment that pays off. Cleaning Supplies Cotton swabs, lint-free cloths, isopropyl alcohol, ultrasonic cleaners (for small inserts). Essential for removing debris between grits. Effectiveness, residue-free. Clean, clean, clean! Can’t stress this enough between grit changes. I always tell new guys, "Don’t skimp on your stones and papers!" Using good quality abrasives and progressing through the grits properly is crucial. Trying to jump from a coarse grit, say 220, to a super fine one like 800 will just leave deep scratches from the 220 grit that are a nightmare to remove later. Patience and the right sequence – that’s the secret sauce for hand polishing. It’s like sanding wood; you wouldn’t jump from 60 grit sandpaper straight to 400 grit and expect a smooth finish, would you? Same principle here, but with much tighter tolerances.
When Should You Upgrade to Power-Assisted Polishing Tools for Molds?
Is hand polishing taking too long and tiring out your team? Power-assisted tools can significantly boost efficiency, especially on larger molds or tougher materials, but knowing when and how to use them is key to avoid costly mistakes.
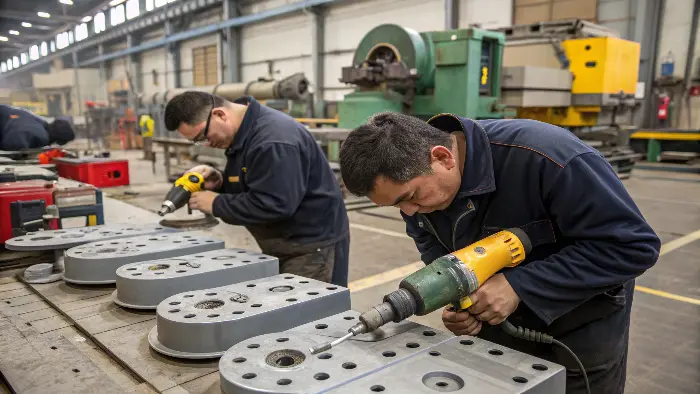
Upgrade to power-assisted polishing tools like rotary handpieces, ultrasonic polishers, or reciprocating profilers when dealing with large surface areas, hard tool steels, or when needing to speed up material removal in early polishing stages. They save time and reduce manual effort but require skill to avoid over-polishing or damaging delicate features.

Hand polishing is an art, no doubt. And for many small, intricate jobs, it’s still the best way. But let’s be real, for a business owner like Michael, time is money, and operator fatigue is a real concern. And sometimes, hand polishing alone just isn’t efficient, especially on big molds for, say, automotive dashboards or appliance housings, or when you’re working with really tough tool steels like H13 or S7. That’s when power-assisted tools become your best buddies. I remember when we invested in our first set of good quality NSK rotary handpieces and an ultrasonic polisher – it was a game-changer for our turnaround times on certain jobs, probably cut down polishing time by 30-40% on larger surfaces!Stepping Up Your Polishing Game
So, when do you make the jump or integrate these tools more heavily? Here are some scenarios:
- Large Surface Areas: Trying to hand polish a massive mold surface uniformly to an SPI B-2 finish is a Herculean task. Power tools, like pneumatic grinders or flexible shaft polishers with larger abrasive pads, cover more ground, faster.
- Hard Mold Materials: Some tool steels, especially those hardened to 50+ HRC, are incredibly tough. Power tools provide the necessary force and speed to effectively work these materials, saving your hands and wrists from a lot of strain.
- Initial Roughing Stages: For removing heavy machining marks, EDM scale, or blending weld repairs, power tools equipped with coarser abrasives (like mounted points or coarser grit stones in a profiler) can significantly cut down the initial prep time.
- Consistency: While skill is still paramount, power tools can help achieve a more consistent finish over large areas compared to hand polishing alone, especially if multiple operators are involved. This is crucial for parts that need a uniform look.
- Specific Features: Ultrasonic polishers are fantastic for getting into tight ribs, slots, and sharp corners where a rotary tool might gouge the surface or a hand tool is too slow.
However, a word of caution: power tools are, well, powerful! It’s much easier to remove too much material, create uneven surfaces ("dishing out"), or round off sharp edges if you’re not careful. They require a good feel, proper training, and a light touch.Common Power-Assisted Tools:
- Rotary Handpieces (Micromotors/Pneumatic Grinders): These are incredibly versatile. You can use them with various attachments like carbide burs for material removal, mounted points for grinding, felt bobs for paste polishing, or even small abrasive brushes. Great for general polishing and detail work.
- Reciprocating Profilers (Filers): These tools provide a short back-and-forth or side-to-side motion. They are excellent for working on flat surfaces, in slots, or along ribs using abrasive stones or diamond files. They mimic the hand filing/stoning motion but much faster.
- Ultrasonic Polishers: These use high-frequency vibrations (think 20,000-30,000 times per second!) with ceramic fiber stones or diamond files. They are fantastic for intricate details, sharp corners, and deep ribs where conventional tools can’t reach effectively or risk damaging the feature. These were a revelation for complex texture work for us, especially for EDM finishes that needed refining.
Don’t think of power tools as a replacement for hand skills, but as a powerful complement. Often, the best results come from a smart combination – using power tools for the heavy lifting and initial smoothing, and then refining with hand polishing for the final touch and ultimate control. It’s about working smarter, not just harder.How Do You Pick the Right Abrasives for That Perfect Mold Finish?
Confused by the endless abrasive options – stones, papers, compounds, oh my!? Choosing the wrong one can ruin hours of work or leave you far from the desired finish. Selecting the correct abrasive type and grit sequence is fundamental to achieving that flawless, specified mold surface finish efficiently.
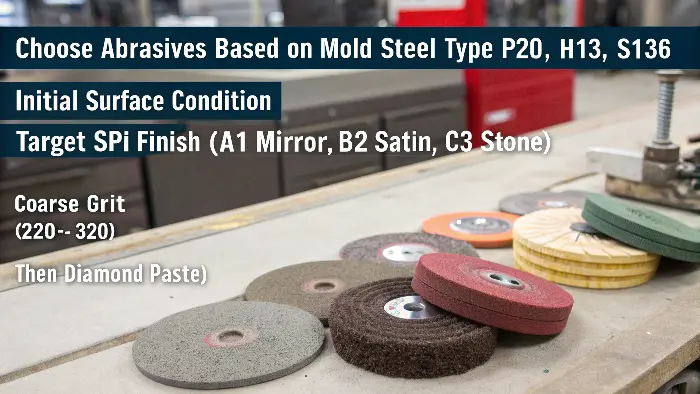
Pick abrasives by considering the mold steel type (e.g., P20, H13, S136), its initial surface condition after machining/EDM, and the target SPI finish (e.g., A1 mirror, B2 satin, C3 stone). Start with a coarser grit (e.g., 220-320) to remove machine marks, then progressively move to finer grits (e.g., 400, 600, 800, up to 3000, then diamond paste) ensuring all scratches from the previous step are meticulously removed.

This is where the rubber meets the road, or rather, the abrasive meets the steel! Honestly, choosing the right abrasives is probably THE most critical part of the entire polishing process. Get this wrong, and you’ll be chasing your tail, trying to fix scratches that seem to appear out of nowhere, or you’ll never reach that beautiful SPI A-1 mirror finish your client (and Michael, your inner perfectionist business owner!) is expecting. It’s not just about grabbing any sandpaper or stone off the shelf. There’s a science and an art to it.Decoding Abrasives for Mold Polishing
There are a few key things to think about when you’re stocking up on abrasives or planning a polishing job:
- Abrasive Material – The Heart of the Tool:
- Aluminum Oxide: A good all-rounder, very versatile. Works well on many common tool steels like P20. You’ll find it in grinding wheels, many abrasive stones, and coated abrasives (sandpaper). It’s tough and cost-effective.
- Silicon Carbide: Harder and sharper than aluminum oxide. Excellent for harder steels (like hardened H13 or stainless mold steels like S136) and for achieving finer finishes faster. It fractures during use, exposing new sharp edges, which keeps it cutting well.
- Ceramic Abrasives: These are very tough, sharp, and durable. Great for aggressive stock removal on hard-to-grind materials or for long life in demanding applications. Often found in high-performance ceramic fiber stones.
- Diamond: The hardest material known, period! Used in pastes, slurries, plated files, and some bonded tools. Indispensable for the final polishing stages, especially when you’re aiming for those SPI A-level mirror finishes (A1, A2). Nothing else gives you that ultimate shine on hard steels.
- Grit Size – The Pathway to Perfection: This is all about progression. You must start with a grit coarse enough to efficiently remove the initial roughness and machine marks (or EDM scale). Then, you work your way down systematically to finer and finer grits. Crucially, each step must remove ALL the scratches from the previous, coarser step. If you skip grits, or don’t spend enough time with an intermediate grit, you’ll pay for it later with a hazy finish or visible deeper scratches.
A Typical Grit Progression Example for a High-Gloss Finish (SPI A-2/A-1):- Machining/EDM marks removal: 120 – 220 grit stones (e.g., Boride stones)
- Initial smoothing: 320 – 400 grit stones/paper
- Pre-polishing: 600 – 800 grit paper/ceramic stones
- Fine Polishing: 1000 – 1200 – 1500 grit paper (often silicon carbide wet-or-dry)
- Lapping/Mirror Finish: Diamond paste (e.g., starting at 15 micron, then 9 micron, 6 micron, 3 micron, and finally 1 micron for the highest gloss), applied with felt bobs, wood laps, or soft cloths. The direction of polishing should be changed with each grit if possible, to make it easier to see if previous scratches are removed.
- Form of Abrasive – The Delivery System:
- Stones: Come in various shapes (square, round, triangular) and sizes for different contours and access.
- Paper/Cloth Sheets/Rolls: Flexible, for hand or power tool use (e.g., on sanding blocks or reciprocating profilers).
- Pastes/Compounds: Abrasive particles suspended in a carrier. Used with felt bobs, wood laps, or cloth for final polishing.
- Mounted Points/Burs: Abrasive bonded to a shank, for use in rotary tools.
I always, always stress the importance of cleaning meticulously between grit changes. Any leftover coarser particles from a previous step will get dragged across the surface by your finer abrasive, creating new, rogue scratches that will sabotage your efforts. Use compressed air, a clean solvent, and fresh cloths. Think of it like painting a car – you wouldn’t leave dust on the surface before applying the clear coat, right? Same deal. This attention to detail is what separates an okay finish from a truly exceptional one. And for businesses like Michael’s, that exceptional finish means high-quality parts, fewer rejects, and very happy customers.Conclusion
Mastering mold polishing with the right tools and techniques isn’t just skill; it’s essential for quality parts and business success. Invest wisely, practice diligently, and your molds will shine. 🔥
- Abrasive Material – The Heart of the Tool:
