
You have a great plastic part, but it feels cheap and hard. Your customers complain that it slips out of their hands. You are losing sales. Overmolding with TPE fixes this. TPE adds a soft grip, seals out water, and makes your product feel premium.
Overmolding with TPE is a process where you mold a soft layer of Thermoplastic Elastomer (TPE) over a harder plastic part. To do it right, you must choose compatible materials so they stick together. You also need to design the hard part with mechanical locks, like holes or grooves, to hold the soft rubber tight. Correct wall thickness and gate placement prevent defects like warping or short shots.
Adding a soft grip sounds simple. Many things can go wrong if you do not plan ahead. Let us look closely at how to master TPE overmolding and make parts your customers will love to hold.
Why Choose TPE for Your Next Overmolding Project?
Metal or hard plastic tools cause blisters. People hate using tools that hurt their hands. If your product causes pain, they will buy from your rival. TPE solves this by adding a soft, rubbery touch.
You should choose TPE for overmolding because it feels soft, stops slipping, and acts like a seal against dust and water. TPE blocks noise and absorbs shocks if the part falls. It is also cheaper and faster to mold than regular rubber because it melts like plastic. This makes it perfect for tool handles, medical devices, and electronics.
The Magic of TPE
TPE stands for Thermoplastic Elastomer. It stretches like rubber. It melts like plastic. When I first started working in the mold factory, we used old-school rubber for soft parts. Old rubber takes a long time to bake inside the mold. It slows down the whole factory. TPE changed everything for us. We can mold TPE very fast in a normal injection machine. This saves a lot of time and money.
TPE Beats Other Soft Materials
You might wonder why we do not use silicone or TPU. Let us look at the choices. Silicone handles high heat very well. Silicone is very expensive and takes special machines to mold. TPU is very strong and hard to scratch. TPU does not feel very soft in your hand. TPE gives you the best mix. It feels great, costs less, and is very easy to mold.
Making Products Better
I have seen many plain plastic parts become top sellers just by adding a TPE grip. Think about a toothbrush. A hard plastic toothbrush is hard to hold when it is wet. A toothbrush with a TPE handle is safe and comfortable. This small change makes the product much better.
| Material Type | Softness | Mold Speed | Cost | Best Use Case |
|---|---|---|---|---|
| TPE | Very Soft | Fast | Low | Hand grips, seals, consumer goods |
| TPU | Medium | Fast | Medium | Wheels, tough cases |
| Silicone | Very Soft | Slow | High | High heat, medical tools |
This table shows why TPE wins for most everyday products. It gives you a great feel without costing too much money.
How Do You Ensure Chemical and Mechanical Bonding in TPE Overmolding?
The worst thing that can happen is peeling. You make a batch of parts, and the soft rubber peels off the hard plastic. Your client rejects the whole order. You must fix the bond.
To ensure a strong bond in TPE overmolding, you must use both chemical and mechanical bonds. For a chemical bond, pick a TPE that shares the same base chemistry as your rigid plastic, like using a PP-based TPE over a PP part. For a mechanical bond, design the hard part with holes, undercut grooves, or textured surfaces so the TPE locks into place when it cools.
What is a Chemical Bond?
A chemical bond happens when the hot TPE melts into the surface of the hard plastic. They become one single piece. This only works if the two plastics are friends. They must have similar chemistry. Polypropylene (PP) is the best friend of most TPE materials. They mix perfectly. If you try to stick standard TPE onto a cold metal part, it will fail. There is no chemical bond at all.
Why You Need a Mechanical Bond
Sometimes a chemical bond is not strong enough. People pull and twist the soft rubber. You need extra safety. This is where a mechanical bond comes in. You must change the shape of your hard plastic part. You can add holes through the hard part. The hot TPE flows through the holes. When the TPE cools, it locks itself in place. You can also add grooves along the edges.
My Experience with Peeling
I remember a client who made a power drill. The soft handle kept peeling off. We looked at the design. They only relied on the chemical bond. We changed the hard plastic design. We added deep grooves and a few small holes. The hot TPE grabbed these holes tightly. The peeling problem stopped right away.
| Bond Type | How It Works | When to Use | Safety Level |
|---|---|---|---|
| Chemical | Materials melt together | When plastics match | Good |
| Mechanical | TPE grabs holes or grooves | Always recommended | Best |
| Combined | Both melting and grabbing | For parts that get twisted | Perfect |
Always use both methods. You will never have to worry about the soft parts falling off in your customer’s hands.
What Are the Key Design Rules for TPE Overmolding?
Bad part design ruins good molds. You try to inject the soft TPE, but it leaves sink marks or flashes over the edges. You waste time fixing the mold. Good design stops these problems early.
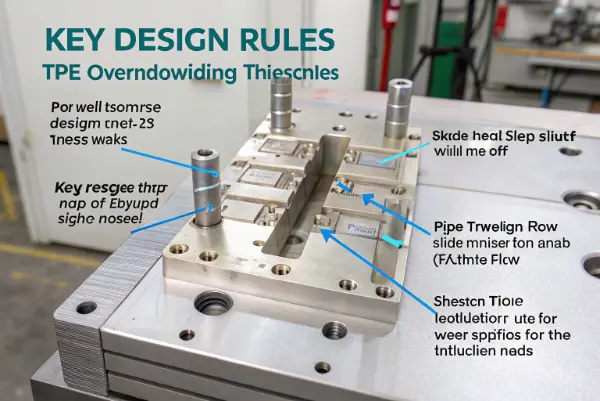
The key design rules for TPE overmolding include keeping the TPE wall thickness between 1.5mm and 3.0mm to avoid sink marks. You must design a clear shut-off area where the TPE ends, using a small step of 0.5mm to 0.8mm to hide the transition. Also, place the injection gate in the thickest part of the TPE to ensure the material flows smoothly.
The Rule of Thickness
Thickness is the most important rule. If you make the TPE too thin, it will cool too fast. The hot material will stop flowing. You will get short shots. A thickness of 1.5mm is very safe. If you make the TPE too thick, it will shrink too much. You will see ugly dips on the surface. These dips are called sink marks. Keep the thickness under 3.0mm to stay safe.
Creating Clean Shut-offs
A shut-off is where the soft TPE meets the hard plastic. You do not want a messy edge. The soft material will bleed over the hard part. You must design a tiny step on the hard part. This step gives the steel mold a place to press down hard. The steel blocks the TPE from leaking. A step of 0.8mm works perfectly. It makes the final part look very sharp and clean.
Managing Shrinkage and Flow
TPE acts like a thick syrup. You must put the injection gate in the thickest area. The TPE pushes from thick areas into thin areas easily. If you push from thin to thick, the pressure drops. The part will look bad. I always tell my design team to check the flow path twice.
| Design Feature | Good Rule | Why It Matters |
|---|---|---|
| Thickness | 1.5mm to 3.0mm | Stops sink marks and short shots |
| Shut-off step | 0.5mm to 0.8mm | Stops messy bleeding edges |
| Gate location | In the thickest part | Keeps pressure high for easy flow |
| Sharp corners | Round them out | Sharp corners cause stress and tears |
Follow these simple rules. Your mold will run smoothly. Your parts will look exactly how you want them to look.
How Do You Select the Right TPE Material for the Rigid Substrate?
Picking the wrong TPE is a costly trap. You buy cheap TPE, but it will not stick to your ABS part. You have to scrap the material and start over. Matching materials correctly saves you money.
To select the right TPE material, you must match its chemistry to the rigid substrate. Polypropylene (PP) is the easiest substrate to bond with most standard TPEs. If your hard part is ABS or Polycarbonate (PC), you must buy special, modified TPE grades made just for those plastics. Always ask your material supplier for a compatibility chart before buying.
Understanding Hard Plastics
The hard plastic is called the substrate. This is the base of your part. The most common base is PP. PP is cheap and very easy to bond with TPE. I love working with PP. Sometimes, a product needs a stronger base. You might need ABS or PC. These plastics are very tough. They drop on the floor and do not break. Standard TPE hates ABS and PC. They will not stick together.
Buying the Right TPE Grade
You must read the label on the TPE bag. Chemical factories make special TPE for ABS parts. They mix extra chemicals into the TPE so it will bite into the ABS. This special TPE costs a little more. It is worth the money. If you try to save pennies and buy standard TPE for an ABS part, you will lose dollars later when the parts fail.
Hardness Matters Too
TPE comes in different levels of softness. We measure this with a scale called Shore A. A Shore A of 30 feels like a soft gel seat. A Shore A of 80 feels like a shoe heel. You must pick the right softness for the user. A power tool needs a firm grip around 60 Shore A. A baby toy needs a very soft grip around 30 Shore A.
| Hard Plastic Base | Best TPE Grade | Bonding Difficulty |
|---|---|---|
| Polypropylene (PP) | Standard TPE | Very Easy |
| ABS | Modified TPE for ABS | Medium |
| Polycarbonate (PC) | Modified TPE for PC | Medium |
| Nylon (PA) | Special TPE for PA | Hard |
Always talk to your plastic seller. Show them your hard part material. They will give you the exact TPE you need.
Conclusion
Overmolding with TPE makes your products soft, safe, and easy to hold. You must match the TPE to your hard plastic to ensure a strong chemical bond. Always design your hard parts with mechanical locks like holes or grooves. Keep the TPE thickness even and make clean shut-offs. Following these steps will help you create perfect, premium products every time.