
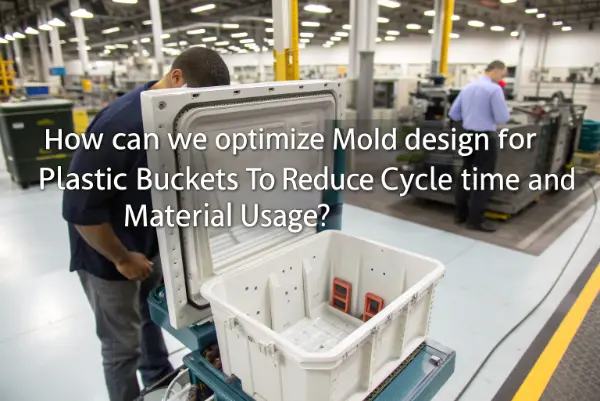
Making plastic buckets seems easy. But high cycle times and wasted plastic eat into your profits quickly. You lose money every second the mold stays closed. You throw away cash with every bit of scrap. I can show you how to fix this by changing your mold design.
You optimize plastic bucket molds by using three main methods. You must shorten the cooling time, reduce the shot size, and avoid waste in the runner or wall sections. You can achieve this by designing thinner walls that remain strong. You need better gate and runner layouts. You must also add efficient cooling channels to pull heat out fast. These steps lower costs and speed up production.
Many factory owners struggle with slow production lines. I see this often in my work at CKMOLD. Clients ask me how to make their machines run faster. They want to know how to save plastic resin. I tell them the secret lives inside the mold itself. You need to look at the design details carefully. Let us look at the best ways to improve your bucket molds right now.
What Are the Best Mold Design Choices for Plastic Buckets?
Choosing the wrong mold design slows down your entire factory. Thick walls waste plastic and take forever to cool. Bad gates cause part defects. You can fix these issues by making smart design choices early in the process.
You must keep wall thickness at the absolute minimum that still meets impact requirements. Thinner walls use less plastic and cool down much faster. You should also use balanced gate and runner layouts. Better flow paths reduce pressure loss and shorten fill time to prevent bad parts.
Dive Deeper: Making Smart Design Choices
When I started working in a mold factory many years ago, I noticed a big problem. Many designers made bucket walls too thick. They thought thicker meant stronger. This is not always true. You just waste material. Minimizing wall thickness works well to reduce material usage without hurting the bucket’s strength. You just need the right structure.
You also need good cooling channels. Efficient cooling channels pull heat out of the thick sections fast. The base and handle areas hold the most heat. Better heat transfer drives down your cycle time. Optimizing cooling channels accelerates heat dispersion. This speeds up the process and makes the final product look better.
Another choice is your steel quality. Implementing high-quality steel for molds improves durability. Good steel handles fast cycles better. It reduces maintenance stops. It prevents cycle interruptions. I always tell my clients to invest in good steel up front.
We can also look at hot runners. Adopting a hot runner system decreases cycle time. It maintains a consistent material temperature. Hot runners eliminate cold-runner waste every single cycle. This is the clearest way to cut your material usage.
Let us look at a simple breakdown of design choices:
| Design Choice | Main Benefit | How It Works |
|---|---|---|
| Thinner Walls | Saves plastic | Uses less resin per shot |
| Balanced Gates | Prevents defects | Creates smooth plastic flow |
| Hot Runners | Removes waste | Keeps plastic melted |
| Good Steel | Stops breakdowns | Resists wear and tear |
You can use CAD and CAM technologies to help with this. Utilizing CAD and CAM streamlines mold design processes. It leads to highly efficient production cycles. You can plan everything perfectly before you cut any metal.
How Do Bucket-Specific Tactics Save Time and Material?
Buckets have unique shapes that cause specific cooling problems. Thick bases and heavy rims trap heat. This heat slows down your machines. You can change the geometry of the bucket to solve these problems.
Buckets usually feature a thick base, a wide wall, and a heavy rim. The thickest zones dominate the cooling time. You reduce unnecessary thickness in the rim by using ribs instead of solid plastic. Smooth transitions help prevent warpage while using much less resin per part.
Dive Deeper: Changing the Bucket Shape
I remember a client who made large paint buckets. His cycle time was very slow. I looked at his bucket design. The rim was a solid chunk of plastic. We changed the solid rim to a ribbed design. We saved material and cut his cooling time in half. For buckets, it is always better to strengthen with geometry than with mass. Ribs and careful radius design preserve performance. They lower the shot weight and speed up the cooling phase.
You should also look at lightweight composite materials. Incorporating lightweight composite materials in mold design reduces material usage. You do not sacrifice any performance.
You must focus on the base of the bucket. The base takes the impact when people drop the bucket. Many designers make the base very thick. You can use a slight dome shape instead. A dome adds strength without adding extra plastic. You can also add localized bosses for handle attachments. This avoids making the whole top ring thick.
Let us break down the geometry changes:
| Bucket Area | Old Method | New Optimized Method |
|---|---|---|
| Top Rim | Solid thick plastic | Hollow with support ribs |
| Bottom Base | Flat and thick | Domed and thinner |
| Handle Mounts | Thick side walls | Localized support bosses |
| Corners | Sharp inside edges | Smooth large radius |
You need to work with your material suppliers too. Collaborative design with material suppliers helps you tailor the plastic polymers. You can get a plastic mix made just for your efficient mold. This optimizes your material usage even more. You need to ask your supplier what resin flows best in thin walls. This simple question saves a lot of money in the long run.
Why Do Process Settings Matter for Mold Efficiency?
You can have a perfect mold, but bad settings will ruin your production. Wrong pressures cause flash. Long dwell times waste seconds. You must tune the machine process to get the real value from your mold design.
Even a good mold runs slowly if the process is not tuned well. Fine-tuning the injection pressure, packing, and cooling time reduces flash and unnecessary dwell time. Scientific molding helps you find the shortest stable cycle instead of guessing at safe machine settings.
Dive Deeper: Tuning the Machine Right
When I ran my own injection machines, I hated guessing the settings. I wasted hours turning dials. Today, we use data. Scientific data-driven process setup helps you find the exact cycle time you need. The fastest cycle is only useful if the part meets quality targets.
You can use advanced simulation software for this. Using simulation software significantly reduces cycle time. It predicts the optimal mold flow and cooling strategies before you start. You know exactly what settings to use.
We also have new technology to help us. Advanced machine learning algorithms can predict mold parameters. They adjust the settings dynamically. This creates optimized cycle times all day long. The machine learns as it runs. Continuous mold monitoring technology helps you find inefficiencies early. You can make real-time adjustments to improve cycle efficiency.
Here is how you control the machine settings:
| Machine Setting | Bad Result | Good Result |
|---|---|---|
| Injection Pressure | Flash and stress | Full part without flash |
| Packing Time | Wasted time | Perfect part weight |
| Cooling Time | Warped parts | Fast ejection |
| Melt Temperature | Burned plastic | Smooth fast flow |
You should set the cooling time based on the thickest part of the bucket. But you must not overpack the mold. Overpacking forces too much plastic into the cavity. This makes the bucket heavier than it needs to be. It wastes plastic. It makes the machine work too hard. You must find the balance. You pack just enough plastic to prevent sink marks. Then you stop. This saves plastic on every single shot.
How Can We Actually Reduce Material Usage in Production?
Throwing away plastic is like throwing away money. Cold runners create scrap. Overpacking creates flash that you must trim off. You can stop this waste by changing how you handle the resin during production.
The most practical way to save material is to reduce the runner size or switch to hot runners. You must minimize overpacking that creates flash. You can also regrind and reuse runners if the part requirements allow it. Choosing a better flowing resin also helps.
Dive Deeper: Saving Plastic Every Cycle
I visited a factory in Ohio last year. The owner was Michael. He had bins full of plastic waste from cold runners. I told him he was throwing away his profits. He needed to change his material strategy. If you cannot afford a hot runner system, you must at least reduce your cold runner size. Make the runner channels smaller. You will throw away less plastic.
You should also look at regrinding. Regrind and reuse sprues or runners. You can grind up the clean waste plastic. You mix it back into the virgin plastic. You must check if your bucket application allows this. Food buckets might need 100% new plastic. But paint buckets can often use some regrind.
You can choose a different plastic resin too. Choose a resin grade that flows well at lower temperatures. This saves heating energy. It also flows into thin walls much easier.
Let us look at ways to save material:
| Saving Method | How to Do It | Cost to Implement |
|---|---|---|
| Hot Runners | Buy a hot runner manifold | High |
| Smaller Cold Runners | Machine the mold channels smaller | Low |
| Regrind Plastic | Grind scrap and mix it back in | Medium |
| Better Flow Resin | Buy a different plastic grade | None |
You have to stop overpacking. I mentioned this before, but it is very important for material savings. Flash is pure waste. Trimming flash takes time. The trimmed flash goes in the trash. You tune the hold pressure to stop flash. You save plastic. You save labor time. Your buckets look cleaner and more professional.
What Is the Best Design Sequence to Follow?
You cannot optimize a mold by guessing. You need a clear plan before you cut any steel. Skipping steps leads to mistakes. Mistakes in mold making are very expensive to fix later.
You must follow a strict sequence. First, define the bucket’s load and stacking needs. Second, set the lowest safe wall thickness. Third, optimize the gate location and runner balance. Fourth, add cooling where the mold runs hottest. Finally, validate everything with mold-flow analysis.
Dive Deeper: The Right Steps to Build the Mold
In my trading company, I see many bad molds. The designers rushed the process. They cut the steel too early. You must never rush the design sequence.
First, you define what the bucket must do. Will it hold heavy water? Will people stack ten buckets on top of each other? You must know the load requirements.
Second, you set the wall thickness based on those needs. You make it as thin as you safely can.
Third, you place the gates. You optimize the gate location. You balance the runners so the plastic flows evenly.
Fourth, you add the cooling lines. You put the cooling lines very close to the thick plastic areas.
Finally, you test it on the computer. You validate with mold-flow analysis before cutting steel. The computer shows you how the plastic will flow. It shows you where the heat will trap.
Here is the sequence you must follow:
| Step Number | Action | Why It Matters |
|---|---|---|
| Step 1 | Define needs | Tells you how strong it must be |
| Step 2 | Set thickness | Saves plastic and cooling time |
| Step 3 | Place gates | Prevents flow marks and short shots |
| Step 4 | Add cooling | Removes heat to speed up cycle |
| Step 5 | Run simulation | Catches mistakes before cutting metal |
If the simulation shows a problem, you go back to step two or three. You change the thickness or move a gate. You run the simulation again. You only buy the mold steel when the computer shows a perfect cycle. This simple sequence saves my clients thousands of dollars. It gives you a mold that runs fast and wastes almost zero plastic from day one.
Conclusion
Optimizing your plastic bucket mold requires careful planning. You must design thinner walls, use smart geometries like ribs, and install efficient cooling channels. Tuning your machine settings and switching to better flow resins will stop plastic waste. Following a strict design sequence ensures your mold runs fast. These simple steps will lower your cycle times, reduce material usage, and make your factory much more profitable.