
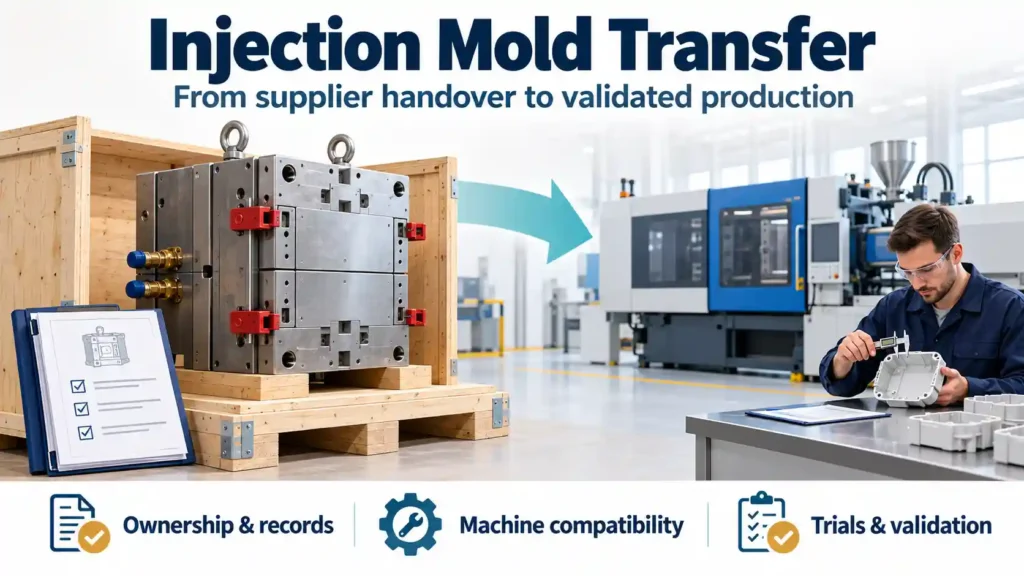
The mold connection with the original manufacturer ends at some point during a mold’s life. Perhaps it’s lost its quality. Perhaps your production schedule has simply grown too long. Perhaps it is the supplier’s end, or maybe you’ve decided to relocate manufacturing nearer to your end market? For whatever reason, you must remove your mold from one factory and start it in another; you must not lose any time, part quality, or tooling investment.
Injection molding involves many mold transfers. They are also the place where much money is lost when purchasers proceed without realizing that the new supplier can’t simply insert the mold into the machine and start making parts. This guide explains everything from verifying ownership to validated production in the new facility, including tips on what to look for, what to gather, and where things often go wrong.
Confirm that you own the mold.
This step prevents transfers before they start. If your purchase order states that the tooling is buyer-owned property, you can generally request its transfer, but ownership alone does not give you unrestricted transfer rights or guarantee a production-ready handover. Take the original PO and read the clause about ownership. You want to see language that the mold is for the buyer and the buyer may request it be transferred at any time, and the terms on which the supplier will release the tooling. Before planning the move, also confirm any outstanding payment obligations, the release conditions, the tool’s current condition, the documentation that will be handed over, and who pays the transfer costs.
When tooling costs are amortized into the part price, ownership and release conditions depend on the contract. If the agreed purchase volume has not been fulfilled, confirm whether any unrecovered tooling balance or other agreed charges must be settled before transfer.
If a supplier delays delivery of a mold that the buyer has paid for in full, raise the delay with the supplier directly and ask for a clear release date. This is worth sorting out face to face before you bring lawyers in, but don’t leave it ambiguous. Get it in writing that the mold will be released.
Gather your mold documentation package.
The documentation accompanying the mold is as important as the steel. If not, the other manufacturer is to recreate your tool rather than run it. Gather the following information prior to the time the mold is shipped:
Original 3D Mold Design & 2D Part Drawing (including the latest revision); location of gates, layout of runners, diagrams for cooling channels, and ejection details. Technical details of steel type and hardness for core and cavity. Documented accumulated shot count, the original agreed mold life, the maintenance history, and a current condition assessment. The latest production run and the last dimensional inspection report (CMM or other agreed measurement data) are complete. Process parameters: barrel temperature, injection pressure, hold time, cooling time, and cycle time. Material characteristics such as resin grade, color, and approved alternatives. All mold changes, repairs, and/or component replacements.
With a supplier such as CKMold, this documentation can be included in the project deliverables, depending on the agreed project scope. Annotated design documents from the mold design process can then track the tool throughout its life. Not all suppliers are as organized, so get your files ready early.
Assess the condition of mold.
If you are sending a mold to a new manufacturer, you must know what shape the mold is. You’re in a different position with an 800,000-shot mold than with a 200,000-shot mold.
Request the current supplier to provide the most up-to-date maintenance log. Examine parting line surfaces, gate areas, ejector pins, and cooling channels. Surface wear on the cavity side is evident from changes in part finish quality. Ejector pins wear out and/or get stuck in the workpiece. Obstruction or corrosion in cooling channels increases cycle times and causes warpage.
It’s easier to identify the need for refurbishment before transfer than after. You can determine this during incoming inspection by the receiving manufacturer, but consider scheduling a new gate insert or new ejector pins in your timeline and budget. Repair work needs an assessment of the mold and a separate quotation. If the degree of wear is severe enough to warrant a new tool, the CKMold injection mold cost calculator can help you budget for a replacement mold.
Build safety stock before you move anything.
The production gap is generated due to a mold transfer. The old supplier stops running parts; the mould is shipped to the new supplier, who performs the inspection and trial, and then production resumes. That time frame ranges from two weeks to two months, depending on the tool’s complexity and whether it requires rework.
Build up enough finished parts in stock before the transfer. Determine your consumption rate in the time frame you are planning to transfer into and allow for any buffers. Allow additional safety stock if repairs or refurbishment could extend the production gap.
This is the only step the purchaser is most likely to miss, as it requires planning while the current supply agreement is still in effect. Do it anyway. When you run out of parts during the transfer, you are under pressure to rush the validation from the new supplier, and that’s when quality issues begin.
Coordinate the physical move.
Injection molds are rather heavy precision tools. A multi-cavity production mold may be several tons in weight, and the machined surfaces inside the mold are ground to micron tolerances. Shipping one is not equivalent to shipping a box of parts.
Clean, dry, and rust-prevent all machined surfaces before leaving the facility. Cooling channels need to be blown out and treated. Slides, lifters, and other moving components should be secured according to the mold’s transport procedure. Any necessary disassembly should be performed, documented, and protected by qualified personnel. The mold must be secured and positioned on a pallet or crate to support the weight.
Customs papers will also be required for international transfers. When moving a mold from a Chinese supplier to a domestic facility, as well as from one country to another, confirm the HS code, arrange for shipping insurance for the replacement cost of the mold and clarify who pays the import duties. Agree on the Incoterms rule in advance. Under FOB, which applies to sea or inland waterway transport, risk generally passes to the buyer once the mold is loaded aboard the nominated vessel at the named port of shipment. For containerized or multimodal shipments, FCA may be more appropriate.
Have the current supplier take pictures of the mold before it is crated, including the parting line surfaces, runner system, and places of visible wear. These photographs will serve as the standard for the receiving inspection.
What the receiving manufacturer should do at intake
Upon arrival of the mold at the new facility, the mold must be subjected to a defined intake process and not be directly fed to a press. The receiving manufacturer checks the steel condition, cooling channel flow, fit of any moving parts and any shipping damage to the mold against the documentation package.
The next step is a benchmark trial (also known as a T0 run). The new manufacturer mounts the mold, uses the process parameters in the documentation as a reference, and processes a few parts in a short batch. These components are compared to the dimensional information from the previous production lot from the old plant. The purpose is to ensure that the mold is able to make the same parts in the new setting. Historical settings are only a reference: the receiving manufacturer must establish and validate settings that suit its own equipment, material handling, and cooling conditions.
CKMold reviews the transferred mold’s condition, available documentation, and compatibility with the receiving equipment before trial molding. Any required repairs or interface modifications are assessed and agreed before work proceeds. For details, see CKMold’s mold transfer service.
Check and validate parts against the original specifications.
The benchmark trial is a trial that informs you whether the mold works or not. Validation will tell you whether parts are suitable for manufacturing. These are two different questions.
Conduct a first article inspection (FAI) on parts from the new facility. Measure critical dimensions on the new parts, rather than relying on the previous report from the old supplier, and compare them to the tolerance specifications. Inspection methods, sampling, and cavity coverage should follow the agreed validation plan. Inspect surface finish, gate vestige, flash, sink marks, and cosmetic specifications, and include assembly and functional checks where applicable.
This is higher for regulated industries. For automotive programs under IATF 16949, a change in manufacturing location usually requires customer notification, approval, and PPAP resubmission, so confirm these requirements with your customer before relocating the mold. Your quality system may require a formal change notification for medical device work under ISO 13485. If requalification is not required for your industry, carry out any capability studies (such as Cpk) for your critical dimensions according to the agreed validation plan before releasing production.
Do not approve production because of only a few good trial run parts. Run parts at production speed, with the quantity, sampling, and cavity coverage set by the agreed validation plan, to gather the data needed to assess repeatability.
Common problems during mold transfers and how to avoid them
The top problem is machine compatibility. The mold was constructed for one manufacturer’s press, and the new manufacturer’s equipment is different from it. Compatibility depends on the clamping force the mold requires, shot capacity, mold dimensions and thickness, tie-bar spacing, opening and ejection travel, and interfaces such as the locating ring and nozzle. A nozzle-radius mismatch is a sealing and compatibility issue: the nozzle may not seal properly against the sprue bushing, which can cause leakage. Check machine specs with the receiving manufacturer prior to mold shipment.
Hot runner systems can cause problems if the new facility uses a different controller or if the connector configuration varies. Send the Hot Runner documentation to the receiver ahead of time, including the wiring diagram and controller model.
Facilities often vary in how they cool their hookups. The number of circuits, connector size, or flow rates could differ from the new facility. You can use adapters, but someone will need to map out the circuits before that mold hits the ground.
Process parameter gaps occur when there is inadequate documentation or when the old supplier used undocumented process parameters in the mold run. That’s why benchmark trial data is more important than a parameter sheet. The new manufacturer will likely need to create a process optimized for their equipment, so this can take time.
Cosmetic changes can surprise buyers even when dimensions are in spec. Surface gloss or color may vary slightly due to a different press, water temperature, or a different batch of resin. Set appearance acceptance criteria, using reference samples, before transfer.
Frequently asked questions
What is the average transfer time for a mold?
Validated production at the new facility could range from 4 to 12 weeks from the decision to move. A simple, single-cavity mold can be transferred within a month with complete documentation, without refurbishment. If the mold is a complex multi-cavity mold, if it requires repairs, new PPAP documentation, or international shipping, then it will take more time.
Is it possible to transfer a mold from a foreign supplier to a domestic producer or the other way around?
Yes. International mould transfers happen often. The logistics are more complex (customs, duties, longer shipping times, risk of corrosion during ocean freight), but the procedure is identical. Properly preserve the mold for transportation and insure it for replacement value.
Who is responsible for the mold refurbishment following a transfer?
Responsibility depends on the cause of the wear or damage, any warranty, the maintenance obligations, and the terms agreed in the original PO. If the mold is damaged as a result of poor maintenance by the previous supplier, the buyer may have a claim against that supplier. Repair work requires an assessment and a separate quotation.
What if the mold is damaged during shipping?
Shipping insurance protects equipment during transportation. Take photos of the mold before it leaves the old facility and as soon as it arrives at the new facility. File claims promptly with the carrier and the insurer.
What about a new PPAP or validation following a mold transfer?
For automotive work, confirm customer notification, approval, and PPAP resubmission requirements with your customer before relocating the mold. For other industries, consult your quality system requirements. It’s good practice to run a validation batch at the new facility even if it isn’t required.
Mold transfer checklist:
Before shipment
☐ Verify in writing that you own the mold, and confirm payment obligations, release conditions, and who pays the transfer costs.
☐ Gather the paperwork: 3D/2D drawings, steel specs, accumulated shot count, original agreed mold life, maintenance history, process parameters, and inspection data.
☐ Assess the mold’s physical condition and get a separate quotation for any repairs it needs.
☐ Check machine compatibility with the receiving manufacturer.
☐ Establish safety stock to cover the production gap.
☐ For automotive programs, confirm customer notification, approval, and PPAP resubmission requirements.
During the move
☐ Clean the mold and cover it with rust preventive.
☐ Secure slides, lifters, and other moving components according to the mold’s transport procedure.
☐ Take pictures of the mold before crating.
☐ Make shipping arrangements, agree on the Incoterms rule, and arrange the appropriate insurance.
At the new facility
☐ Inspect the mold on arrival and document its condition.
☐ Run a benchmark trial, using the historical process parameters as a reference.
☐ Do first article checks against the original specification, including assembly and functional checks where applicable.
☐ Run a pilot batch according to the agreed validation plan.
☐ Obtain customer approval before moving to production.
About CKMold
CKMold was founded in 2002 and designs and builds injection molds and produces molded parts. Its management systems are certified to ISO 9001 and ISO 14001. Its ISO 13485 certification is limited in scope to plastic housings for infrared thermometers, and its IATF 16949 certification covers injection molded plastic parts and excludes product design. A CKMold project typically runs through nine stages, from product DFM analysis to mold design, tooling, trials, and production, and the company has in-house injection molding capacity up to 1200 tons. Documentation and other deliverables depend on the agreed project scope.
The CKMold injection mold cost calculator provides a rough cost estimate before requesting a formal quote. In contrast, the injection molding capabilities page provides machine tonnages, compatible resins, and industries served.