
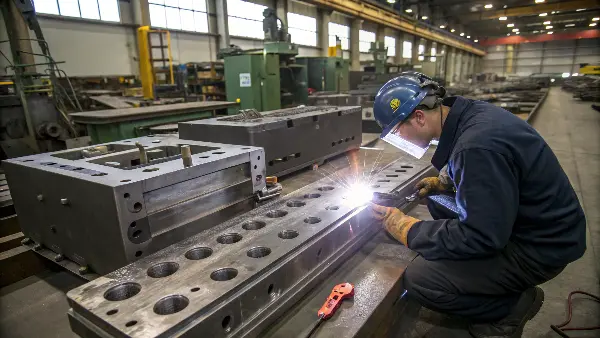
Do you have a problem of injection molding such as burn, short shots, or weak weld lines? It could be the machine or the material but the actual offender is usually lurking in the shadow. The problems result in delays during production and wastage of materials which are going to eat into your profits and frustrate you. The trick is to realize that vent design that is successful on one plastic may be a complete failure on another.
Injection mold venting cannot be selected from geometry alone because plastics differ in viscosity, thermal sensitivity, moisture behavior, filler, gas generation, flash tendency and processing temperature. A vent that works for an unfilled commodity resin may be inadequate or too aggressive for a high-temperature, filled or moisture-sensitive grade. Venting should be reviewed whenever resin, grade, color, filler or process window changes materially.
Related CKMOLD resources: mold design, production injection molding, mold testing and validation.
This, yes, the proper venting is very much specific on the plastic material that one uses. The viscosity, melt flow rate, and profile of gas emissions of each polymer have a special influence on the optimal vent depth and position. As an illustration, in low-viscosity materials such as Nylon the vents must be very shallow (in the range of 0.012-0.025 mm) to avoid flash, whereas rigid PVC which may release corrosive gases must have large vents made of corrosion-resistant steel. These material-specific requirements need to be mastered to ensure consistency and high quality production and prevent the expensive damage of molds.

What Are the Fundamental Principles of Vent Design?
Do you think that you are guessing where to put vents in your molds? You can put in a couple on the parting line and wish to luck and only to discover that you still have a problem. This is a trial and error method which is not efficient. It may cause costly moulding adjustments and deadline failure, simply due to the fact the fundamental air flow principles were not observed. You must not depend on guesswork, you must have a reliable strategy.
The principle behind this is to establish an easy way out of air and gas whilst preventing the molten plastic. The last points should be filled with vents and where the lines of the welds occur since they are the areas where airtightness can occur through traps. They should also be deep enough so as to allow gas to escape rapidly and at the same time should be shallow enough to ensure that the material does not flash. An ordinary vent has a shallow land area and a higher relief area to make sure that the air can escape out of the block of the mold fully.
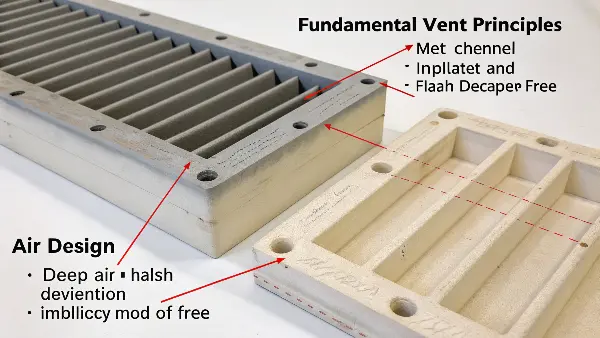
Let’s dig into the core mechanics. A good vent system has three key parts. First is the vent location. You must place vents at the absolute end of the flow path. Think of filling a bottle with water; you need to leave a space for the air to get out. It’s the same in a mold. I generally use mold flow analysis to pinpoint these “last-to-fill” areas accurately. Weld lines are another critical spot, as two melt fronts trap air when they meet. Second is the vent depth and land. The depth is the most critical dimension and is entirely material-dependent, which we’ll cover extensively. The land is the short, shallow section (usually 1-5 mm long) that freezes the plastic before it flashes. If the land is too long, the gas can’t escape effectively. Third is the relief channel. This is a deeper channel (0.5-1.5 mm deep) cut behind the land. Its job is to collect the gas from the shallow vent land and transport it out of the mold entirely. Without a proper relief channel, the air has nowhere to go, and the vent becomes useless.
How important is Mold Design?
The construction of the mold vents is also important in guaranteeing good ventilation of gases. A prudent choice of the vent placement will assist in the realization of the optimal airflow and the reduction of defects. Avoiding poor moulding can be enhanced in strategic vent site positions.
Another necessary consideration with regard to design of the mould is the vent size. Smaller vents can also fail to carry away a sufficient amount of gases resulting to defects. On the other hand, when too large in size, vents will lead to material spillage and molds. The difficulty is to balance the right way.
The vents applied in designing the mould have different kinds with their purposes:
- Edge Vents: This is located at the edge of the mold to release the gas fast.
- Flash Vents: Vents that are slim, and through which the gas escapes without loss of material.
- Pin Vents: Small openings that get rid of trapped air in in-depth cavities.
These features can be analyzed in designing a mold and this will improve the efficiency in manufacturing. The knowledge of the operation of each type of vent allows the engineers to develop molds that can ensure the quality of the product, as well as a speedy production process. Constant improvements can be achieved through constant evaluation and modification of the design.
Why Is Material-Specific Venting So Crucial for Part Quality?
Ever wonder why a mold that ran reliably yesterday is suddenly producing scrap parts with a new material? You might see burn marks at the end of the fill path or parts that aren’t fully formed. It’s frustrating because it feels like a random problem, but it’s not. This inconsistency directly impacts your bottom line, causing delays and forcing you to troubleshoot under pressure, do not knowing when the problem will strike again.
Material-specific venting is important, as it was made to address the trapped air and gas directly, which are the most common causes of many molding defects. The air trapped in the cavity compresses and gets superheated, causing diesel-like burn marks on the plastic. It also creates back pressure that prevents the mold from filling completely, resulting in short shots. Different plastics generate different amounts of gas and flow at different rates, so the “one-size-fits-all” vent will either be too big, causing flash, or too small, which traps the air and compromises part integrity and appearance.
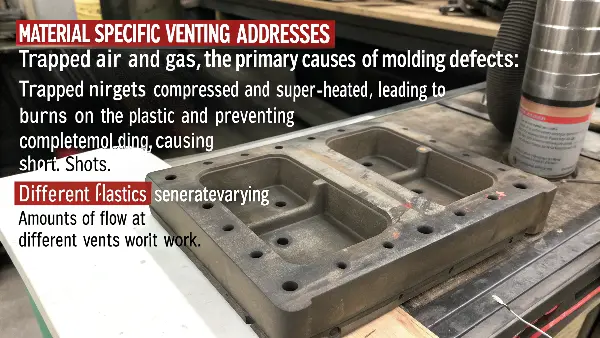
The plastic melt that enters the mold acts like a piston, pushing the air already in the mold ahead. If that air can’t escape through vents, it gets compressed into the last corner of the cavity. This happens so fast that the temperature of the air goes through the roof, often exceeding the ignition point of the plastic. This phenomenon is called the “diesel effect,” and it burns the plastic, leaving black or brown burn marks. I’ve even seen this ruin many an expensive mold. Besides burns, this entrapped air then acts as a cushion. The injection pressure coming from the machine has to fight against this air pressure. If that air pressure is too high, then plastic melt stops before it fills the cavity and results in incomplete parts-or “short shots.” Every material has a different viscosity. A low-viscosity material such as Nylon flows easily and will slip into vents if they are too deep and cause flash. A high-viscosity material such as PC moves slower and needs deeper vents to give enough time for all air to escape. And that is why you simply cannot use the same design for vents with different materials and expect professional results.
How Should Venting Be Adapted for Commodity Plastics?
PP, PE, PS and related families cover grades with different viscosity, fillers, colorants, recycled content, degradation behavior and flash tendency. Material-family tables are screening notes, not vent dimensions. Obtain the exact grade and process window, predict where gas finishes moving, and use short shots plus flash/pressure evidence to release depth, land, width and relief.
- Record virgin/regrind ratio, color package and contamination controls.
- Check whether the symptom follows a material lot, cavity, speed or residence change.
- Maintain the vent map and dimensions as tool-controlled characteristics.
The importance of Mold Venting and Impact of Various Plastics on Mold Venting Requirements
Venting injection molding is crucial in producing molded components of high quality. In its absence, gases trapped may produce serious flaws in the end product. Such flaws may contribute to the rise of costs and delays in production.
The mold has vents so that gases can escape when molding. This eliminates such frequent problems as voids and surface blemishes. Venting of each plastic material is different.
There is a reason why venting is important, which will be considered as follows:
- Reduces product defects
- Efforts better filling and cycle time.
- Improves the quality of the products
With venting issues focused on, manufacturers will be able to have more reliable operations.
The Impact of Various Plastics on Mold Venting Requirements
The distinct characteristics of various plastic materials influence the need for venting. For example, larger or more vents are frequently needed for high-viscosity plastics. This is because, in contrast to materials with low viscosity, they flow less readily.
The behavior of thermosets and thermoplastics during molding differs greatly. Because of their smooth flow properties, thermoplastics usually require less venting. For best results, thermosets may need more complex venting configurations.
The particular plastic material utilized should be taken into account while developing mold venting systems. A one-size-fits-all strategy may result in flaws and inefficiencies in production.
Important variations in plastic include:
- Levels of viscosity
- Sensitivity to heat
- Production of gas during molding
Higher production quality and efficiency are ensured by adapting mold venting to the plastic type.
How Should Engineering-Resin Venting Be Qualified?
PC, ABS and polyamide grades may differ materially in moisture sensitivity, melt window, additives, reinforcement and degradation gas. Follow the exact supplier drying and processing guidance, then separate material-preparation evidence from the mechanical vent path. A burn or splay condition is not automatically solved by making vents deeper.
For filled grades, inspect vent edges and shutoffs for deposit and wear; fiber/mineral systems can change flow, orientation and maintenance needs. Define cleaning by measured condition and defect trend rather than a fixed 4–8 hour interval.
How Should High-Temperature or Specialty Grades Be Reviewed?
Use the commercial grade’s processing guide and safety information. High processing temperature, flame-retardant or specialty additive packages can change viscosity, deposits and decomposition risk, but a family label does not define one vent depth. Review resin condition, residence/shear, gate and fill pattern with the vent layout, then validate the proposed dimensions at the most demanding approved process conditions.
How Can You Diagnose and Fix Venting-Related Mold Defects?
Are you tired of playing the guessing game when a molding defect appears? Is it the temperature, the pressure, or the material? When production stops, the pressure is on to find a solution fast. Randomly tweaking parameters without a clear diagnosis can make things worse and waste hours of valuable time. Knowing how to quickly identify a venting problem is a skill that can save a project and make you look like a hero.
You can diagnose venting problems by looking for specific visual cues on the part. Burn marks at the end of the fill path are a classic sign of trapped, super-heated air. Short shots or incomplete parts point to back pressure from unvented air fighting the plastic flow. Poor surface finish, weak weld lines, and even warp can also be caused by inadequate venting. The location of the defect is your biggest clue to where a vent is needed or needs to be improved.
Over my career, I’ve developed a simple but effective diagnostic method. First, identify the defect. Is it a burn mark? A short shot? A sink mark? Second, locate the defect on the part. Where is it happening? Often, the location tells you the story. For example, if you see a burn mark, you know that’s the last place the air had to go. That exact spot needs a vent or a better vent. If you have a short shot, find where the flow stopped. The air ahead of that point couldn’t get out.
Here’s my quick troubleshooting guide:
- Burn Marks: The most obvious sign. You have trapped air. Solution: Add a vent at the exact location of the burn. If a vent is already there, it’s too shallow, too long, or clogged. Clean it and measure it. If needed, deepen it slightly (in 0.01 mm increments).
- Short Shots: The mold isn’t filling completely. Solution: Check venting at the short shot location. Also, check vents along the entire parting line. Poor perimeter venting can create general back pressure.
- Flash: Plastic is escaping the cavity. Solution: Your vent is too deep for the material’s viscosity. The mold might also be clamping unevenly. Measure the vent depth; it likely needs to be made shallower (by welding and re-machining).
- Weak Weld Lines: Two flow fronts meet but don’t fuse properly. Solution: Air is trapped at the weld line, preventing a strong bond. Add an overflow tab or a vent directly on the weld line to let the trapped gas escape.
- Dieseling/Clogging: Vents get blocked with residue over time. Solution: Institute a regular mold cleaning and maintenance schedule. I tell my clients to clean vents every 4-8 hours of production for critical jobs. This preventative step saves a lot of trouble later.
Record the Venting Change When the Resin Changes
A material substitution review should identify grade, reinforcement, color/additives, recycled content, drying/conditioning, melt and mold windows, flash limit and expected deposits. Re-run the fill/air-trap review and inspect the tool after trial before approving the substitution.
Primary technical sources checked: DME — Venting Solutions (mold-vent design and maintenance options); Autodesk Moldflow — Air Trap Result (interpretation of predicted air-trap locations); BASF — Ultramid PA Product Brochure (grade-dependent polyamide properties and processing context); Covestro — Makrolon 3108 Product Data (one commercial PC grade's documented data). Apply the cited scope to the exact grade, tool and acceptance plan.
Amorphous and Semi-Crystalline Resins
Amorphous materials such as ABS and PC often respond strongly to flow temperature, stress and gas compression. Semi-crystalline materials such as PP, PA, POM and PBT have different freeze and shrinkage behavior, and their weld lines and vent needs can change with mold temperature and crystallinity.
Filled and Reinforced Materials
Glass, mineral, flame-retardant and other additives can change viscosity, orientation, wear and flash behavior. Filled materials may need stronger wear protection around vents, gates and shutoffs, while fiber orientation can make a weld-line region more sensitive to design and vent location.
Moisture-Sensitive and High-Temperature Materials
Wet resin can generate vapor or degradation products, while high-temperature materials may produce volatile material if residence or melt temperature is excessive. Drying, purge, venting and thermal history should be diagnosed together.
Flexible and Low-Viscosity Materials
Flexible materials may enter a vent more easily or seal differently at the parting line. Gate, fill speed, mold temperature, flash, ejection and vent land should be tested with the exact hardness and grade rather than copied from a rigid resin.
Use a Resin-Specific Validation Plan
For a material change, review fill pattern, last-fill location, pressure, burn, flash, weld-line appearance, weight and dimensions. Inspect vents after a run and update the process window or vent specification when the grade changes the flow behavior.
How Venting Should Change for Different Injection Molding Plastics: Buyer Review Checklist
- Classify resin by viscosity, moisture, thermal sensitivity, filler, flash and freeze behavior.
- Review vent location and wear for amorphous, crystalline, filled, flexible and high-temperature grades.
- Control drying, residence, purge, melt and mold temperature before changing vent dimensions.
- Check weld lines, burns, flash, pressure, weight and dimensions after a material change.
- Record resin-specific vent and process requirements in the mold file.
FAQ
Can the same vent design run every plastic?
Not necessarily. Resin viscosity, filler, moisture, temperature, flash tendency and degradation can change the effective venting requirement.
Why do filled plastics wear vents faster?
Abrasive fillers and higher pressure or shear can erode vent lands, shutoffs and gates, changing both gas release and flash control.
Conclusion
Mastering injection mold venting isn’t about memorizing a single number; it’s about understanding the unique personality of each plastic. From the easy flow of PP to the extreme fluidity of LCP, every material demands a specific vent design. By tailoring your vents to the material, you move from guesswork to precision, eliminating defects, protecting your tooling, and ensuring consistent, high-quality results. This knowledge is a cornerstone of successful and profitable molding.