
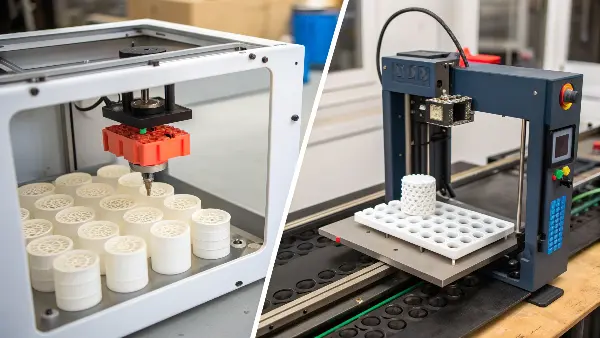
The high cost and long wait for a traditional steel mold can stop a new product idea in its tracks. You lose momentum, competitors get ahead, and testing a simple design change feels like a massive investment. What if you could create a functional mold in days, not months, for a fraction of the cost? This is exactly where the world of 3D printing offers a powerful solution.
Yes, absolutely. 3D printing is a game-changer for creating plastic injection molds, especially for prototyping and low-volume production. Using high-temperature resins with technologies like SLA or Material Jetting, you can print a mold cavity and insert it into a master mold frame. This method, often called "bridge tooling" or "rapid tooling," is perfect for producing hundreds, sometimes thousands, of real injection-molded parts quickly. It’s a powerful way to test designs with final production materials without committing to expensive steel tooling.

This sounds almost too good to be true, but it’s not a magic bullet. I’ve seen this technology save projects and I’ve also seen where it falls short. To really understand if this is the right move for your business, we need to look closer at the process. Let’s break down how you can actually make a 3D printed mold, what materials to use, and where the real-world limits are. Stay with me, and I’ll share what I’ve learned from years on the factory floor.
Can you 3D print a custom mold for injection molding?
You have a fantastic new part designed, but you can’t justify spending thousands on a steel mold just for a small test run of 100 pieces. This hesitation creates a bottleneck, stalling your entire project. But what if you could get a custom mold made quickly and cheaply, allowing you to validate your design with real, molded parts in your hands within a single week?
Yes, you can 3D print a custom mold for injection molding, and it’s a very effective strategy for rapid tooling. The process involves designing the mold in CAD, just like a traditional one, but then printing the core and cavity inserts using a high-temperature resistant photopolymer resin. These printed inserts are then polished for a smooth finish and fitted into a universal steel mold base. This hybrid approach gives you the incredible speed of 3D printing combined with the robustness of a standard molding machine setup.

When I first started exploring this, I was skeptical. But the process is quite straightforward once you understand the key steps. It’s not just about hitting "print." You have to think like a mold maker even when designing for a 3D printer.
Key Steps for Printing a Mold
- CAD Design: Your part design needs to incorporate features for injection molding. This means you must add draft angles so the part can be ejected, plan for parting lines, and design gates for the plastic to flow into the cavity. You are essentially designing the negative space of your part.
- Choosing the Right Technology: Not all 3D printers are created equal for this task. The best results come from high-resolution technologies that can handle heat.
- Stereolithography (SLA): Uses a laser to cure liquid resin. It offers a very smooth surface finish, which is crucial for the mold cavity.
- Material Jetting (PolyJet): This is like an inkjet printer but with photopolymers. It provides incredible accuracy and smooth surfaces, making it a top choice for complex molds.
- Post-Processing: After printing, the mold insert needs work. It must be cleaned of excess resin, fully cured under UV light to maximize its strength and thermal resistance, and then polished. Any imperfections on the mold surface will be transferred directly to your final part. A little sanding and polishing here go a long way in achieving a professional-looking product.
Can you use PLA for injection molding?
You’re already familiar with 3D printing and have a desktop FDM printer running PLA. You might think, "Can I just print a mold with this and try it out?" It’s a tempting shortcut, but using a standard material like PLA for an injection mold can lead to quick failure and a lot of frustration. You need to understand why it’s the wrong tool for this specific job.
No, you cannot use standard PLA (Polylactic Acid) for a practical injection molding tool. PLA has a very low glass transition temperature, around 60°C (140°F). Hot molten plastic injected at temperatures of 200°C (392°F) or higher will instantly melt and deform a PLA mold. The mold would fail on the very first shot. For 3D printed molds, you must use specialized, high-temperature resistant resins designed to withstand the heat and pressure of the injection molding process.

I’ve seen people try this in the early days, and the results are always the same: a mess. The injection molding process is a battle of heat and pressure, and your mold material has to be tough enough to survive it. Standard thermoplastics just can’t take it.
Why Material Choice is Everything
The entire success of a 3D printed mold hinges on using the right material. Think of it like building a boat; you wouldn’t use cardboard, you’d use something that can handle the water. It’s the same principle here.
| Material Property | Why It’s Important for Molds | Suitable 3D Printing Materials | Unsuitable Materials |
|---|---|---|---|
| High Heat Deflection Temperature (HDT) | The mold must not soften or warp when hot plastic is injected. It needs to hold its precise shape under thermal stress. | High-Temp SLA Resins (e.g., Formlabs High Temp Resin), Digital ABS (PolyJet) | PLA, Standard ABS, PETG |
| High Compressive Strength | The mold must withstand the immense clamping pressure of the injection molding machine without cracking or deforming. | Ceramic-filled Resins, High-Temp Resins | PLA, Flexible Resins (TPU) |
| Smooth Surface Finish | The surface quality of the mold directly determines the surface quality of the final part. A smooth mold needs less post-processing. | SLA and PolyJet Resins | FDM materials (due to layer lines) |
So, while PLA is a fantastic material for general 3D printing and making prototypes of the part itself, it is completely unsuitable for creating the mold. You have to invest in the right high-temperature materials to get a usable tool that can produce consistent parts.
Is 3D printing as strong as injection molding?
A client once asked me if they could just 3D print their final parts instead of molding them. They liked the speed, but their big concern was strength. They assumed the parts would be weak and brittle. This is a common question, and the answer is crucial for deciding which process fits your product’s real-world use.
No, a 3D printed part is generally not as strong as a solid injection-molded part made from the same base plastic. Injection molding creates a solid, isotropic part where the plastic molecules are bonded uniformly. In contrast, 3D printing builds a part layer by layer. These layers create anisotropic properties, meaning the part is weakest along the layer lines, similar to the grain in wood. An injection-molded part will be stronger, especially against shear and tensile forces across those layer lines.

The difference in strength comes down to how the part is formed. Imagine building a wall. Injection molding is like pouring a solid concrete wall in one go. It’s solid through and through. 3D printing, especially FDM, is like carefully laying bricks one on top of the other. The wall is strong, but its weakest point will always be the mortar between the bricks.
Understanding Anisotropy
This concept of "anisotropy" is the key difference.
- Isotropic (Injection Molding): A part has uniform strength in all directions (X, Y, and Z axes). It doesn’t matter which way you pull or bend it; the material behaves the same. This is because the molten plastic fills the mold cavity as one continuous mass and cools together.
- Anisotropic (3D Printing): A part’s strength depends on the direction of the force applied to it. The bonds within a single printed layer are strong, but the bonds between the layers are weaker. If you pull a 3D printed part apart along its layer lines (in the Z-axis), it will break much more easily than if you pull it along the length of the layers (in the X or Y-axis).
While advanced 3D printing materials and technologies (like SLS or HP Multi Jet Fusion) are closing this gap by creating better layer fusion, the fundamental structural integrity of a solid injection-molded part remains the gold standard for mechanical strength and durability in mass-produced plastic components.
Can 3D printing replace injection molding?
Every few years, a new technology comes along, and people ask if it’s the "killer" of the old ways. Business owners see the speed of 3D printing and wonder if they can finally ditch the expensive, time-consuming process of making molds. It is the dream of on-demand manufacturing, but the reality is much more complicated.
No, 3D printing cannot replace injection molding for mass production, and it’s unlikely to do so anytime soon. The two technologies serve different purposes. 3D printing is unmatched for speed in low volumes, customization, and complex geometries. Injection molding is unbeatable for its low cost-per-part, speed, and material variety in high-volume production. They are complementary tools, not direct competitors for the same applications.

Thinking of this as a competition is the wrong way to look at it. I encourage my clients to think of it as having two different tools in their toolbox. You wouldn’t use a hammer to drive a screw. Similarly, you wouldn’t use 3D printing to make 100,000 simple plastic caps.
Choosing the Right Tool for the Job
The decision really comes down to quantity, speed, and cost. Here’s a simple way I break it down:
- 1 – 100 Parts (Prototyping & Customization): 3D printing is the clear winner. The speed is phenomenal, there are no tooling costs, and you can make design changes with every single print. This is perfect for functional prototypes, custom jigs and fixtures, or highly personalized products. The cost-per-part is high, but the total project cost is low.
- 100 – 10,000 Parts (Bridge Production & Low-Volume): This is the gray area where 3D printed molds shine. You can get to market quickly without the huge upfront investment in steel tooling. It’s the perfect "bridge" to see if your product has demand before committing to a massive production run. The cost-per-part is moderate.
- 10,000+ Parts (Mass Production): Injection molding is the only logical choice here. The upfront cost of the steel mold is high, but it gets spread out over hundreds of thousands of parts. The cost-per-part becomes incredibly low, often just a few cents. The speed is also unmatched, with cycle times of just a few seconds per part.
The future isn’t about one replacing the other. It’s about using both technologies intelligently to make your business faster, more flexible, and more competitive.
Why can’t 3D printing completely replace injection molding?
We’ve established that 3D printing isn’t a total replacement for injection molding. But you might be wondering about the deeper reasons. Why can’t the technology just get faster and cheaper until it takes over? The limitations are not just about speed and cost; they are fundamental to the physics and materials of each process.
3D printing cannot completely replace injection molding due to fundamental limitations in speed at scale, cost-per-part, material selection, and part strength. While 3D printing excels at complexity and customization in low volumes, injection molding’s core advantages—producing millions of strong, identical parts from a vast range of plastics at an extremely low per-unit cost—are something additive manufacturing is structurally unable to replicate for mass markets.

Even if a 3D printer became magically fast, there are still core reasons why injection molding will remain essential for manufacturing. I’ve built my business on the reliability of molding, and these factors are at the heart of it.
The Four Pillars of Injection Molding’s Dominance
- Sheer Speed at Scale: An injection molding machine can produce a part every few seconds. A multi-cavity mold can produce 8, 16, or even 64 parts in that same cycle. That’s potentially thousands of parts per hour from one machine. 3D printing is an additive process—it builds one thing at a time, layer by layer. It simply cannot compete with the parallel processing power of a multi-cavity mold for high-volume runs.
- Cost Economics: The business model of injection molding is built on amortization. A $50,000 steel mold that produces one million parts adds only 5 cents of tooling cost to each part. The material cost is low, and the cycle time is minimal. The cost-per-part for 3D printing remains relatively flat whether you print one or one thousand, making it prohibitively expensive for mass production.
- Material Universe: Injection molding can handle an unbelievably vast range of thermoplastic polymers, composites, and elastomers. From flexible TPE to glass-filled polycarbonate to standard polypropylene, if it’s a thermoplastic, you can probably mold it. The library of reliable, engineering-grade materials for 3D printing is still much smaller and often more expensive.
- Strength and Finish: As we discussed, the solid, isotropic nature of an injection-molded part gives it superior mechanical properties. Furthermore, the surface finish of a molded part can be controlled to a very high degree by polishing the steel mold, achieving mirror-like, textured, or matte finishes that are difficult and time-consuming to replicate with 3D printing.
Conclusion
So, can you use a 3D print for plastic injection molding? Yes, and it’s a powerful strategy for the right situation. It’s the perfect tool for creating prototypes and low-volume runs quickly. However, it’s not a replacement for traditional injection molding. The strength, speed, cost, and material options of injection molding make it the undisputed king of mass production. The smart move is to see them as partners, not rivals, in your manufacturing toolbox.
CKMOLD Engineering Update: Where 3D Printing Fits in Plastic Injection Molding
Yes, 3D printing is used in injection molding programs, but its role depends on the required heat, load, accuracy, finish, quantity and evidence. A printed prototype, printed mold insert, printed fixture, printed cooling component and printed production mold solve different problems. Treating all of them as the same technology creates unrealistic expectations about tool life and part equivalence.
Related engineering resources: rapid tooling | prototype injection molding | mold testing and validation
Prototype the Product Before the Tool
Printed parts can expose fit, packaging, ergonomics and assembly issues quickly. They are excellent for checking form and clearance, but they may not reproduce molded shrinkage, weld lines, fiber orientation, surface texture or material conditioning. Use the prototype to improve the design, then use molded samples for process decisions.
Build Bridge or Soft Tooling for Learning
Printed or hybrid inserts can support early material screening and limited shots when temperature and pressure fit the tool. Use a rigid mold base, replaceable wear areas and controlled vents. Define tool-life evidence and a transition point to aluminum or steel before the project depends on the printed route.
Accelerate Fixtures and Inspection
Printed loading nests, go/no-go aids, protective caps and camera mounts can reduce changeover time and improve repeatability. Include stable datums, wear inserts and a calibration check. A fixture is part of the process and should be validated like any other quality aid.
Investigate Additive Metal Tooling
Printed metal inserts may enable complex cooling or faster production of a tool module, but they still need dimensional inspection, pressure testing, surface finishing, sealing and maintenance planning. Compare the additive route with conventional machining based on cycle improvement and total risk.
Keep Prototype and Production Evidence Separate
Mark printed-tool samples and record the tool, material, process and conditioning. Do not release a design or material based only on a printed mold result if the final tool will change flow, cooling, finish or ejection. The handoff should include what was learned and what remains to be proven.
Engineering and Sourcing Checklist
- Choose printing for prototypes, inserts, bridge tooling, fixtures or cooling based on the actual need.
- State differences between printed and molded material, shrinkage, surface and orientation.
- Design hybrid tooling with rigid bases, vents, wear control and replacement access.
- Validate printed fixtures, gauges and additive metal modules for repeatability and safety.
- Keep printed-tool evidence traceable and define the handoff to production tooling.
Search Intent Takeaway
3D printing is already useful in injection molding when its role is clearly defined. It speeds learning and tooling support; it does not remove the need for production-representative validation.
Need a practical review? Discuss material, mold and validation requirements with the CKMOLD injection molding team, then contact CKMOLD with your part and application details.
Frequently Asked Questions
What is the most common use of 3D printing in molding programs?
Early prototypes, fixtures, inspection aids and limited bridge tooling are common because they reduce lead time without carrying full production-tool expectations.
Can printed mold parts replace production samples?
Only when the printed tool and process have been shown to reproduce the relevant geometry, material behavior, surface and quality requirements.