
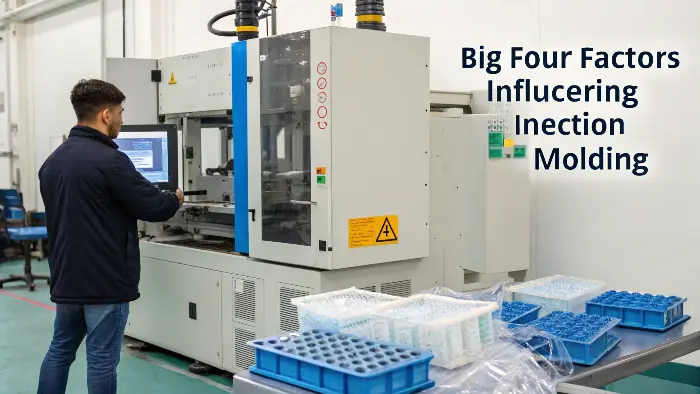
Struggling with warped or misshapen plastic parts? It’s frustrating when final products don’t meet specs. Optimizing injection molding parameters is the key to consistent, high-quality results.
Injection molding process parameters influence deformation because they control how the cavity fills, how much the material is packed and how heat leaves the part. A parameter change can improve one dimension while increasing stress or shifting a different area. The solution is a controlled process window built from part data, not a single setting copied from another mold.
Related CKMOLD resources: production injection molding, mold testing and validation, mold design.
Key injection molding parameters like melt temperature, injection speed, and cooling time directly impact part deformation. If these aren’t set right, you’ll see issues like warpage, shrinkage, and sink marks. Careful adjustment and analysis of these settings are crucial to minimize defects and achieve accurate dimensions.
So, What Exactly Are We Talking About with Injection Molding Process Parameters?
Ever feel like you’re juggling a dozen settings on the injection molding machine, and one wrong move sends things sideways? It can be a bit much, and one wrong tweak might mean a whole lot of bad parts.The main parameters in the injection molding process include melt temperature, mold temperature, injection pressure, holding pressure, injection speed, and cooling time. Each of these plays a vital role in how the plastic flows, fills the mold, cools, and ultimately forms the final part.
- Melt Temperature:This is how hot the plastic is when it’s injected. Think of it like pancake batter – too hot, and it’s runny and might burn; too cold, and it’s thick and won’t spread. For plastics, too hot can degrade the material or make it take forever to cool, leading to warpage. Too cold, and it won’t flow properly, potentially causing short shots where the mold doesn’t fill completely. A small bump up, like 5 degrees Celsius, and voila – problem solved! It’s amazing how such small changes can make a big difference.
- Mold Temperature: This affects how the plastic cools once it’s in the mold. A warmer mold can sometimes help the plastic flow better, improve surface finish, and reduce internal stresses, which is great for minimizing warpage. But, a cooler mold speeds up the cycle time, meaning more parts per hour. It’s a balancing act, for sure. We often aim for the coolest mold temp that still gives us good parts.
- Injection Pressure & Speed: This is about how forcefully and quickly the molten plastic is pushed into the mold cavity. You need enough pressure to fill the mold completely, especially intricate details. But if you blast it in too hard or too fast, you can cause flash (plastic squeezing out of the mold seams) or build up a lot of stress in the part. Speed influences how the material flows and can affect things like weld lines (where two flow fronts meet). Sometimes, a slower, more controlled fill is better than a super-fast one.
- Holding Pressure & Time (Packing Phase): After the mold is filled, holding pressure (or packing pressure) is applied. This is super important because as plastic cools, it shrinks. Holding pressure packs a bit more material in to compensate for this shrinkage. Getting this right is absolutely critical for dimensional stability and avoiding ugly sink marks over ribs or bosses. Too little packing, and you get sinks; too much, and you might get parts sticking in the mold or even flash.
- Cooling Time:This is simply how long the part stays in the mold to solidify before it’s ejected. Too long, and you’re just wasting precious cycle time and money. This one often has the biggest impact on overall production speed, so everyone wants to make it as short as possible, but you can’t cut corners too much, or quality suffers. Understanding these basics is the first step to taking control. It’s not just about turning knobs; it’s about knowingwhy you’re turning them and what effect it’ll have. It takes a bit of experience, but once you get a feel for it, you can really start to dial things in.
Beyond Just Settings, What Are the Big Four Influencing the Whole Injection Molding Game?
Feeling like there’s more to good parts than just fiddling with machine settings? You’re absolutely right. Getting consistent quality is about a bigger picture, and sometimes a small change in one area you weren’t even looking at can have massive ripple effects.
The four primary elements influencing injection molding are: the plastic material itself, the injection molding machine’s capabilities, the design and construction of the mold, and the process parameters we set. All these factors interact dynamically and must be considered holistically for successful molding.
It’s so easy to get tunnel vision and just focus on the machine settings, but I’ve learned – sometimes the hard way, with a pile of scrap parts next to me – that successful injection molding is like a four-legged stool. If one leg is wobbly or too short, the whole thing can tip over, no matter how good the other legs are. Think about it this way for your own operations, the buyer:
- Plastic Material:This is your absolute starting point. You wouldn’t build a house with Jell-O, right? Different plastics (like ABS, Polycarbonate, Polypropylene, Nylon, etc.) have vastly different personalities – they melt at different temperatures, flow differently, shrink at different rates, and have unique strengths and flexibilities. You can’t just swap one material for another and expect the same results without adjusting everything else, sometimes significantly. Man, that changed everything! We had to re-evaluate almost all our process parameters and even discuss minor mold tweaks because the new material behaved so differently, especially its abrasiveness and shrinkage. It’s a big deal! For someone like you, the buyer, working with plastic components for sensitive consumer electronics, material selection is absolutely critical not just for performance but also for things like UL ratings and overall product feel.
- Injection Molding Machine: The machine itself matters a whole lot. Its clamping force (can it hold the mold shut against injection pressure?), shot size capacity (can it inject enough plastic?), screw design (how well does it melt and mix the plastic?), and the precision of its controls all play a massive role. An older machine with sloppy hydraulics might not have the fine control needed for complex, tight-tolerance parts. You need the right tool for the job. It’s like trying to paint a miniature with a house painting brush – not gonna work well!
- Mold Design:This is where we at CKMOLD spend a huge amount of our time and energy, because the mold is the heart of the operation! Gate location and size, the runner system that feeds plastic to the cavities, the layout of cooling channels, how well the mold vents air – these design features are absolutely critical. A poorly designed or poorly made mold can cause endless headaches, no matter how good your material or machine is. For instance, if the cooling isn’t uniform across the part, you’re almost supported to get warpage.
- Process Parameters: And finally, we come back to the settings we adjust on the machine – all those temperatures, pressures, speeds, and times we just talked about. These are how we fine-tune the interaction between the specific material, the chosen machine, and the given mold. They are the conductor’s baton, guiding the orchestra.
These four elements are deeply interconnected. A change in material might require a different mold temperature (a process parameter) or even a different gate design (a mold feature). It’s all a complex system. Getting it right means understanding how they all work together, and sometimes, it means going back to the drawing board on one of them if things just aren’t working out.When We Talk About Optimizing, Which Parameters Are We Really Tweaking to Get Those parts that meet the agreed requirements?
Tired of parts that are almost right but just not quite there, leading to high reject rates or customer complaints? This is where the real skill and experience in injection molding comes in – fine-tuning those settings. It’s less about guesswork (though there’s generally a bit of intuition involved!) and more about a methodical approach to hit that sweet spot for quality and efficiency.
Optimization in injection molding focuses on systematically adjusting key process parameters like melt temperature, mold temperature, packing pressure, packing time, injection speed, and cooling time. The goal is to achieve desired part quality (dimensions, appearance, strength), minimize defects like warpage or sink marks, and ensure dimensional stability efficiently, all while keeping cycle times reasonable.
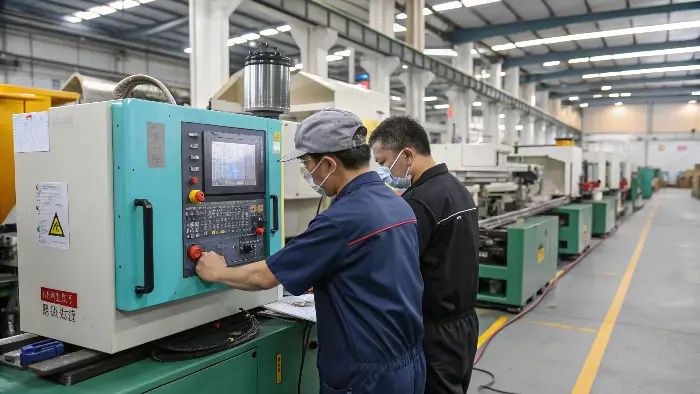
Okay, so we know the main parameters. But when it comes to optimization, especially to tackle something stubborn like part deformation, which ones give us the most leverage? It’s about making targeted, intelligent changes. I generally tell people, and I have to remind myself sometimes too, don’t just start randomly twisting knobs like a mad scientist – that’s a recipe for frustration, a lot of wasted time, and a mountain of scrap material. Instead, think scientifically, one variable at a time if possible, or use structured experiments.
Here are the big hitters for optimization, especially when you’re wrestling with deformation:
- Melt Temperature: As we’ve touched on, this is huge. If the melt is too hot, it can lead to excessive and often unpredictable shrinkage, and it also means longer cooling times, which can increase the chance of warpage as internal stresses have more time to build or release unevenly. Too cold, and you risk incomplete fill or high internal stresses because the material is being forced too hard. We often do a temperature sweep – trying a range of temperatures while keeping other things constant – to find the ideal processing window for a specific material and mold combination.
- Mold Temperature: This is a delicate balance and a powerful tool for controlling warpage. A higher mold temperature (within reason!) can reduce internal stresses by allowing the polymer chains to relax more before solidifying, and it can improve surface finish. This often minimizes warpage. However, it also extends the cooling time, which directly affects cycle time and, therefore, cost. Sometimes, we even use differential mold temperatures – setting the core and cavity sides of the mold to different temperatures – to strategically counteract a known warpage tendency. It’s a bit like playing chess with heat!
- Packing Pressure and Time:This phase is probably one of the most critical for controlling shrinkage, sink marks, and voids. After the initial fill, packing pressure forces more material into the cavity to compensate as the plastic cools and shrinks. If packing pressure is too low or the time is too short, you’ll almost certainly see sinks and voids, and the part might be undersized. Fine-tuning the packing profile – how the pressure is applied over time – is an art.
- Injection Speed: While often seen as mainly affecting fill, the speed can also influence orientation of polymer molecules and fillers, which in turn can affect shrinkage and warpage. A very fast fill might create more shear and differential shrinkage.
- Cooling Time: Sufficient cooling is absolutely essential for the part to solidify properly and maintain its shape after ejection. If ejected too soon when it’s still a bit soft, it can warp, distort, or show ejector pin marks. Optimization here involves finding the shortest possible time that still produces a dimensionally stable, defect-free part. We often use cooling analysis during the mold design phase to ensure uniform cooling across the part, which is a massive help in preventing warpage before we even start molding.
the engineering guidance here, learned over many years, is that careful, documented experimentation is key. You might use something like a Design of Experiments (DOE) approach. This is a structured way to test different combinations of settings to see how they interact and affect the outcome. It sounds complex, but even a simplified version – changing one parameter at a time and measuring the result – can save a ton of time and material compared to just guessing. For business owners like the buyer, this systematic approach means more predictable quality, less scrap, and faster problem-solving – all directly impacting the bottom line and customer satisfaction.How Can Mold Flow Simulation Help Us Predict and Optimize Before We Even Cut Steel?
Ever wish you had a crystal ball to see exactly how that molten plastic is going to behave once it’s shot into the complex pathways of a new mold? Well, mold flow analysis software is pretty darn close to that! It’s an incredibly powerful tool in our arsenal, but like any tool, its output is only as good as its input. So, what exactly are we feeding into it to get those useful predictions?
Mold flow analysis uses parameters such as detailed material viscosity data (rheology), specific thermal properties of the plastic, melt and mold temperatures, injection rate or time, gate locations and sizes, runner system design, and cooling channel layout. These inputs allow the software to simulate the filling, packing, and cooling stages, accurately predicting potential issues like warpage, sink marks, air traps, or short shots.
- Material Data: This is absolutely foundational. The software needs highly detailed information about the specific grade of plastic resin being used. This isn’t just “Polypropylene”; it’s “Company X’s Grade Y Polypropylene.” We need its viscosity at different temperatures and shear rates (this is called rheological data), its thermal properties (like specific heat and thermal conductivity, which dictate how it heats and cools), and its PVT (Pressure-Volume-Temperature) data, which describes how its density changes with temperature and pressure. Without accurate material data, often sourced directly from material suppliers or specialized databases, the simulation is just a pretty picture with questionable accuracy.
- Process Settings (Initial Guesses & Ranges): We input proposed process parameters like the intended melt temperature, mold surface temperature, injection time or a target injection speed, and profiles for packing pressure and time. These are often based on material supplier recommendations, our own experience with similar parts and materials, or sometimes we input a range to see how sensitive the outcome is to variations. The software can then run multiple simulations to help us narrow down the optimal window.
- Mold Geometry:The complete 3D CAD model of the part(s), the runner system (sprues, runners, sub-runners), the gate(s) (type, location, size), and the cooling channels is, of course, absolutely essential. The software analyzes how the plastic flows through this specific geometry and how the heat is removed by the cooling system. We can test different gate locations or runner sizes virtually to see how it impacts fill balance, weld lines, or pressure drop. Mold flow showed this clearly. We were able to test three alternative gate locations in the simulation and find one that hid the weld linebefore any steel was cut. That saved a hugely expensive mold modification and a lot of headaches later.
- Cooling System Design: The layout, diameter, and distance from the cavity surface of the cooling channels, along with the coolant type, its inlet temperature, and flow rate, are crucial inputs for predicting cooling efficiency and, very importantly, potential warpage. Uneven cooling is a primary cause of warpage, and simulation can highlight hot spots or areas that cool too slowly or too quickly.
The software then crunches all this data and gives us incredibly valuable visual and numerical outputs: how the mold fills, pressure and temperature distributions throughout the part at different stages, shear rates (which can affect material degradation), weld line locations, potential air traps, and critically for deformation, detailed predictions for volumetric shrinkage and warpage patterns. This allows us to optimize the mold design (e.g., adjust gate locations, improve cooling channel placement, balance runner systems) and refine the process parameters before we commit to the costly and time-consuming process of manufacturing the actual mold. For someone like the buyer, who is keenly focused on managing lead times, controlling costs, and ensuring product quality, this proactive approach using mold flow simulation is invaluable. It helps ensure the mold will perform as expected from the very first shot, minimizing costly trials and rework.Melt and Mold Temperature Set the Thermal Starting Point
Higher melt temperature can improve flow and delay freeze-off, but it may increase cycle time and thermal history. Mold temperature affects surface replication, cooling rate and residual stress. The useful target is the range that fills the part consistently without unnecessary degradation or heat imbalance.
Injection Speed Changes Orientation and Pressure
A faster fill can reduce premature freezing in thin sections, but it may increase shear, fiber orientation and trapped-air risk. A slower profile may reduce jetting or stress in one area but create a short shot elsewhere. Multi-stage speed profiles are often more informative than one global speed value.
Pressure and Holding Control Volumetric Shrinkage
Packing pressure and holding time compensate for shrinkage while the gate remains open. Too little packing can create sink and dimensional undersize; too much can create stress, flash or difficult ejection. Gate-freeze studies and part-weight curves help show when additional holding no longer changes the part.
Cooling and Ejection Determine the Released Shape
Cooling time must be long enough for the part to hold its shape, but additional time cannot correct an uneven cooling design. Ejection force, mold release, support ribs and pin balance can distort a still-soft part. Measure parts at a defined time after ejection so the team does not confuse thermal relaxation with process drift.
Use DOE or Structured Trials Instead of Guessing
Change one factor at a time for a quick diagnosis, or use a designed experiment when factors interact strongly. Record weight, critical dimensions, flatness, cavity, cycle, pressure and material condition. The result should identify a robust window, not merely a best-looking sample.
How Injection Molding Parameters Affect Warpage and Deformation: Buyer Review Checklist
- Record melt temperature, mold temperature and material condition with every deformation trial.
- Use fill studies or staged speed profiles to observe orientation and freeze-off behavior.
- Find the gate-freeze point before increasing holding pressure or time.
- Check cooling and ejection while measuring parts at a consistent post-mold interval.
- Use structured experiments to identify interactions and define a robust process window.
FAQ
Which parameter affects warpage the most?
It depends on the geometry and material. Mold temperature, cooling balance, packing, gate freeze and fiber orientation are often more important than one universal machine setting.
Can increasing cooling time fix deformation?
It can reduce post-ejection movement, but it cannot replace balanced cooling or correct an unsuitable gate, wall or ejection design.
Conclusion
Optimizing injection molding parameters isn’t just about randomly tweaking knobs; it’s a systematic, knowledge-based approach to ensure consistent part quality, effectively minimize deformation, and significantly boost overall manufacturing efficiency. Understanding these critical settings and their intricate interplay is absolutely key to mastering the craft and achieving success in this field. 🔥