
Do you have a problem with quality and speed in your injection moulding process? The wrong settings of temperature, pressure or cooling may result in expensive defects, lengthy cycles and wastage of material. It is as though it is a battle all the time. The initial step towards becoming a master of your production and having consistent and high-quality results is to understand the relationship between these three important variables.
Temperature, pressure and cooling time are coupled variables in injection molding. Temperature changes viscosity and freeze time; pressure changes filling, packing and stress; cooling determines when the part can be ejected without distortion. Adjusting one variable changes the useful range of the others, so process development should study their interaction rather than optimize each setting independently.
Related CKMOLD resources: production injection molding, mold testing and validation, mold design.
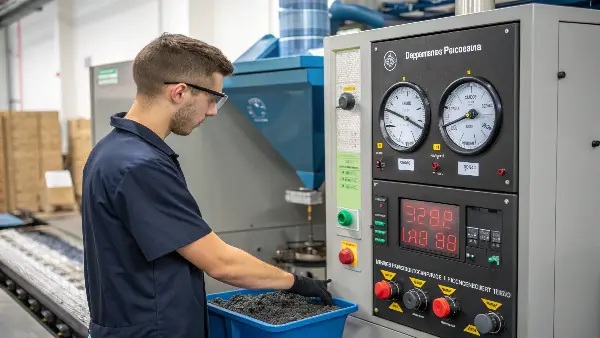
Injection molding is very much interrelated with temperature, pressure, and cooling time. Increased melt and mold temperature has a longer cooling period but may enhance flow. The injection and holding pressures are used to fill and pack the mold properly, which also determines the amount of heat required to be removed. These three factors should be optimized jointly to reduce the cycle time and avoid defects such as sink marks or warping to have an efficient and stable process.
Use Why Mold Temperature Matters for Different Plastic Materials for the material-dependent role of mold temperature. This article isolates the interaction among temperature, pressure and cooling time.
How to Understand the Injection Molding Process?
Injection molding plays a central role in modern manufacturing. The process consists of a number of distinct phases, each vital in its own right for the production of precise parts.
First, the material is melted into a viscous state. It is then injected into a mold designed with high precision. That mold defines the shape and structure of the final product.
Material injection molding process involves several steps:
- Melting the raw material
- Injecting it into the mold cavity
- Holding it under pressure
- Cooling and solidification
- Ejection of finished part
Master these steps, and one can ensure efficiency and precision. Every step affects the cycle time of the whole process. The objective is to make quality parts faster, quicker, and at an efficient rate, which requires correct comprehension of the process.
What Really Determines the Cycle Time for Injection Molding?
Is your production falling behind schedule because of unexpectedly long cycle times? Every extra second on a cycle adds up, eating into your profits and delaying deliveries. It’s frustrating when you can’t pinpoint exactly what’s causing the slowdown. The key is to understand that cycle time is a sum of many stages, with cooling time very often being the most substantial part of it. Let’s break it down.
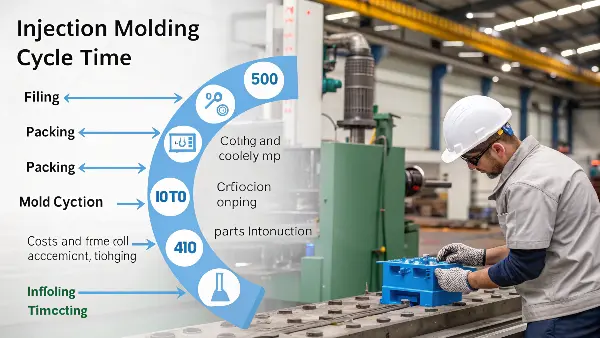
Total cycle is fill, pack/hold, cooling, mold motion/ejection and other required actions. Cooling may be the largest phase for many parts, but its share is not universally above 50%; measure the actual cycle and define when the part is sufficiently rigid for ejection and handling.
Cycle reduction should begin with a time study by phase and the current quality limits. A shorter timer is only an improvement if the same accepted dimensions, appearance, function, yield and uptime are maintained.
The Four Stages of an Injection Molding Cycle
- Filling Time: This is how long it takes for the molten plastic to fill the mold cavity. It’s usually very fast, just a few seconds. The speed here depends on injection pressure and the viscosity of the plastic, which is tied to its temperature. Faster isn’t generally better; too fast can cause defects.
- Packing/Holding Time: After the cavity is filled, we apply pressure to pack more material in. This compensates for material shrinkage as it cools. This stage is critical for part accuracy and avoiding sink marks. It’s directly tied to pressure and how the material solidifies.
- Cooling Time: This is the big one, the marathon stage of the cycle. The part has to cool down enough to become solid so it can be ejected without deforming. As I mentioned, this often makes up the bulk of the cycle time.
- Mold Open/Ejection/Mold Close Time: This is the mechanical part of the cycle. The mold opens, the ejector pins push the part out, and the mold closes again for the next shot. This is usually a fixed time based on the machine’s speed.
Here is a table to put it in perspective for a typical part:
| Stage | Description | Typical % of Cycle Time | Key Influences |
|---|---|---|---|
| Filling | Injecting molten plastic into the mold. | 5-10% | Injection Pressure, Melt Temp |
| Packing | Holding pressure to compensate for shrinkage. | 10-20% | Holding Pressure, Melt Temp |
| Cooling | Solidifying the part inside the mold. | 50-70% | Part Thickness, Mold Temp |
| Ejection | Robot/mechanical time to open and close. | 10-15% | Machine Speed, Mold Design |
As you can see, cooling is where you win or lose the time game. Small improvements in filling or ejection are great, but a 10% reduction in cooling time can have a massive impact on your overall efficiency. That’s why we focus so much on the factors that control it.
The effect of injection molding temperature and pressure
The temperature plays a critical role in injection molding. It mostly influences the flow of the material. The right temperature settings make the material to melt evenly. This enables it to be used in filling the mold.
The temperature of injection molding is dependent on the type of material. The various plastics melt at varying temperatures. An example would be that polypropylene melts when it is hot as compared to polycarbonate. Hence, it is important to know the properties of the material.
Excessively high temperature may lead to degradation of the material. This causes such defects as discoloration and weakening. On the other hand, a low temperature will not allow the entire filling of the mold. This may lead to incomplete components and scrap.
Here are some important facts concerning temperature:
- The optimum temperature is determined by the material properties.
- Even melting results in easy flow and quality.
- In case the temperature is excessive, degradation will take place.
- Unfilled filling is caused by low temperatures.
- Adjustment of temperature is sensitive. They have a substantial effect on the molding process and the final product quality.
The Importance and effect of Pressure in Injection Molding
In injection molding, pressure is important for accurate part shaping; it forces the molten material into the mold cavity. There, under holding pressure, the material solidifies.
Excess pressure leads to defects such as part deformation. It can create flash problems, where the excess material leaks out. However, too little pressure creates voids or incomplete parts. It is crucial to control the pressure level to achieve quality.
Consider these pressure points:
- Provides force for material injection.
- Prevents part deformation and defects.
- Holds material in mold until it has solidified.
Optimum pressure is achieved, enabling uniformity while reducing defects. Attaining the proper pressure requires insight into how materials behave. Informed pressure management is critical to any successful injection molding.
What Factors Affect the Cooling Time in Injection Molding?
Are you finding it difficult to reduce cycle times without compromising part quality? You might lower the cooling time in the machine’s settings, only to pull out a warped or distorted part. This happens because cooling isn’t just a timer; it’s a thermal process influenced by many variables. Focusing only on the machine’s setting without understanding the root causes is a common mistake.
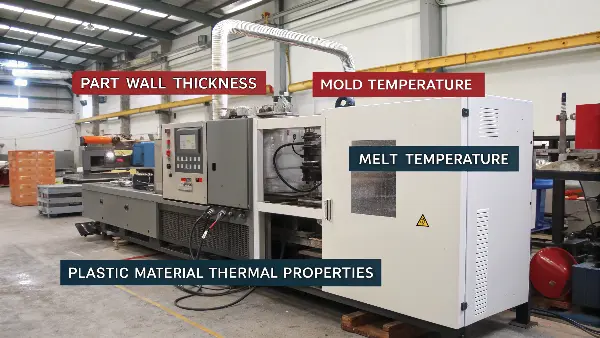
The most significant factors affecting cooling time are part wall thickness, mold temperature, melt temperature, and the plastic material’s thermal properties. Thicker walls take exponentially longer to cool. A warmer mold can improve part finish but extends cooling. A hotter melt flows better but adds more heat that must be removed. Finally, each plastic type has its own rate of heat transfer, which directly impacts how quickly it can solidify.
To truly master cooling time, you have to think like a thermal engineer. Heat must be removed from the molten plastic, through the steel of the mold, and carried away by the cooling fluid. Anything that slows this transfer of heat will extend your cycle time. When I work with a new mold design, these are the critical elements I review to predict and optimize the cooling performance.
The Core Four of Cooling
It all boils down to four main areas. If you can control these, you can control your cooling time.
- Part Design (Wall Thickness): This is the number one factor, without a doubt. The time it takes for heat to escape is related to the square of the wall thickness. This means doubling the wall thickness can quadruple the cooling time. This is why we generally push for uniform wall thickness in part design. A thick boss on a thin wall will create a hot spot that dictates the cooling time for the entire part.
- Material Selection (Thermal Properties): Different plastics cool at different rates. A material’s thermal diffusivity describes how quickly it can transfer heat. For example, semi-crystalline materials like Polypropylene (PP) and Nylon (PA) have a sharp melting point and release a lot of latent heat during solidification, often requiring more cooling than amorphous materials like ABS or Polystyrene (PS). You can’t change the material’s nature, but you must account for it.
- Mold Design (Temperature Control):The mold is the heat exchanger. The efficiency of your cooling channels—their size, placement, and proximity to the part cavity—is critical. The mold temperature itself is a balancing act. A colder mold cools faster but can cause flow issues or poor surface finish.
- Processing Parameters (Melt Temperature): The hotter the plastic you inject, the more heat you have to remove. Running the melt temperature at the lower end of the recommended range for the material can help reduce cooling time. However, if you go too low, the plastic becomes too viscous, leading to incomplete filling or high injection pressures. It’s about finding that sweet spot.
Understanding these factors moves you from simply setting a timer to intelligently managing the thermal dynamics of your process. This is how you gain precise control over both cycle time and part quality.
What Can a Cooling-Time Equation Tell You?
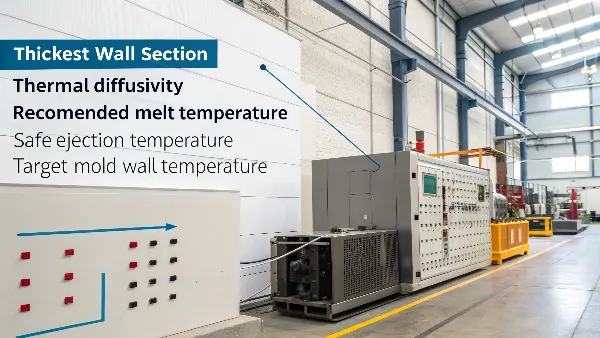
One-dimensional conduction models can provide an early estimate, but they depend on geometry, thermal diffusivity, melt/mold/ejection temperatures and boundary assumptions. Autodesk states that cooling time is theoretically proportional to the square of the heaviest wall thickness and inversely proportional to polymer thermal diffusivity. That relationship is useful for screening; a full tool also depends on runners, inserts, steel, cooling circuits, flow and acceptable ejection condition.
Do not present one calculated value as the production cycle. Record the equation/source, property data and units, then validate with cavity-surface temperature, circuit data, part temperature, dimensions and deformation at ejection.

How Do You Use the Thickness Relationship Safely?
Illustrative screening example — not a CKMOLD project or quotation. If the controlling wall changes from 3.0 mm to 2.5 mm while material, mold boundary conditions and ejection criterion remain unchanged, the thickness-only ratio is (2.5/3.0)² = 0.694. The simplified model therefore suggests about 30.6% less cooling time for that wall region—not 30.6% less total cycle or unit cost.
Before using the result, check whether a boss, runner, insert, corner or local hot spot becomes controlling. At trial, step cooling only while monitoring ejection force, flatness, critical dimensions and post-ejection change.
If the limiting variable is the mold’s thermal response, compare the business case for advanced mold-temperature control and document the resulting settings with the stable temperature-profile method.
Release the Interaction as a Process Window
The square-of-thickness relationship is a screening tool. A supplier should still provide actual melt and cavity-surface temperatures, fill/transfer/hold traces, gate-seal evidence, circuit flow and the part condition used to approve ejection. Compare low/high settings and normal pauses rather than one center point.
Primary technical sources checked: Autodesk Moldflow — Cooling-Time Equations (analytical cooling relationships and their inputs). Apply the cited scope to the exact grade, tool and acceptance plan.
Temperature Changes Pressure Demand
A warmer melt or mold can reduce viscosity and pressure requirement, but it may increase cycle, flash, degradation or shrinkage. A colder condition can raise pressure and freeze the gate earlier. Review pressure traces with fill time, temperature and material condition.
Pressure Controls Packing Until Gate Freeze
Injection pressure fills the cavity, while holding pressure feeds material as the part shrinks and the gate remains open. Once the gate freezes, additional hold may not change the cavity. Gate-freeze time and part weight help separate useful packing from wasted cycle.
Cooling Controls Ejection and Shape
The part must reach enough stiffness for ejection and handling. Cooling too briefly can cause sticking, warpage or post-ejection change; cooling too long can add cost without improving quality. Thick sections, inserts, mold temperature, water flow and resin crystallinity control the required time.
Use a Designed Process Study
Vary temperature, pressure or cooling in a controlled matrix while tracking fill time, peak pressure, weight, dimensions, flatness, appearance, ejection force and cycle. Avoid changing all three at once. Use the smallest stable window that meets function and quality.
Translate the Result Into Limits
Set process limits for melt or mold temperature, injection pressure, hold, gate freeze, cooling, cushion and part data. Define what happens when a trend moves toward the limit. A process window should be robust to material and machine variation, not only ideal conditions.
How Temperature, Pressure and Cooling Time Interact in Injection Molding: Buyer Review Checklist
- Review temperature, pressure, viscosity, freeze, packing and cycle as a coupled system.
- Separate fill pressure from holding pressure and verify gate-freeze behavior.
- Set cooling from ejection readiness, thickness, resin, mold temperature and water flow.
- Use a controlled study with weight, dimensions, flatness, appearance and ejection data.
- Document stable limits and response actions for drift toward the process boundary.
FAQ
What happens when cooling time is reduced too much?
The part may eject warm and deform, stick, change dimension or continue shrinking after ejection.
Can higher pressure replace higher temperature?
It may force filling, but it can increase stress, flash, wear and energy; the correct balance depends on material, gate, venting and geometry.
Conclusion
In injection molding the balance between temperature, pressure and cooling time is critical. The interaction among these parameters is complex, and affects the total cycle time and quality of the product which is being molded. When these factors are properly managed, it will result in efficient production and quality parts.
Optimal performance is made possible through a consistent monitoring and adjustments. Knowing the correlation between temperature, pressure and cooling enables proper manipulations that lead to cost reductions and efficiency. The ability to control these factors is central in dealing with the obstacles of injection molding process and gaining a competitive advantage in production.