
Injection molding becomes cheaper than 3D printing when its tooling and setup cost are spread over enough accepted parts to offset the printed part’s variable cost. There is no universal breakeven volume because printer rate, material, post-processing, geometry, labor, mold cost, cavity count, cycle, scrap, quality and delivery requirements differ. Use a scenario model instead of relying on a single industry rule of thumb.
For a molded-material trial, compare prototype injection molding and rapid tooling with the eventual production molding route. This page focuses on the cost crossover; the cost-reduction guide addresses improving an already selected molding process.

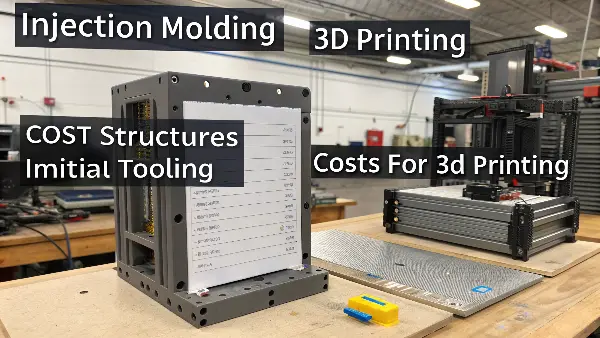
Illustration only. The 500–10,000-unit range printed in this image is not a verified break-even range and must not be used for budgeting. Calculate the crossover from the project-specific costs and assumptions below.
A broad published quantity range is not a budget decision. Build low, expected and high cases from quotations for the same part revision, material, finish, inspection and delivery scope, then identify which assumptions move the crossover.
How is injection molding different from 3D printing?
3D printing is an additive process that builds geometry layer by layer from a digital model. Injection molding forms a part by filling a mold cavity with molten polymer, then packing, cooling and ejecting it. Both routes need process-specific design rules and acceptance evidence.

Equipment illustration only; it is not a documented comparison test or evidence of CKMOLD equipment capability.
The Additive Approach: Building from Nothing
With 3D printing, your part is born from a digital design file (like a CAD file). The printer reads this file and starts building the object from the ground up, one thin layer at a time. Whether it’s melting plastic filament (FDM), curing liquid resin with light (SLA), or fusing powder together with a laser (SLS), the principle is the same: you add material only where you need it.
Additive processes can create features that are difficult to mold, but orientation, supports, powder removal, minimum feature size, anisotropy and inspection still constrain the design. A printed part may avoid molding draft or side actions, yet it is not free of manufacturing rules.
The Formative Approach: Filling a Void
Injection molding requires a dedicated tool and a qualified cell before production. Plastic is melted, injected, packed, cooled and ejected in a repeating cycle. Actual cycle time may be seconds or minutes depending on resin, wall thickness, cavities, cooling, machine movement and handling; it must be demonstrated rather than assumed.
Key Differences to Quote on the Same Basis
| Decision input | 3D printing | Injection molding |
|---|---|---|
| Fixed launch effort | Build preparation, qualification and fixtures as needed; no production mold | Mold, sampling, cell setup and validation |
| Variable accepted-part cost | Build time, material, supports/powder handling, finishing, labor, failures and inspection | Resin, machine time, labor/automation, scrap, maintenance, inspection and packaging |
| Geometry constraints | Orientation, support, nesting, feature resolution, distortion and finishing | Draft, parting, gates, wall strategy, undercuts, cooling and ejection |
| Throughput evidence | Build volume, nesting, utilization, post-processing and accepted yield | Cavities, demonstrated cycle, uptime and accepted yield |
| Material evidence | Printed grade, direction, conditioning and post-process data | Molded grade, process window, cavity traceability and part validation |
Cost Comparison Breakdown: Injection Molding and 3D Printing
Compare both routes against the same accepted-part requirement. Include tooling or print setup, material, machine time, finishing, inspection, scrap, labor, packaging, change risk and delivery; a low prototype price and a production unit price are not directly comparable unless their scope and quality are equal.
Tooling and Setup Costs
Tool and launch cost: Quote mold design/build, hot runner or auxiliaries, sampling, inspection, validation, changes and any dedicated automation. Published $3,000–$100,000 ranges do not define the cost of a specific tool.
Material Costs
Material and accepted-part cost: Use current supplier quotations for the exact resin or print material, including conditioning, supports, purge/runner, scrap and recycling restrictions. Do not use one generic $/kg range for different technologies or grades.
Production Time and Labor
Production time and labor: Model cavities, demonstrated cycle, uptime, yield, handling, finishing, inspection and packaging. A nominal seconds-per-cycle statement is not an accepted-part capacity.
Design Changes and Revalidation
Design changes: a molding change may require steel work, re-sampling and renewed approval, while a printing change may avoid production tooling but still require build preparation, finishing and revalidation. Select the route from the cost and schedule of the expected revision cycle, not from a claim that changes are instantaneous or free.
The economic route depends on program stage, forecast, geometry, material, quality and change risk. Printing often supports early learning or uncertain demand; molding can reduce accepted-part cost after its fixed launch cost is recovered. Neither route guarantees uniform quality or the lowest total cost without a controlled process and acceptance evidence.
Is injection molding really cheaper than 3D printing?

Cost matters only after both routes can meet the material, geometry, tolerance, surface, regulatory and validation requirements. When both are technically viable, compare the total program cost and change risk with the breakeven model.
Per-Part Cost: Where Molding Shines
After launch, molded accepted-part cost can fall because several cavities and short stable cycles spread fixed cost across volume. Calculate resin, machine, labor, scrap, maintenance, inspection and packaging; do not assume every molded part costs pennies.
Printed unit cost depends on nesting, utilization, material, support, finishing, failed builds, labor and inspection. Setup can be spread across a batch, so the cost of one and one thousand parts is not automatically identical; request the actual batch assumptions.
Calculate the Breakeven With Accepted-Part Cost
Let Q be the number of accepted parts. Printing total cost is Tp = Fp + Q × Vp; molding total cost is Tm = Fm + Q × Vm. Fixed launch costs Fp and Fm use the same currency, while Vp and Vm are variable cost per accepted part. In the usual case where Fm > Fp and Vp > Vm, the equality point is Q* = (Fm − Fp) ÷ (Vp − Vm). Molding is cheaper above that quantity under these assumptions; equality is not yet a saving.
If Vp = Vm, compare fixed costs: increasing quantity does not recover a higher molding launch cost. If Vp < Vm, greater quantity does not favor molding in this simple model. Compare the two total-cost equations directly when the fixed-cost ordering is different. Use separate quantity bands if prices, cavities, yield or labor change with volume; do not extrapolate one constant unit cost through those changes.
Illustrative calculation, not a CKMOLD quotation: assume USD 200 printing setup plus USD 7 per accepted part, and USD 6,200 molding launch cost plus USD 1 per accepted part. The equality point is (6,200 − 200) ÷ (7 − 1) = 1,000 accepted parts, where each total is USD 7,200. At 1,001 parts, molding is USD 6 cheaper in this simplified model. The unit costs already include the assumed yield loss; do not divide by yield again.
Test the decision against a plausible alternative quote: if printed variable cost falls to USD 4 with all other assumptions unchanged, equality moves to 2,000 accepted parts. Confirm that forecast demand, capacity, delivery and the expected revision life support that volume. Add inventory, transport, validation and change costs consistently when they are outside either quotation.
Ask both suppliers to quote the same CAD revision, material/performance requirement, finish, tolerances, sample approval, quantity profile and delivery scope. Submit those inputs through the RFQ page; if CAD is needed, send it separately to jerry@ckmold.com after submitting the form.
Formlabs’ published mixer-latch cost comparison demonstrates how strongly a crossover depends on the selected part, printer, labor, tooling and purchasing assumptions. It compares its own in-house printing route with outsourced molding and excludes shipping and tariffs. Use its method to question a quotation; do not transfer its prices or crossover to another part.
How Does Part Complexity Change the Crossover?
Undercuts, textures, thin walls, deep features and internal geometry may add mold actions, inserts, cooling work, finishing or qualification effort. Ask the mold maker which features change the fixed launch cost and which change cycle, yield or maintenance. A geometry change can affect both terms.
Printing avoids many mold actions, but geometry still affects orientation, support, nesting, build time, distortion, finishing and inspection. Complexity changes both cost models in different ways, so it cannot be omitted from the printed-part quotation.
What’s the most cost-effective 3D printing method for early prototypes?
FDM can be economical for some form-and-fit prototypes, but it is not automatically the cheapest usable route. Select FDM, SLA, SLS, MJF or another method from required material behavior, feature size, tolerance, surface, build orientation, quantity, finishing and test purpose.

When FDM Is Sufficient for the Test
FDM can support rapid iteration when its layer resolution, anisotropy, material and finish are adequate for the test. Quote machine time, support removal and labor; do not promise a same-day part or a few-dollar cost without a specific build.
When to Consider SLA, SLS or Other Processes
- SLA: screen it when fine features or a smooth presentation surface matter, then verify resin aging, dimensional stability, support marks and whether the part is suitable for the planned functional test.
- SLS or MJF: screen powder-bed nylon routes when support-free nesting or selected functional behavior is useful, then verify grade, direction, porosity, tolerance, surface and conditioning.
- FDM: screen it for selected form, fit or fixture work when layer resolution, direction and surface are adequate.
Request a process and material that answer the prototype’s test question; no method is automatically cheapest or closest to an injection-molded production part.
Match the Prototype to the Question
| Question | Evidence to request |
|---|---|
| Does the geometry fit the assembly? | Critical dimensions, build direction, support-removal condition and inspection result |
| Does the surface communicate the design? | Finish method, color, gloss, support marks and viewing condition |
| Can it support a functional test? | Exact print grade, orientation, conditioning, load case and limitations versus production material |
Select the least costly route that provides valid evidence for that question. A prototype that looks good may not represent production mechanics, and a strong printed coupon may not represent a molded weld line or fiber orientation.
Consider Development and Change Risk
3D printing is flexible when the design changes weekly. A mold becomes valuable after geometry and requirements stabilize, but a late change may create rework. Rapid tooling can occupy a middle position when the team needs injection-like material and process evidence before production tooling.
Model the Whole Program
Use expected volume, timing, variant count, inventory, service parts, validation and end-of-life demand. A high-volume part may justify a multi-cavity or production tool, while several low-volume variants may favor printing or a common modular mold.
When Does Injection Molding Become Cheaper Than 3D Printing: Buyer Review Checklist
- Calculate printed and molded cost using accepted parts, labor, material, finishing and inspection.
- Use fixed-cost and variable-cost assumptions in a sensitivity model, not one breakeven number.
- Include geometry, tolerance, surface, material and quality differences in the decision.
- Account for design-change risk, validation timing, variants, inventory and service demand.
- Consider rapid tooling when injection-like evidence is needed before final production tooling.
FAQ
What volume makes injection molding cheaper than 3D printing?
There is no universal number; calculate it from mold cost, printed cost, molded cost, yield, labor, cavities, quality and the actual volume scenario.
Can 3D printing remain better at high volume?
Yes, when customization, geometry, revision frequency or the qualified printed process keeps total program cost lower. High aggregate volume spread across many variants is different from high repeat volume for one stable part. Compare accepted performance and cost for the actual variant mix.
Conclusion
The decision is project-specific. Printing may reduce early fixed cost and preserve change flexibility; molding may reduce accepted-part cost after the calculated crossover. Use the formula and sensitivity cases above rather than a universal 500–10,000-part threshold.