
Are you struggling with TPE parts that come out with flash, warpage, or poor surface finish? Thermoplastic elastomers can be tricky. Bad process settings can waste a lot of time and material. If you do not get the parameters right, your project will fail. I will show you how to set up your process and fix common problems quickly.
The best practices for TPE injection molding include setting the melt temperature between 320°F and 430°F, using moderate to fast injection speeds, and applying enough packing pressure to avoid sink marks. You also need to control mold temperatures, usually keeping them between 70°F and 130°F. If you face defects like flash, you should lower the injection pressure or check mold clamping force. For short shots, increase the melt temperature or injection speed to help the material flow better.
Getting these settings right takes some practice. When I first started working with TPEs in the factory, I made many mistakes that ruined whole batches of parts. But once you understand how this material acts under heat and pressure, things get much easier. Let us look closer at the specific settings and fixes you need to succeed.
What are the ideal temperature settings for TPE injection molding?
Dealing with burnt TPE or parts that will not fill the mold? Temperature control is usually the main problem. If your barrel is too hot, the material degrades. If it is too cold, the plastic will not flow. Here is how you can find the perfect heat range.
The ideal temperature for TPE injection molding depends on the specific grade, but generally ranges from 320°F to 430°F (160°C to 220°C). The feed zone should be cooler, around 300°F, to prevent early melting. The nozzle should be the hottest part. The mold temperature should stay between 70°F and 130°F (20°C to 55°C) to cool the part evenly and stop sticking.
Temperature control is the heart of working with TPE. I remember a time when a client sent me a design for a soft-grip tool handle. We tried to mold it, but the material kept burning. We had the heat set too high in the rear zones. TPE melts differently than hard plastics like ABS. It needs a smooth rise in heat as it moves toward the nozzle.
How barrel zones affect TPE
You must set the barrel temperatures in a rising profile. This means the back is cooler and the front is hotter.
| Barrel Zone | Recommended Temperature Range | Purpose |
|---|---|---|
| Rear (Feed Zone) | 300°F – 340°F | Stops material from melting too early and blocking the throat. |
| Middle Zone | 340°F – 380°F | Starts to melt the TPE evenly. |
| Front Zone | 360°F – 400°F | Finishes melting and gets the plastic ready to shoot. |
| Nozzle | 380°F – 430°F | Keeps the plastic hot enough to flow into the mold. |
Mold cooling matters too
Your mold temperature is just as important as your barrel heat. If the mold is too hot, the TPE will stay soft. It will stick to the metal when the mold opens. If the mold is too cold, the TPE might freeze before it fills the whole shape. You need to use chillers or heaters to keep the mold steady. A steady mold heat gives you parts that look the same every time. You should always use a thermometer to check the mold steel.
How do you control injection speed and pressure for TPE?
Do your parts have ugly flow marks or missing sections? Wrong speed and pressure settings cause this. Pushing TPE too fast causes shear heat, which burns the plastic. Pushing it too slow leaves the mold empty. You need a good balance to get perfect parts.
For TPE injection molding, you should use moderate to fast injection speeds to push the material into the mold before it cools. However, if the speed is too high, it creates flow marks. You need to set the injection pressure high enough to fill the mold fully. After filling, apply a holding pressure that is about 50% to 70% of the injection pressure. This keeps the part full as it shrinks.
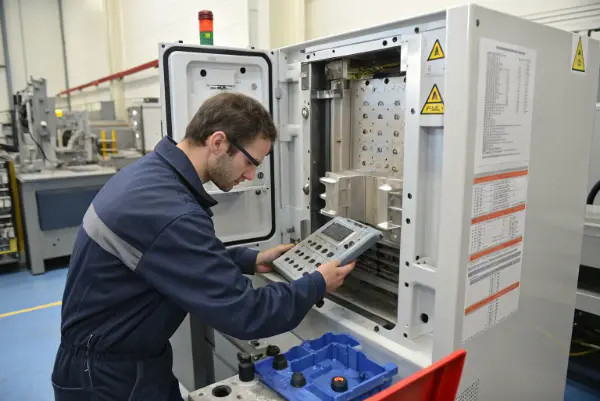
Setting the speed and pressure feels like driving a car. You cannot just step on the gas all the way. Years ago, I worked on a soft phone case project. We tried to fill the mold fast to save time. But the edges came out looking burned and rough. TPE is very sensitive to shear. Shear is the friction the plastic feels when it is pushed through a small hole. If you push too hard, the plastic burns itself from the inside.
Finding the right injection speed
You need to match your speed to the thickness of your part. Thin walls need fast speeds so the plastic does not freeze too early. Thick walls need slower speeds to stop air from getting trapped inside.
Pressure settings for success
Pressure is what pushes the soft plastic into every corner of your mold. But you do not want to use all your machine’s power at once.
| Parameter | Setting Guide | Why it matters |
|---|---|---|
| Injection Pressure | Start low, increase slowly. | Fills the part without pushing the mold open. |
| Holding Pressure | 50% – 70% of injection pressure. | Packs the plastic in to stop sink marks. |
| Back Pressure | 50 – 100 psi. | Mixes the melted plastic and removes air bubbles. |
When you set holding pressure, watch the gate. The gate is where plastic enters the part. You must hold the pressure until the gate freezes solid. If you stop too early, the plastic will flow backwards out of the mold.
What is the best way to design molds for TPE materials?
Are your TPE parts tearing when they come out of the mold? Soft plastics stick easily to metal. If your mold design is bad, the parts will get ruined during ejection. Ejector pins can push right through the soft rubber. Let us fix your mold design before you cut steel.
To design a good mold for TPE, you must use a larger draft angle, usually between 1.5 to 3 degrees, to help the soft part release easily. You should also add a textured finish to the mold surface to stop the TPE from sticking like a suction cup. Make sure you use large ejector pins or stripper plates because small pins will poke holes in the soft plastic. Place cooling lines close to the cavity.
Mold design for TPE is completely different from hard plastics like polycarbonate. Early in my career, I designed a mold for a rubber seal. I used standard draft angles and small ejector pins. When we ran the mold, the pins punched holes right through the seals. We had to remake the whole mold. That was a very expensive lesson. TPE acts like a rubber band, so you have to treat it gently.
Draft angles and textures
Because TPE is sticky, you need more slope on the sides of your mold. This slope is called draft. A big draft angle lets the part slide out easily.
| Feature | Hard Plastic Rule | TPE Rule |
|---|---|---|
| Draft Angle | 0.5 to 1 degree | 1.5 to 3 degrees (more if textured) |
| Ejection Method | Standard pins | Large pins, ejector blades, or stripper plates |
| Surface Finish | High polish is fine | Sandblasted or textured is better to stop sticking |
Venting the mold
TPE materials trap air easily. If air gets stuck in the mold, it will heat up and burn the part. You must cut small air vents at the end of the flow path. These vents let air escape but are too small for plastic to leak out. I always tell my clients to put vents everywhere they can. Good venting stops short shots and bad surface finishes.
How do you troubleshoot flash and short shots in TPE molding?
Finding extra plastic on your part edges or missing corners? Flash and short shots are the two most common headaches in molding. Flash means wasted material and extra cleaning work. Short shots mean the part goes straight in the trash. You need a simple way to fix these issues fast.
To fix flash in TPE molding, you should lower the injection speed or pressure. You also need to check if the mold clamping force is high enough to keep the mold tightly closed. To fix short shots, where the mold does not fill completely, you should increase the melt temperature, raise the injection speed, or clean out blocked air vents. Adjusting one setting at a time helps you find the exact cause.
Troubleshooting TPE is like being a detective. When I owned my first factory, we ran a big job making soft pedals. One day, every part had flash. The next day, half the parts were short shots. I learned that you cannot just change buttons randomly. You have to look at the clues the plastic gives you.
Stopping flash
Flash happens when plastic sneaks out of the mold cavity. TPE is very thin when it melts, so it flashes easily.
| Cause of Flash | How to Fix It |
|---|---|
| Injection pressure too high | Lower the pressure by 10%. |
| Material too hot | Lower the barrel temperature. |
| Clamping force too low | Increase the machine clamping force. |
| Tooling wear | Check the mold for damage and repair the steel. |
Curing short shots
A short shot is the exact opposite. The plastic stops moving before the part is done. Sometimes this is because the plastic is too cold. Other times, it is because trapped air is pushing back against the plastic. If raising the heat does not work, look at your vents. I always clean the mold vents first when I see a short shot. A tiny piece of dirt in a vent can ruin a whole shift of work. Do not ignore your air vents.
How do you fix shrinkage and warpage in TPE parts?
Do your finished parts look bent or smaller than you planned? TPE shrinks as it cools down. If it shrinks too much or unevenly, the part will warp. This ruins the fit and function of your product. You need to control how the plastic cools to keep the shape perfect.
To fix shrinkage and warpage in TPE parts, you must hold the packing pressure longer. This keeps pushing material in while the part cools, which makes up for the shrinking. You also need to make sure the mold temperature is even on both sides of the tool. If one side is hotter, the part will warp and bend towards the hot side. Check your cooling lines to ensure good water flow.
Shrinkage is a natural part of making plastic parts. But with TPE, it can really surprise you. I remember making a long, flat TPE strip for a car door. When the strips fell out of the machine, they were straight. Ten minutes later, they looked like bananas. They warped because we cooled one side too fast. The part will always shrink towards the heat.
Managing the packing phase
The best weapon against shrinkage is your holding pressure. When the mold is full, the plastic starts to shrink away from the walls. You must keep pushing more plastic in.
| Problem | Root Cause | Solution |
|---|---|---|
| High total shrinkage | Packing time too short. | Increase holding pressure time until the gate freezes. |
| Part is warping | Uneven mold cooling. | Check water flow in mold cooling channels. |
| Sink marks | Not enough holding pressure. | Increase the holding pressure slowly. |
Cooling evenly
Water channels inside the mold control the cooling. If one channel gets blocked with rust or dirt, that side of the mold gets hot. This is why you must clean your mold cooling lines often. I always teach my team to use a thermometer on the mold steel. We check the heat in different spots. If the numbers are different, we know we will get warped parts. Keeping everything steady and even is the true secret to mastering TPE molding.
Conclusion
TPE injection molding requires careful control of temperatures, pressures, and mold design. You must use a rising heat profile, manage your injection speeds, and design molds with good draft and venting. By solving common issues like flash, short shots, and warpage methodically, you will save time and produce high-quality parts every single time.