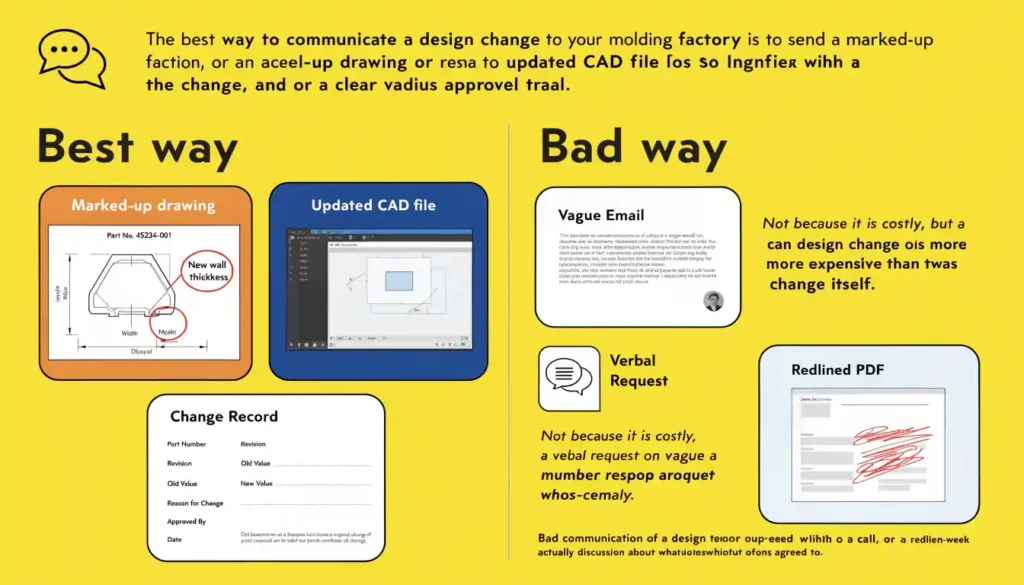
Send one controlled change package: updated CAD, a marked drawing and a short change record that identifies the part, current and new revisions, old and new requirements, reason, affected cavities, approval owner and required verification. This prevents verbal or chat instructions from becoming an ambiguous machining decision.
“Communicate early” is useful only when the factory receives measurable, revision-controlled information. This article explains the minimum package, how timing changes the tool impact, and what engineering response to obtain before authorizing work.
Why "Just Tell Them What Changed" Isn’t Enough
Verbal instructions such as “make the boss a little thicker” leave essential questions unanswered: which boss, what new dimension and tolerance, which surrounding walls or datums change, and whether ejector, cooling or assembly interfaces are affected. Put those answers in the controlled change package rather than asking the toolmaker to infer design intent.
If no one answers those questions, someone at the factory makes a reasonable guess and answers them. On occasion, the guess is correct. If it’s not, you discover it at the T1 sample review, after cutting steel based on the incorrect assumption.
The solution isn’t to be more enthusiastic in your emails. It’s providing the factory with one of the following: a marked-up drawing, a changed CAD file, or a written change description linked to a feature, dimension, or callout number. If you can show the tooling engineer exactly where the change will be applied on the part in a way they can open and measure, you’ve already done the difficult part.
Know Which Kind of Change You Are Actually Requesting
Be familiar with the type of change you’re asking for. Some design changes are more expensive than others, and understanding the category of your change will impact the way you communicate.
Steel-safe changes
“Steel safe” describes a direction and allowance intentionally left so a feature can be adjusted by removing steel from the relevant core, cavity or insert. It is feature- and tool-design-specific: enlarging a plastic feature may require removing steel on one mold side but not another, so the tooling engineer must confirm the actual geometry.
If the DFM or mold drawing identifies a steel-safe allowance, reference that feature and remaining allowance in the change request. Do not assume the label makes the modification quick; access, heat treatment, texture, nearby cooling and dimensional dependencies still affect the method, cost and schedule.
New-feature changes
Adding a boss, rib, or snap feature that wasn’t part of the original design can be more involved than a simple edit, and in some cases, needs a new mold section. Depending on where the feature sits and how the mold was built, the tooling engineer may handle it as a local edit, a new insert, or a larger mold section. If the added feature could shift plastic flow or cooling, or risk warping or sink marks, a Moldflow re-check may be worth running before machining, but it isn’t required for every added feature.
You don’t need to classify the change with certainty. However, when you submit the change, naming your best guess (I believe this is steel safe, but please confirm) provides the molding factory engineer with a starting point rather than a blank drawing to interpret from scratch.
Add-steel, insert-replacement and larger modification paths
When the required plastic geometry cannot be achieved by the available steel-removal direction, the tool may need welding and re-machining, a replacement insert, a new local insert or a larger section rebuild. Ask the tooling engineer to compare these routes rather than assuming every add-steel change requires welding.
Each route has different cost, timing, finish, hardness and service-life implications. A replaceable insert can be preferable when the tool architecture permits it; a qualified weld repair can be appropriate in other cases. Record the selected method and affected surfaces.
Before authorization, obtain the proposed repair method, affected steel/texture, dimensional verification, required trial scope, cost and lead-time impact.
Submit the Change as a Marked File, Not a Description.
The one thing you can send that will help is a redlined drawing or a new 3D model, not a paragraph. A redline is a copy of your original drawing with the changes highlighted in a different color and a note explaining the changes and why.
A usable change submission contains at least:
- The drawing or model affected by the change, with the change marked visually at the exact location of the feature.
- If your drawing includes dimension or feature callouts, include the dimension or feature callout number.
- Old value and new value, expressed numerically (not adjectivally), e.g., 2.5 mm to 3.0 mm rather than "a bit thicker."
- Briefly, why the change was made (for fit, failure in field, cosmetic request, cost reduction)
- If you have a multi-cavity tool, whether this has an impact on one cavity or all cavities
That’s why the reason field is important. If it’s a functional failure in the field, it’s treated differently than if it’s a cosmetic preference; if it’s a functional failure, a factory that understands the reason you’re asking might have a better solution than the one you’re asking for. Without it, your engineer is merely an order taker, and you miss out on the skills you are paying for.
A Quick Change-Request Checklist:
Before sending the request, confirm your package includes: part number and current revision number; the new revision number the change will roll into; old and new dimensions with tolerances; the updated CAD file and marked-up PDF or drawing; written approval from the person authorizing the change; and agreement on how the change will be verified in the next sample round. Keeping these in one place reduces back-and-forth and gives the factory what it needs to price and schedule the work.
Use a Written Change Record, Even an Informal One
Larger or regulated organizations may use a formal Engineering Change Notice (ECN), request, order and implementation notice. A smaller project can use a simpler record, but good change control still identifies the date, revision, approved scope, authorization and first sample or lot in which the change appears.
This is at least
- A unique identifier for the change (such as "Change 3" or a date-based label).
- What was asked for, and what was authorized (this is not necessarily the same as what was approved, and if the factory offered an alternative)?
- Who gave it their blessing and when?
- What is the first mold revision or round of samples in which the change is introduced?
This matters more than it sounds because, three months later, it becomes an unanswerable question: "Which version is this part actually built to?" It usually comes up at the worst time, when the factory pulls the wrong revision from storage or during a quality dispute.
A mold revision mark can support traceability when it is tied to the change log and drawing, but the marking location and need depend on the tool and customer system. Confirm the current tool/drawing revision and the record of implemented changes before issuing the next revision.
Time the Request Around Where the Project Actually Is
The same change can be cheap or expensive depending on when you raise it. The earlier you flag it, the less the factory has to redo.
Before DFM sign-off
This is the lowest-cost place to make changes. No machining has been performed. It’s all right to have a new CAD file and a brief explanation.
After DFM, before steel is cut
Now, the mold design has been settled around the current geometry, and the changes to the mold will require re-touching the mold design, not just the part file, and the cost is still relatively low. Flag it as early in this window as possible.
After steel is cut, before T1 sampling
After steel cutting begins, classify the affected feature by the actual remaining steel, insert architecture and machining status. The path may be further machining, insert replacement, weld repair or a larger rebuild; “steel safe” versus “weld risk” is not a complete decision tree.
After T1 sampling
After T1, the molded evidence helps define the correction. The next verification can be a targeted sample, cavity-specific check or full trial depending on what changed and which dimensions, appearance zones, flow/cooling behavior or assemblies could be affected.
After production has started.
This is the most costly and slowest point of the change, as it usually involves removing a running mold from the production schedule and therefore impacting the delivery of all orders behind it, not only the order that is triggering the change.
This doesn’t mean late changes aren’t allowed. It’s the real question to pose to your factory: "Can you do this?" is not the question; it’s "Given the situation, how much time/money will this be, and will it impact what I’m already doing? A supplier who can tell you that, rather than simply saying yes to you, will be a good one to trust with the next change.
What to Expect Back From the Factory
A controlled change request should receive a documented engineering response before work is authorized. At minimum, request:
- The confirmation of what’s changing, restated in the factory’s own words, so that you can catch a misunderstanding before the actual machining begins.
- If it is a change, whether it is a steel-safe change or a weld repair
- Cost and lead time impact is not "a little extra," but a number.
- If it has an impact on other features, cooling, or cavity balance in a multi-cavity tool
- If a new sample round is needed, what will be measured
When a manufacturer says "yes" to every change, no matter how simple, that’s a red flag that might not be a relief. Or all the changes you’ve made so far were indeed insignificant, but it’s also possible that no one is checking the request against the mold design before approving it.
Common Mistakes That Slow This Process Down
- Only sending the change via text message. While it’s right to use WhatsApp or WeChat for a quick conversation, it’s not a suitable system of record. A change that is discussed in a chat thread and then not confirmed in writing on the actual drawing can easily get confused before approving it and before it’s cut out.
- Talking about the change when compared to a part rather than the drawing. For each person who looks at the part from a different perspective, "the side wall near the connector" has a different meaning. Removing the ambiguity is the callout number or marked location.
- Not making mention of whether the change is for all cavities. In a multi-cavity tool, this is a real and common cause of costly confusion. Be clear about which cavity you mean, or whether you mean all of them.
- Costs for design changes aren’t standardized across a project. There is no standard cost for design changes. A steel-safe trim on one feature and a weld repair on a similar-looking feature on a different part of the same part can cost vastly different amounts and will surprise the budgeter if they assume they’re the same.
- Failure to inquire about the disposition of parts already on hand. Existing inventory that was built to the old revision will not automatically receive the change if it’s approved during production. Reach out to ask if it was scrapped, used without changes, or reworked, and obtain a written description of the change and whether it was one of these three options.
FAQs
Does it require an Engineering Change Notice for a small tooling project?
Not necessarily in a regulated-industry format, but keep a controlled record of what changed, who approved it, which revision it creates and the first sample or production lot affected. The format can be proportionate to the project risk.
In the clearest possible terms, what is the difference (steel-safe vs. weld-risk changes)?
A steel-safe change uses a deliberately available steel-removal direction and allowance for a specific feature. Other changes may require insert replacement, welding, new inserts or a rebuild. The tooling engineer should confirm the route from the mold design before cost or timing is approved.
How can I check whether or not the change I requested is steel-safe?
The tooling engineer should check the part change against the core/cavity split, inserts, slides, cooling and remaining allowance. Part-side intuition alone is unreliable because the plastic-feature direction does not always reveal which mold component must gain or lose steel.
Can a change in design be requested after production has begun?
Yes, but it will likely be the slowest and most disruptive time to ask for one, as it will most likely require removing an active mold from the production schedule. Total downtime may be minimized if the change is not critical and can be scheduled with other planned changes.
If I don’t have the CAD software to create a correct redline, what should I send?
A picture or scan of the drawing with the changed dimension(s) marked by a handwritten note showing new and old dimensions is a viable alternative. The key is that the change isn’t just described in words; it’s clearly tied to a location on the part.
The Brief Version
To send a marked file, not a sentence. State old and new values as numbers. Explain the rationale behind the change. If you are asking about the project timeline, flag it, since the change affects cost more than the change itself. Practice getting it in writing, even informally, before the factory lays a hand on any steel. A good molding factory will also meet you halfway with clear answers regarding the cost, timing, and classification. One that says yes to everything without pushing back is worth a second look before you send the next change.