
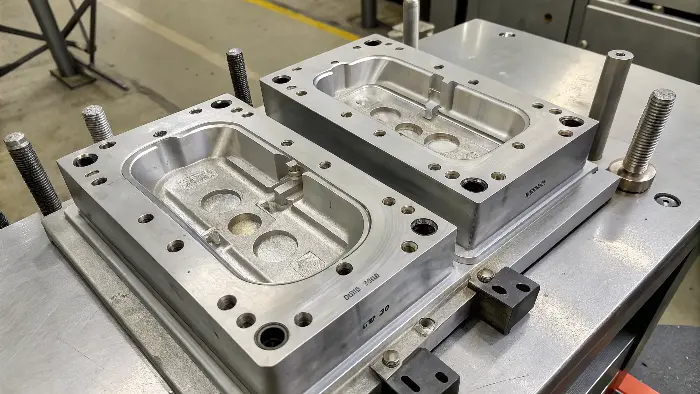
Insert-molded products are reliable only when the insert, polymer, mold and inspection plan are designed as one system. Define location, support, flow loading, shutoffs, retention, residual stress and service tests before production tooling is approved.
A successful insert molded product begins with a component designed to survive molding and remain functional afterward. The insert, plastic, mold and assembly tolerances must be treated as a combined system. Designers should define how the insert is located, loaded, surrounded, cooled, retained and inspected before selecting a production tooling route.
Related CKMOLD resources: insert molding and overmolding, DFM analysis, mold design.
Successful insert molding relies on a well-conceived plan for the insert itself, insert and plastic material compatibility, mold design (gates and runners) to ensure that the insert is maintained, and integration of features to hold the insert firmly in place both in and out of the molding process. Whatever these factors are, they need to be resolved prior to starting to prevent costly errors and result in strong, reliable finished products.

Scope of this guide: This guide concentrates on part and interface design—retention, shutoffs, wall transitions, tolerances and load paths. For ownership, review gates and deliverables across the full program, see the insert molding project workflow.
How Does Proper Insert Design Itself Impact Moldability and Part Strength?
A poorly defined insert can move, damage shutoffs, create flash or concentrate stress in the polymer. Design reviews should therefore cover how the insert is manufactured, tolerated, loaded, encapsulated and inspected—not only its nominal CAD shape.
Successful insert design involves the design of features that assist in its secure positioning and retention in the mold, assist in smooth plastic flow past it, and produce good mechanical interlocks with the plastic. Features like knurls, grooves, undercuts, or through-holes on the insert are not trappings; they play a critical role in preventing the insert from shifting, rotating, or pulling out, thereby leading to a strong and durable assembly.

Give insert design its own controlled review. The approved insert drawing should identify functional datums, orientation, retention features, radii, surface/coating, cleanliness and the dimensions that interact with mold locating and shutoff steel.
- Mechanical Interlocks: Select knurls, grooves, holes, shoulders or keyed geometry for the defined pull-out, torque or anti-rotation load without creating thin polymer ligaments, air traps or excessive stress.
- Knurls: Rough, patterned surfaces that give the plastic something to grip.
- Grooves/Undercuts: Channels or indentations that the plastic flows into, creating a physical lock.
- Through-holes: Holes in the insert allow plastic to flow through, creating a very strong connection, almost like a rivet.
- Shoulders/Flanges: These can help position the insert and provide a surface for the plastic to press against, preventing pull-out.
- Orientation and Placement Features: How will the insert be loaded into the mold?
- Flats or Asymmetrical Shapes: These can prevent the insert from rotating and ensure it’s placed in the correct orientation, especially important for automated loading.
- Avoid Sharp Corners: The plastic molded around the insert may develop stress points due to sharp internal corners, which could result in cracks. Try to include radii where possible.
- Material and Surface Finish: The insert material itself and its surface texture can influence how well the plastic adheres. A slightly rougher surface might be better than a highly polished one for some plastic-insert combinations.
- Tolerances: The insert needs to fit snugly in the mold cavity. If it’s too loose, it can shift. It may become stuck or harm the mold if it is too tight.
Key Insert Design Features and Their Purpose
| Insert Feature | Purpose |
|---|---|
| Knurling | Increases surface area and provides grip for anti-rotation and pull-out resistance. |
| Grooves/Undercuts | Create mechanical locks when plastic flows into them. |
| Through-holes | Allow plastic to flow through, forming a strong mechanical anchor. |
| Shoulders/Flanges | Help with positioning, prevent push-through, and resist pull-out forces. |
| Flats/Keyways | Ensure correct orientation and prevent rotation. |
| Radiused Edges | Reduce stress concentration in the surrounding plastic. |
What Role Does Material Selection Play for Both the Insert and the Plastic?
Selecting materials for your insert and the surrounding plastic may seem simple, but a mismatch can lead to serious issues. Incompatible materials can lead to poor adhesion, cracking due to different shrinkage rates, or even chemical degradation, dooming your part. Achieving a long-lasting and useful insert molded product requires an understanding of proper material selection and pairing.
Material selection is critical. The insert material must withstand molding temperatures and pressures, while the plastic must be compatible with the insert for good adhesion and have appropriate flow characteristics. In order to avoid stress, cracking, or delamination after molding, it is also necessary to control the differences in the thermal expansion coefficients of the plastic and the insert.

Do not infer compatibility from material family names. Compare thermal expansion, processing exposure, chemical contact, moisture/conditioning, corrosion, galvanic risk and the exact grade’s adhesion or mechanical-retention behavior.
- Melt Flow Index (MFI): A higher MFI means the plastic flows more easily, which can be good for filling around complex inserts, but too high might lead to flashing.
- Shrinkage Rate: All plastics shrink as they cool. If the plastic shrinks too much around a rigid insert, it can cause high stress or even crack the plastic.
- Mechanical Properties: Strength, stiffness, impact resistance – these need to match the application.
- Thermal Properties: Can it withstand the operating temperatures of the final product?
- Adhesion Characteristics: Some plastics bond better to metals or other materials than others.
For the insert material (often metal, but can be ceramic or another plastic):
- Strength and Stiffness: It must withstand the injection pressure without deforming.
- Thermal Conductivity: High thermal conductivity can help the insert cool faster, but it can also create a cold spot that affects plastic flow if not managed.
- Corrosion Resistance: Important if the part will be exposed to moisture or chemicals.
- Coefficient of Thermal Expansion (CTE): This is a big one. If the CTE of the insert and the plastic are very different, temperature changes can cause stress at the interface. For example, metals generally expand less than plastics.
Material Property Considerations for Insert Molding
| Property Category | Plastic Resin Considerations | Insert Material Considerations |
|---|---|---|
| Mechanical | Tensile strength, impact resistance, flexural modulus. | Yield strength, hardness, resistance to deformation. |
| Thermal | Melt temperature, heat deflection temperature, shrinkage rate. | Melting point, thermal conductivity, CTE. |
| Flow/Processing | Melt Flow Index (MFI), viscosity. | N/A (but surface finish can affect plastic flow over it). |
| Compatibility/Adhesion | Chemical compatibility with insert, potential for bonding. | Surface energy, potential for chemical/mechanical bonding. |
Why is Strategic Gate Location and Runner Design Crucial for Insert Molding?
Your design may succeed or fail based on how the plastic enters the mold, even though you have your insert and materials. Poor gate placement can cause the plastic to hit the insert directly, potentially damaging or dislodging it, or lead to unfinished filling and weak spots. Let’s discuss why carefully planning your gate and runner system is critical for protecting your insert and ensuring a high-quality molded part.
Strategic gate location and runner design ensure that molten plastic flows smoothly and evenly around the insert, rather than directly impinging on it. This minimizes the risk of insert movement, damage, or “jetting.” Well-designed runners also help maintain consistent pressure and temperature, leading to uniform filling, strong bonds, and reduced internal stresses in the final part.

The gate is the opening where molten plastic enters the mold cavity. Its position and type are super important.
- Avoid Direct Impingement: The golden rule! You don’t want the high-velocity stream of hot plastic hitting your insert head-on. This can push the insert out of position, bend it (if it’s delicate), or cause uneven cooling and stress.
- Gate Types:
- Tab Gate: Often a good choice as it directs flow along a wall rather than at an insert.
- Submarine (Sub) Gate or Tunnel Gate: Can be useful for automatic de-gating, but placement needs to be careful to avoid jetting towards an insert.
- Film Gate or Fan Gate: Spreads the flow out, which can be good for filling around larger inserts or flat areas, reducing localized pressure.
- Multiple Gates: For larger parts or parts with complex insert geometry, using multiple gates can help the plastic flow more evenly and fill the cavity completely without excessive pressure on any single point of the insert.
- Runner System: The channels that lead the plastic to the gates should be “balanced.” This means they are designed so that all cavities (if it’s a multi-cavity mold) or all parts of a single large cavity fill at the same time and pressure. This prevents one area from being overpacked while another is underfilled.
Flow analysis can compare pressure and flow-front loading around the insert, but it must use representative geometry, material data and process assumptions. Confirm the predicted loading and weld/air regions with controlled trials before changing steel or approving the production window.
Gate Types and Their Suitability for Insert Molding
| Gate Type | Advantage for Insert Molding | Potential Concern |
|---|---|---|
| Tab Gate | Directs flow along a wall, good for avoiding direct impact on insert. Easy to remove. | Can leave a larger vestige. |
| Submarine Gate | Allows automatic de-gating. Can be hidden. | Requires careful placement to avoid jetting at insert. |
| Film/Fan Gate | Spreads flow over a wide area, good for even filling around large inserts, reduces stress. | Can be more complex to design and machine. |
| Cashew Gate | Allows gating onto an internal surface, good for aesthetics. | Similar concerns to submarine gates regarding jetting. |
How Can You Design for Secure Insert Retention and Prevent Movement During Molding?
Your insert looks great, but if it moves during the high-pressure injection process, your part is ruined. Insert shifting leads to misaligned components, inconsistent part quality, and potentially damaged molds, causing significant production delays and costs. We need to explore design strategies for both the mold and the insert itself to ensure it stays exactly where it’s supposed to be.
Designing for secure insert retention involves creating features in the mold cavity that precisely locate and hold the insert, and features on the insert itself that resist the forces of flowing plastic. This can include support pins, custom-fit pockets in the mold, and designing the insert with shoulders or asymmetrical shapes that prevent rotation or displacement during the injection phase.

Keeping that insert locked in place is a top priority. Here’s how we tackle it:
- Mold Features for Location and Support:
- Support Pins: These are pins in the mold that the insert rests on or against. They need to be robust enough not to bend under injection pressure.
- Custom Pockets/Nests: The mold cavity can be shaped to create a precise pocket where the insert fits snugly. This is very effective for complex insert shapes.
- Crush Ribs: These are small, raised features in the mold that slightly deform or “crush” against the insert when the mold closes, holding it tightly. Use with caution as they can stress the insert if not designed properly.
- Magnetic Holders: If your inserts are made of a ferrous (iron-containing) metal, magnets can be embedded in the mold to help hold them in place.
- Insert Features for Anti-Rotation and Stability:
- Shoulders or Flanges: As mentioned before, these can rest against a surface in the mold, preventing the insert from being pushed too far.
- Asymmetrical Shapes/Flats/Keyways: If an insert is reliably round, it can rotate. Adding a flat side or a keyway that mates with a feature in the mold prevents this.
- Bosses or Protrusions: Features on the insert that fit into corresponding recesses in the mold can provide very positive location.
- Balancing Support with Aesthetics:
- Be mindful that any feature in the mold that touches the insert might leave a small witness mark on the final part. This needs to be considered, especially for cosmetic surfaces.
- Understanding Plastic Flow Forces:
- The incoming molten plastic exerts significant force. You need to anticipate the direction and magnitude of this force and design your retention features to counteract it. Again, mold flow analysis can be helpful here.
Applications of Insert Molding and Overmolding
Insert Molding Applications:
Automotive: Produces long-lasting parts such as knobs, handles, and connectors with metal inserts for strength and plastic for appearance or insulation.
Medical Devices: Produces precise components like surgical instruments or device enclosures, with metal for durability and plastic for comfortable grips.
Electronics: Seals connectors, sensors, or circuit components, insulates and provides structural reinforcement.
Consumer Products: Employed in appliances, tools, and toys, to embed metal components for strength into plastic housing.
Aerospace: Manufactures light yet stiff components like fittings or brackets with metal inserts to enhance mechanical performance.
Overmolding Applications:
Tool Handles: Features soft, ergonomic grips (e.g., rubber over plastic or metal) to provide comfort and to avoid slipping.
Medical Devices: Creates non-slip, ergonomic grips for surgical instruments or devices, usually made of biocompatible materials.
Consumer Electronics: Includes device housings with soft-touch coatings or protective finishes, like remote controls or cell phone cases.
Sporting Goods: Produces club or racket grips, with hard cores and cushioned surfaces.
Automotive: Used in interior components like steering wheels or gear knobs, where hard bases are combined with soft touch coatings.
Key Difference:
Insert molding inserts other materials or metal into plastic, with an emphasis on structural integration. Overmolding covers one material (usually rubber or soft plastic) on top of another (metal or plastic) for enhanced ergonomics, appearance, or protection.
Methods for Insert Retention in the Mold
| Retention Method | How It Works | Key Consideration |
|---|---|---|
| Support Pins | Pins in the mold provide physical support against plastic flow forces. | Can leave witness marks; must be robust. |
| Custom Pockets/Nests | Mold cavity is shaped to closely match and hold the insert. | Requires precise machining of mold and insert. |
| Crush Ribs | Small mold features that deform slightly to grip the insert. | Must be carefully designed to avoid over-stressing insert. |
| Magnetic Holders | Magnets in the mold hold ferrous inserts in place. | Only for magnetic insert materials. |
| Insert Features | Shoulders, flats, keys on the insert mate with mold features for positive location. | Requires these features to be designed into the insert. |
Convert Service Loads Into Interface Tests
Do not approve retention by visual encapsulation alone. Identify the real service load and convert it into a measurable test with conditioning that represents use.
| Required function | Design evidence | Acceptance evidence |
|---|---|---|
| Threaded fastening | torque path, insert shoulder and surrounding wall | installation torque, proof torque and post-cycle crack inspection |
| Pull-out resistance | load direction, engagement length and polymer ligament | defined-rate pull test after agreed conditioning |
| Electrical interface | pin position, insulation spacing and protected contact zone | continuity/insulation and dimensional checks before and after molding |
| Seal or fluid interface | datum, flatness, surface and compression stack | leak/pressure test in the assembled condition |
Record insert lot, molding cavity, process revision and failure mode with the result. That traceability shows whether a failure came from insert variation, loading, molding or the product design.
Make the Insert Mold-Friendly
Add flats, holes, knurls, grooves, undercuts or other retention features where appropriate, while protecting the insert’s function. Avoid thin unsupported projections that can bend during loading or filling. Define insertion direction, datum surfaces and allowable variation for every critical feature.
Give the Resin a Predictable Path
Gate location, flow direction, wall thickness, weld lines and venting affect insert movement and encapsulation. The melt should not push the insert into a cosmetic surface or leave an air pocket around a sealing or electrical area. Flow should be reviewed with insert geometry included.
Control Thermal and Residual Stress
Different materials expand and contract differently. Thick plastic around a metal insert may shrink and create stress, while a rigid insert can restrain the plastic and cause cracks or warpage. Radii, transition thickness, preheating, resin grade and cooling should be selected together.
Design Flash and Ejection Out of the Interface
Parting lines, shutoffs, ejectors and slides must keep plastic away from functional insert surfaces. The part needs enough draft and support to release without pulling the insert loose or damaging an exposed feature. Ejection force should be distributed through the plastic structure.
Build Tolerance and Validation Around the Assembly
Check insert position, exposed length, torque, pull-out, electrical continuity, leak, fit and final dimensions. The acceptance condition should include material lot, insert condition, post-mold temperature or aging when those change the interface.
Design Considerations for Reliable Insert Molded Products: Buyer Review Checklist
- Define insert datums, variation, loading direction, retention and functional surfaces.
- Review gate, flow, weld lines, venting and cavity support with the insert in the model.
- Evaluate thermal expansion, plastic shrinkage, stress, radii and wall transitions.
- Protect functional areas from flash and design ejection for stable release.
- Validate position, retention, torque, electrical, sealing, fit and environmental performance.
FAQ
Why does plastic crack around a molded insert?
Differential shrinkage, sharp geometry, insufficient radii, excessive interference, residual stress, assembly load or unsuitable material can contribute.
Should the insert be preheated before molding?
Sometimes, depending on insert material, resin, thermal shock, bonding and cycle requirements; the decision should be validated rather than assumed.
Conclusion
Successful insert molding is a blend of art and science, with careful design being the foundation. By thoughtfully considering the insert design itself, material choices, gate and runner strategies, and methods for secure insert retention, you can avoid many common pitfalls. I hope this guide from CKMOLD gives you the confidence to tackle your next insert molding project with success, creating robust and reliable products.
Additional Design Decisions
Does a textured or knurled insert guarantee a strong interface?
No. Retention depends on the exact geometry, engaged polymer, load direction, resin condition, molding quality and service environment. Verify it with the specified part-level test.
Is chemical adhesion required?
Not always. Some products rely on mechanical capture, some on an adhesive or compatible overmold bond, and some on both. State which mechanism carries each load and how it will be validated.
Can preheating solve insert cracking?
Preheating may change flow, weld formation and thermal stress, but it is not a universal fix. Establish a safe insert-temperature window and compare molded dimensions, interface strength and material effects.