
Struggling with imperfect part finishes or difficult mold release? Poor polishing could be costing you time and money. Let’s fix that.
Mold polishing is a critical finishing process that creates the desired surface texture on a mold, directly impacting part appearance, release, and mold longevity. It involves systematically removing material using progressively finer abrasives to achieve specific smoothness levels, often defined by SPI standards. This ensures high-quality parts and efficient production.
Injection mold polishing is a controlled surface-engineering process, not simply making steel shiny. The correct technique depends on steel condition, EDM layer, cavity geometry, resin, texture or gloss requirement, optical sensitivity and how the surface will be inspected. Poor polishing can round edges, change shutoffs, expose defects or create a surface that looks good in one direction but fails in production.
Related CKMOLD resources: mold design services, mold testing and validation, mold repair or modification.
What Does Surface Finish Need to Achieve?
Define the product function first: visual gloss or texture, optical behavior, release, sealing/contact, cleaning or a controlled coating interface. A steel finish influences the result, but resin, fillers, color, flow, venting, temperature, pressure, geometry and draft also affect the molded surface.
A smoother tool does not automatically remove weld/flow marks, reduce cycle time or improve durability. Accept the specified mold surface and then validate the molded-part result under representative processing and viewing or functional conditions.
What Are the Basic Principles of Mold Polishing?
Inspect the starting surface before selecting an abrasive. Record machining or EDM condition, damaged layer, exact steel and hardness, target reference, protected edges and how form or roughness will be checked.
- Remove the previous damage, not an arbitrary amount of steel. Start only coarse enough for the observed condition and retain required geometry.
- Use a justified progression. Move on when the preceding scratch or damaged layer is removed; the exact grades depend on the abrasive system and steel.
- Change direction as an inspection aid where geometry permits. Direction helps reveal remaining scratches, but release also depends on draft, texture, resin, pressure and geometry; stroke direction is not a universal ejection solution.
- Prevent contamination. Separate and identify tools, clean the work and component between grades, and inspect under controlled lighting or magnification.
- Protect form and edges. Support the abrasive, control pressure and stop when the specified surface and geometry are achieved.
Uddeholm’s mold-polishing guidance explains gradual abrasive steps, direction changes, cleanliness, pressure and the influence of steel and heat treatment. Apply those principles to the actual geometry and acceptance method rather than copying one grit sequence to every mold.

How Should SPI-Style Finish References Be Used?
The DME Micro-Finish Mold Tool Finish Guide provides preparation references: A-1/A-2/A-3 use #3/#6/#15 diamond; B-1/B-2/B-3 use 600/400/320 paper; C-1/C-2/C-3 use 600/400/320 stone; D-1 uses #11 glass bead at the stated distance, pressure and time, while D-2 and D-3 use #240 and #24 oxide under their stated blasting conditions.
The DME values are approximate tool-surface results under the stated preparation conditions. They are not guaranteed Ra, gloss or appearance values for every supplier, steel or molded polymer. Put the reference, surface zone, transition, protected edges, resin/color, sample standard and inspection conditions on the project specification.
| Family | Published preparation reference | Buyer must still define |
|---|---|---|
| A | diamond-polished grades | steel condition, optical/appearance limit and molded master |
| B | paper-finished grades | direction, zone and acceptable scratch pattern |
| C | stone-finished grades | zone, transition and molded appearance |
| D | specified blasting media/conditions | edge masking, uniformity and rework boundary |
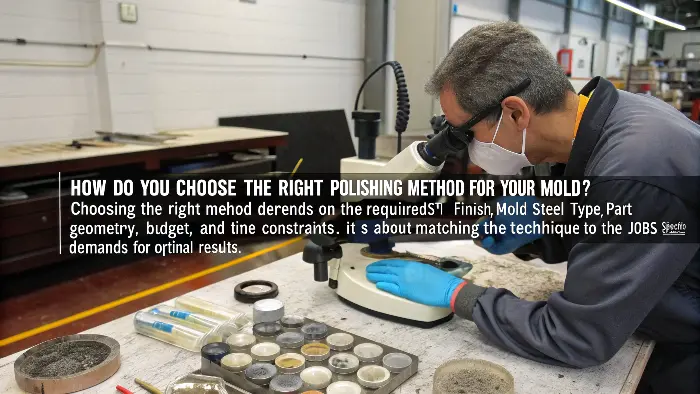
How Do You Choose the Right Polishing Method for Your Mold?
Alright, so you know why polishing is important and you understand the SPI grades. But with so many tools and techniques out there, how do you actually pick the right way to polish your specific mold? It can feel a bit overwhelming.
Choosing the right polishing method depends heavily on the required SPI finish, the type of mold steel, the complexity of the part geometry, and, of course, budget and time constraints. There’s no one-size-fits-all; it’s about matching the technique to the job’s specific demands for optimal results.
 Selecting the right polishing pathway is a bit like a chef choosing the right knife for a specific cut. You wouldn’t use a meat cleaver for fine dicing, right? Same idea here.
1. The Target SPI Finish: Your North Star
This is usually the primary driver.
2. Mold Steel Type: The Canvas
Different steels polish differently.
3. Part Geometry: The Terrain
Complex shapes, deep ribs, sharp corners, and intricate details all influence the choice of tools and techniques.
4. Budget and Time: The Real-World Constraints
Let’s be honest, achieving an SPI A-1 finish is significantly more expensive and time-consuming than a C-3. The labor hours involved in high-gloss polishing are substantial. So, it’s generally a balance between the “ideal” finish and what’s practical and necessary for the application. This is where good communication with the client, like the buyer, is key to ensure the chosen finish aligns with their budget and product requirements. Sometimes, a B-2 is reliably adequate and saves a lot of money compared to an A-2, if the application doesn’t demand extreme gloss.
Choosing the right method is a skill honed through experience. It involves looking at the mold, understanding the requirements, and then planning the most efficient and effective route to get there.
When Are Advanced Polishing Methods Justified?
Ultrasonic, reciprocating, rotary, lapping and other assisted methods can improve access or stock-removal control, but none guarantees nanometer roughness or an optical surface. Select the method from steel, geometry, starting damage, target and measurement capability; prove it on the critical zone without rounding or waviness.
Uddeholm’s polishing guide stresses gradual steps, cleanliness, direction, pressure and steel/heat-treatment quality. For optical work, agree form error, roughness or scatter measurement, viewing/functional test and representative molded sample rather than relying on a mirror-like visual impression.

What Common Mistakes Should I Avoid During Mold Polishing?
Mistake #1: Rushing the Process (The “Grit Skipper”)
This is probably the most common one. You’re trying to save time, so you jump from a coarse stone (say, 220 grit) directly to a much finer paper (like 800 grit) or even a diamond paste.
Mistake #2: Uneven Pressure and Inconsistent Strokes
Applying more pressure in some areas than others, or changing your polishing direction haphazardly.
Mistake #3: The Peril of Over-Polishing
Yes, you can have too much of a good thing! This often happens when trying to remove a stubborn scratch or when focusing too much on one area.
Mistake #4: Ignoring Cleanliness Between Stages (The “Contaminator”)
Not thoroughly cleaning the mold surface, your tools, and your hands when moving from a coarser to a finer abrasive.
Mistake #5: Neglecting Edges, Corners, and Complex Geometries
Focusing all the effort on the easy-to-reach flat or gently curved surfaces and giving less attention to the tricky bits.
Avoiding these common mistakes will dramatically improve the quality and consistency of your mold polishing. It’s all about being methodical, patient, and paying attention to the details. Trust me, a little extra care here goes a very long way!
If you want to learn more about Complex Manufacturing Challenges read our complete article How CKMOLD’s High Pressure Injection Molding Solutions Solved Complex Manufacturing Challenges?
Define the Required Surface Before Polishing
Classify the surface by function and appearance: textured, matte, standard gloss, high gloss or optical-adjacent. Identify visible zones, weld-line sensitivity, gate area and shutoffs. A high gloss on a non-cosmetic region may add cost without value, while a visible lens-like surface needs much tighter control.
Prepare the Steel and Remove the Damaged Layer
Milling marks, EDM recast, heat-affected material, grinding burns, pits and inclusions must be assessed before the abrasive sequence begins. Starting with a finer abrasive cannot reliably hide a deep defect. Surface preparation should preserve dimensions, edges, parting features and corner radii.
Use a Controlled Abrasive Sequence
Polishing normally progresses from coarser correction to finer finishing, with each stage removing the previous scratch pattern. Direction control helps reveal remaining marks, while suitable stones, papers, diamond compounds and tools match the steel and geometry. Excessive pressure or heat can distort small features and contaminate the surface.
Protect Edges, Shutoffs and Deep Features
Flat surfaces are easier than ribs, corners, deep pockets and shutoffs. The polishing method should avoid rounding an edge that controls flash or changing a dimension that affects fit. Specialized tools or hand techniques may be required, and the sequence should be agreed before work on critical surfaces.
Inspect More Than Reflectivity
Inspection may include visual comparison, gloss or roughness measurement, scratch direction, surface replication, dimensions and molded-part appearance. The final test is often a controlled molding trial because a polished steel surface can interact with resin flow, release, texture and cooling in ways that a light-only inspection cannot show.
Injection Mold Polishing Techniques: Buyer Review Checklist
- Classify surface zones and acceptance criteria before selecting a polishing sequence.
- Remove EDM recast, machining marks and burns without changing critical geometry.
- Progress abrasives in a controlled sequence and keep direction and cleanliness consistent.
- Protect edges, shutoffs, ribs, deep pockets, parting surfaces and dimensions.
- Verify surface and molded-part appearance with defined inspection and trial evidence.
FAQ
What is the difference between polishing and texturing an injection mold?
Polishing creates a controlled smooth surface, while texturing intentionally creates a repeatable pattern or matte finish using a separate surface process.
Can polishing remove all EDM marks?
It can remove suitable EDM damage when enough material and access are available, but deep recast, burns or geometry distortion may require rework before polishing.
Conclusion
Reliable mold polishing starts with a measurable surface requirement and an appropriate steel condition. Remove machining or EDM damage progressively, protect geometry, clean between stages and inspect the mold and molded part by the method that matches their function.