
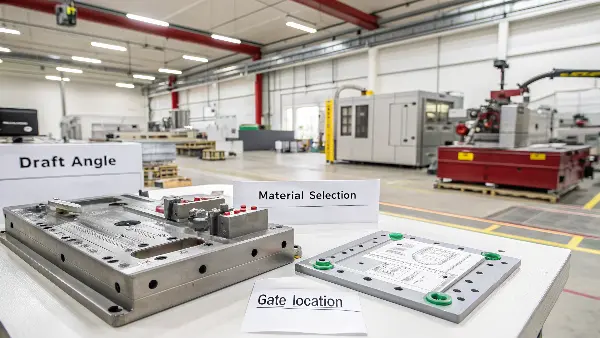
Struggling to make your product stand out in a crowded market? A cheap-looking finish can undermine even the best design, making it feel flimsy and low-quality. You need a finish that not only looks premium but also performs flawlessly. This is crucial for commanding a higher price and building brand loyalty.
Premium appearance is not created by polishing the tool at the end of a project. It is the result of coordinated decisions about visible zones, texture or polish, parting lines, gates, vents, ejection, resin, color, coating and inspection. CKMOLD’s surface-finish capability is most valuable when it is used early to turn a visual target into a manufacturable and repeatable surface system.
Related engineering resources: mold design | DFM analysis | production injection molding
At CKMOLD, we elevate products by providing a comprehensive range of surface finishes, from ultra-high, mirror-like polishes (SPI-A1) to intricate, custom-etched textures. We achieve this through meticulous manual polishing, precision EDM, and chemical etching processes. This allows you to specify the exact look and feel your design requires, ensuring your final product communicates quality and durability, reliably aligning with your brand’s premium positioning and meeting customer expectations.
Why is choosing the right surface finish so critical for your product’s success?
Are you worried that your product’s feel doesn’t match its high-tech function? A poor surface finish can create a disconnect, making customers question the product’s overall quality and value, no matter how advanced it is internally. This can directly impact sales and brand perception, leaving you with a product that fails to meet its market potential.
Choosing the right surface finish is critical because it directly influences three key areas: user perception, product functionality, and manufacturing cost. A premium finish, like a high gloss or a specific texture, communicates quality and justifies a higher price point. Functionally, it can affect grip, wear resistance, and even part ejection from the mold. Finally, the chosen finish impacts mold complexity and production cycle times, so making an informed choice early is vital for a successful and profitable product.
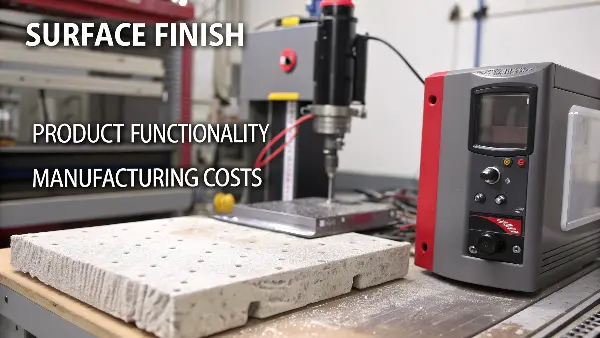
The Tangible Impact of an Intangible Feel
The right finish can transform a simple piece of plastic into a component that feels substantial and reliable. We need to consider how the finish affects the product on multiple levels:
Connecting Finish to Manufacturing Reality
The choice of finish has direct consequences on the mold-making and production process. This is where the production team’s experience becomes invaluable.
| Finish Aspect | Design Consideration | Manufacturing Implication |
|---|---|---|
| High Gloss (Polishing) | Requires a higher draft angle (typically 3°+) to prevent scuffs during ejection. | Involves intensive manual labor and specialized tools. Increases mold cost and lead time. |
| Complex Textures (Etching/EDM) | The depth of the texture dictates the minimum draft angle needed. Deeper textures need more draft. | Mold steel must be of high quality. The process adds steps and cost. Can affect cycle times. |
| Material Choice | Softer materials like TPE will replicate a texture differently than rigid materials like ABS or PC. | Some materials release more easily from certain finishes. This affects mold flow and ejection pin placement. |
Understanding this interplay between design intent, user experience, and manufacturing feasibility is the key. It’s a conversation we need to have early in the design process to prevent costly changes down the line.
How do we achieve finishes from a standard polish to a suitable mirror surface?
Have you ever specified a “high gloss” finish, only to receive parts that look dull or have visible imperfections? This inconsistency can completely derail a premium product launch and requires costly and time-consuming rework. You need a partner who understands the rigorous process required for a true optical-grade, mirror finish.
We achieve a consistent mirror finish (SPI-A1) through a multi-stage manual polishing process. Our skilled technicians start with coarse diamond pastes and progressively move to finer grades, finishing with a soft cloth and a 1-micron diamond paste. Each stage removes the scratches from the previous one, requiring immense patience and expertise. This meticulous work, performed under special lighting to spot imperfections, is what separates a standard polish from a true lens-quality mirror surface.
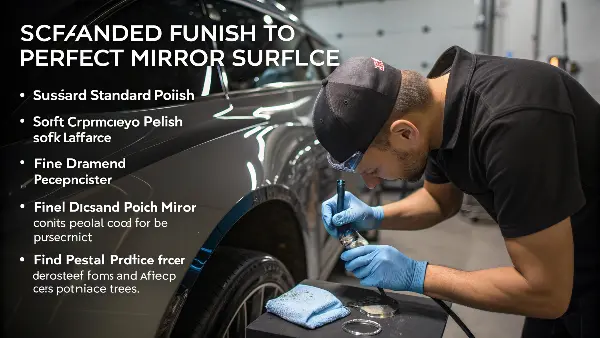
Achieving that suitable, consistent polish is more of an art form than a pure science. I’ve spent countless hours in the workshop watching our most experienced polishers at work. It’s a quiet, focused process. They are not just polishing steel; they are creating the surface that will be replicated on thousands, or even millions, of your products. The difference between an SPI-A2 and an A1 finish might seem small on paper, but the labor involved is immense. It requires a deep understanding of steel properties, the right tools, and an unwavering attention to detail. It’s a craft we take great pride in, as we know this final touch on the mold is the first impression your customer will have of your product.
Breaking Down the Polishing Standards
To ensure everyone is speaking the same language, the industry relies on standardized charts, most commonly the SPI (Society of the Plastics Industry) standards. These provide a clear guide for both designers and mold makers.
- SPI-D (Unfinished): The surface is left as-is after machining. Tool marks are visible. This is typically used for non-cosmetic, internal parts where appearance doesn’t matter.
- SPI-C (Stone Polish): The surface is smoothed with fine stone abrasives (e.g., 600-grit). It results in a low-gloss, matte finish suitable for many industrial products where a basic, clean appearance is sufficient.
- SPI-B (Paper Polish): After stoning, the surface is polished with fine-grit emery paper (e.g., 600-grit paper). This results in a medium-gloss finish. It’s a popular choice for consumer products that need a pleasing appearance without the high cost of a mirror polish.
- SPI-A (Diamond Buff): This is the highest grade, reserved for premium products. The mold is polished with diamond paste in successive stages to create a mirror-like, high-gloss finish.
- A-3: Grade #15 diamond buff. High gloss.
- A-2: Grade #6 diamond buff. Higher gloss.
- A-1: Grade #3 diamond buff. A true mirror finish, often required for optical lenses and luxury product surfaces.
The CKMOLD Polishing Methodology
Our process is built on precision and patience. Here’s a closer look at how we approach a top-tier SPI-A1 polish.
| Stage | Tool/Material Used | Objective |
|---|---|---|
| 1. Initial Smoothing | Stones (320-600 grit) | Remove all machine marks and create a uniform surface. |
| 2. Pre-polishing | Emery Paper/Diamond Paste (15-micron) | Erase all stone marks and begin developing a luster. |
| 3. Main Polishing | Diamond Paste (6-micron) | Refine the surface, removing all previous finer scratches. The gloss becomes highly reflective. |
| 4. Final Buffing | Diamond Paste (1-3 micron) & Soft felt bobs | Achieve the final optical-grade mirror finish. This stage is about perfection. |
This systematic approach, combined with our technicians’ years of experience, ensures that when you specify a finish, you get exactly what you expect, consistently across the entire mold surface.
How do you create unique textures beyond a simple polish?
Does your design call for a unique tactile feel, like a leather grain or a geometric pattern, that a simple polish can’t provide? Trying to achieve these complex finishes can be a challenge, and a poor execution can make a product look cheap and poorly made. You need a process that can faithfully replicate intricate details consistently.
We create custom textures using two primary methods: chemical etching and Electrical Discharge Machining (EDM). For organic patterns like leather or wood grain, we use a photo-etching process where acid selectively eats away at the mold surface. For precise geometric patterns or deep textures, we use EDM, where a custom-shaped electrode erodes the steel with high-frequency sparks. This dual capability allows us to produce nearly any texture you can design.
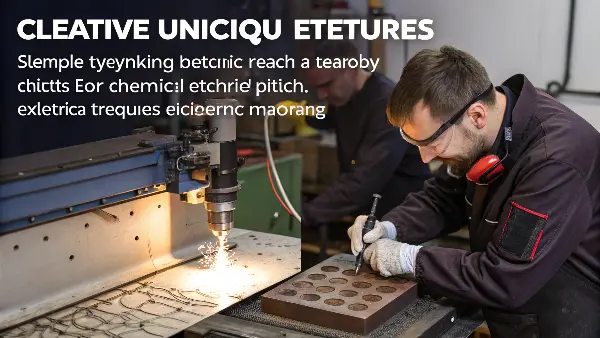
Two Paths to Texture: Etching vs. EDM
Choosing the right texturing method is crucial and depends entirely on the desired outcome. Both have their strengths and are suited for different applications.
-
Chemical Etching: This process is ideal for creating complex, non-uniform, and organic-looking surfaces. Think of it like developing a photograph on steel.
- Cleaning: The mold cavity is meticulously cleaned to ensure the surface is free of any oils or contaminants.
- Masking: A “resist” (an acid-proof material) is applied to the mold surface. A pattern, often developed on film, is used to expose certain areas of the resist.
- Etching: The mold is submerged in an acid bath. The acid eats away at the unprotected areas of the steel, creating the texture. The depth is controlled by the acid’s strength and the duration of exposure.
- Stripping: The resist is removed, revealing the final textured surface.
-
Electrical Discharge Machining (EDM): This method is suitable for precise, repeatable, and often geometric patterns. It uses electrical sparks to erode steel.
- Electrode Creation: A custom electrode is machined from graphite or copper. The shape of the electrode is the inverse of the desired texture.
- EDM Process: The mold and the electrode are placed in a dielectric fluid. A current is passed through the electrode, creating controlled sparks that jump to the mold surface, eroding the steel molecule by molecule to match the electrode’s shape.
- Finishing: The surface left by EDM has a unique matte texture of its own, which can either be the final desired finish or be polished further.
Choosing the Right Method for Your Design
Understanding the difference is key to specifying the right process for your product.
| Feature | Chemical Etching | Sinker EDM |
|---|---|---|
| Best For | Organic patterns (leather, wood, stone), large surface areas, subtle frosting. | Geometric patterns (grids, logos), sharp-edged details, deep textures. |
| Precision | Good for overall look and feel, but less precise for sharp lines. | Extremely high precision and repeatability, suitable for technical patterns. |
| Depth | Typically creates shallower textures. | Can create very deep textures with sharp, defined walls. |
| Cost | Generally more cost-effective for large, complex organic patterns. | Can be more expensive due to the need to machine a custom electrode. |
By offering both methods, we can advise you on the most effective and economical way to achieve the exact texture that will make your product stand out.
What design factors are critical for achieving a suitable surface finish?
Are you frustrated by finished parts showing drag marks, flow lines, or uneven gloss? These flaws often originate not in the manufacturing process, but in the initial design. If key factors like draft angles and material selections are not optimized for your chosen finish, achieving perfection is nearly impossible.
The three most critical design factors for a suitable surface finish are draft angle, material selection, and gate location. A higher gloss or deeper texture requires a greater draft angle (often 3-5 degrees or more) to prevent scuffs during part ejection. The type of plastic resin chosen directly impacts how well it replicates the mold surface. Finally, the gate location must be carefully planned to hide any aesthetic blemishes and control the flow of plastic, preventing defects like flow lines and knit lines.
A Designer’s Checklist for a consistent Finish
Before you finalize your design, running through a mental checklist can prevent most common surface finish issues. We work with our clients to review these points together.
-
Draft Angle, Draft Angle, Draft Angle: This is the most common culprit for surface defects. A part needs to release cleanly from the mold. The friction during ejection can cause drag marks or scuffs, especially on delicate finishes.
- Rule of Thumb: A standard polish (SPI-C1) might only need 1-2 degrees. A high-gloss, mirror finish (SPI-A1) needs at least 3 degrees, and sometimes 5 or more.
- Textures: For every 0.001 inch (0.025mm) of texture depth, you should add approximately 1 to 1.5 degrees of draft.
-
Material Selection Matters: Not all plastics are created equal when it comes to finish.
- Amorphous plastics (like PC, ABS, and PS) are excellent at replicating high-gloss, polished surfaces. They shrink uniformly and create a beautiful sheen.
- Semi-crystalline plastics (like PP, PE, and Nylon) tend to shrink more and don’t replicate polished surfaces as well, often resulting in a duller finish. However, they are great for textured surfaces. Glass-filled materials are abrasive and can quickly wear down a polished mold, and the fibers can be visible on the surface.
Strategizing for Cosmetic Perfection
Beyond the core factors, we need to think like a manufacturer to hide the unavoidable marks of the molding process.
| Design Element | Strategic Consideration | CKMOLD’s Approach |
|---|---|---|
| Gate Location | The gate will generally leave a small blemish. Where can we hide it? | We analyze the part’s use case to place the gate on a non-cosmetic surface, under a label, or in an area that will be covered by another part. We might use a submarine gate or a hot tip to minimize the mark. |
| Parting Line | The line where the two mold halves meet can sometimes be visible. | We try to place the parting line along a sharp edge or corner of the part to make it virtually invisible, integrating it into the design itself rather than letting it be a random flaw. |
| Ejector Pin Marks | These circular marks are necessary to push the part out of the mold. | We strategically place ejector pins on non-visible, structural features like ribs or bosses. We also ensure they are flush with the mold surface to prevent indentations or raised marks. |
By considering these factors up front, we move from simply making a part to engineering a high-quality product, ensuring your design intent is reliably preserved in the final piece.
Translate the Visual Target Into Engineering Language
Define gloss, texture, roughness, color, grain direction, transition location and acceptable witness marks. A reference photograph can communicate intent, but it cannot replace a zone map or inspection method. Separate appearance-critical surfaces from hidden and functional surfaces so tooling effort follows customer value.
Protect the Surface During Part and Mold Design
Gate, weld-line, vent, ejection and parting-line decisions can be visible after molding even when the steel texture is suitable. Use DFM to move flow artifacts away from premium zones, provide enough draft for texture and maintain a clean shutoff. Review the opening sequence and ejection marks before committing to the finish.
Choose Polish and Texture With the Secondary Process
Paint, print, plating, laser marking and bonding each respond differently to roughness and direction. A texture may improve grip or hide small variations but reduce coating uniformity; a high polish may support a premium gloss but expose every sink or flow mark. The finish should be selected with the downstream process owner.
Use Inserts and Repair Strategy Intelligently
Replaceable cavity inserts can protect high-wear or high-risk surfaces and make future texture changes more practical. The insert boundary, steel hardness, polishing direction and cooling path still need to be controlled so the repair strategy does not create a new visual discontinuity.
Make Acceptance Repeatable
Inspect approved samples under defined light, distance, angle and cleanliness. Where relevant, measure gloss, roughness, color, coating adhesion or plating coverage. Retain a master and connect defects to cavity, batch, texture area and process condition so a premium appearance can be maintained after maintenance and production changes.
How Surface-Finish Engineering Elevates Premium Injection-Molded: Buyer Review Checklist
- Create a surface-zone map with measurable appearance expectations.
- Use gates, vents, parting and ejection to protect premium areas.
- Select polish or texture with paint, print, plating, marking and bonding in mind.
- Plan inserts, repair access and texture transitions for long-term consistency.
- Approve samples and inspect under defined, repeatable conditions.
Frequently Asked Questions
Can a premium surface specification be based only on a photograph?
A photograph helps communicate intent, but a production specification should add zones, texture or gloss references, viewing conditions and acceptable limits.
Why should surface finish be reviewed before mold steel?
Gate, parting, draft, vent and ejection decisions can make a desired finish difficult or impossible to reproduce after the tool architecture is fixed.
Conclusion
In summary, the surface finish is a defining feature of your product. It shapes user perception, ensures proper function, and dictates manufacturing strategy. At CKMOLD, we combine expert craftsmanship in polishing, etching, and EDM with a deep understanding of design-for-manufacturing principles. We partner with you to ensure every choice, from draft angle to material, is optimized for a consistent result. Our mission is to transform your design into a premium product that looks and feels exactly as you envisioned.