
Picking the wrong plastic can lead to failed parts, budget overruns, and immense project delays. This uncertainty is stressful, especially when you’re facing tight deadlines and high expectations from your clients or team. But imagine having a clear, step-by-step framework that guides you to the ideal material every single time, ensuring product success and peace of mind.
There is no universally suitable injection-molding material. The right choice is the grade that meets the part’s mechanical, thermal, chemical, dimensional, appearance, processing, supply and total-cost requirements with enough margin for normal variation. A disciplined selection process turns vague requests such as ‘strong,’ ‘heat resistant’ or ‘low cost’ into measurable conditions and a qualification plan.
Related engineering resources: DFM analysis | production injection molding | mold testing and validation
To choose the suitable material, start by defining your product’s non-negotiable requirements. Consider its mechanical loads, operating temperature, and chemical exposure. Then, evaluate aesthetic needs and any regulatory compliances, like FDA or UL ratings. Finally, you must balance these technical specifications against material cost and processing difficulty. This systematic approach narrows down the vast number of plastics to the one best suited for your application, preventing costly errors and ensuring optimal performance.
What Are the Critical Functional Requirements You Must Define First?
It’s easy to get lost in massive material datasheets without a clear starting point. This guessing game often leads to over-engineering, which inflates costs, or even worse, under-engineering, which causes part failure. What if you could pinpoint the exact functional needs of your part first? This would turn a confusing datasheet into a powerful ally, not your enemy.
Start by defining the mechanical load: will the part face impact, tension, or constant stress? Next, determine the thermal environment, specifying both continuous use and peak temperatures. You also need to think about the electrical properties, like if the part needs to be an insulator or conductive. Then, consider any other unique functional needs, such as optical clarity or creep resistance. Documenting these primary functions is the absolute first step before you even look at a single polymer.
Before you can even think about juggling cost and aesthetics, you have to answer one simple question: What does this part do? The answer forms the foundation of your entire material selection process. A practical approach is to sitting down and creating a “functional requirements checklist” for every new project. It’s a simple document, but it forces clarity and prevents crucial oversights. This isn’t just about high-level ideas; you need to get specific and, if possible, assign numbers to these requirements.
Breaking Down the Core Functions
The primary function of a part usually falls into one or more key categories. Let’s break them down.
Here is a table to help you think through these primary requirements.
| Functional Requirement | Key Question(s) to Ask | Example Material Properties to Check |
|---|---|---|
| Mechanical Performance | What kind of stress will it see? Impact, flex, tension? | Tensile Strength, Flexural Modulus, Izod Impact Strength |
| Thermal Stability | What is the normal operating temperature? Any peaks? | Heat Deflection Temp (HDT), Vicat Softening Temp, UL RTI |
| Electrical Needs | Does it need to insulate, or is it near an EMI source? | Dielectric Strength, Volume Resistivity, UL94 Rating |
| Optical Properties | Does the part need to be clear or transparent? | Haze, Luminous Transmittance |
By starting here, you create a clear profile of what your ideal material must achieve. This initial list of non-negotiables will immediately eliminate 80% of the plastics on the market, making your job much, much easier.
How Do Environmental and Chemical Exposures Impact Your Material Choice?
You’ve designed a suitable part, and the material has the right strength and temperature resistance. But then it fails in the field because it was exposed to a common cleaning chemical, or it degraded after a few months in the sun. This is a frustrating and common problem that happens when you don’t consider the part’s environment. This oversight can compromise a product’s integrity and even its safety.
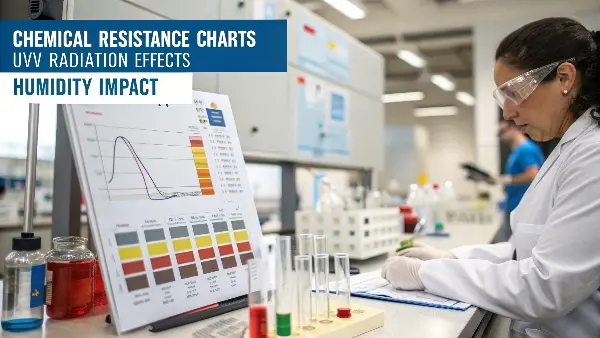
You must identify every chemical, fluid, and radiation source the part will encounter during its entire lifecycle. This includes not only its end-use environment but also any solvents or agents used during assembly or cleaning. Check the material’s chemical resistance charts for compatibility. Also, consider environmental factors like UV radiation from sunlight, which can degrade many plastics, and humidity, which can affect the dimensional stability and properties of hygroscopic materials like Nylon.
Analyzing the Operating Environment
To avoid these problems, you need to conduct a thorough environmental analysis. This goes beyond the obvious.
Here’s a simple framework to guide your environmental analysis.
| Environmental Factor | Key Question(s) to Ask | Common Solutions & Considerations |
|---|---|---|
| Chemical Exposure | What specific chemicals will the part contact? | Consult chemical resistance charts. Consider PP, HDPE, or PEEK for high resistance. |
| UV Radiation | Will the part be used outdoors or exposed to sunlight? | Use inherently UV-resistant materials (e.g., PMMA, ASA) or specify UV-stabilized grades. |
| Moisture/Humidity | Is the operating environment humid? Are tolerances tight? | Avoid hygroscopic materials (e.g., Nylon) for tight-tolerance parts, or design for dimensional change. Use PP or POM for stability. |
Thinking through these factors protects your product from the silent threats of its environment, ensuring it performs reliably throughout its intended lifespan.
How Do You Balance Mechanical Properties with Cost and Manufacturability?
You’ve found a high-performance polymer that meets all your functional and environmental needs. But it costs a fortune and is incredibly difficult to process, requiring special mold features and high temperatures. This is the classic designer’s dilemma: balancing the “suitable” material with the practical realities of budget and production. Ignoring this trade-off can make your project commercially unviable before it even begins.
Evaluate the total cost, not just the per-kilogram price of the resin. Factor in processing costs, as high-temperature materials need more energy and may lead to longer cycle times. Also, consider the material’s moldability. A resin with a very high shrink rate or poor flow characteristics will demand a more complex and expensive mold and can lead to more rejected parts. The ideal material is one that meets all a product’s “must-have” requirements while being cost-effective and easy to manufacture.

This balancing act is where experienced designers really earn their keep. It’s easy to pick an exotic engineering polymer that solves every problem, but it’s much harder to find a commodity resin that does the job for a fraction of the price. My goal is generally to find the least expensive material that meets all the non-negotiable requirements. This is the core of “Design for Manufacturability” (DFM). You’re not just designing a part; you’re designing a profitable product. This means you must consider how your material choice affects everything downstream, from the cost of the tool to the cycle time on the injection molding machine.
The Triangle of Trade-offs: Performance, Cost, and Processability
Think of these three factors as points on a triangle. You can rarely maximize all three. Improving one often means compromising on another.
-
Cost Analysis: Don’t just look at the price per kilogram. That’s a rookie mistake. You need to calculate the cost per part. This includes:
- Material Price: The raw resin cost.
- Processing Cost: High-temperature materials like PEEK or LCP require machines and molds capable of handling extreme heat, consuming more energy and potentially leading to slower cycle times. A slower cycle time means fewer parts per hour, increasing the cost of each part.
- Part Density: If two materials work, the one with the lower density will result in a lighter part, using less material by volume and potentially lowering costs.
-
Manufacturability (Processability): How easily can the material be molded?
- Flow Characteristics: Does the material flow easily into thin walls and complex features (high Melt Flow Index), or is it stiff and sluggish? A poor-flowing material might require more injection pressure, more gates, or a more complex mold design.
- Shrinkage Rate: All plastics shrink as they cool. A material with a high and non-uniform shrinkage rate is more prone to warpage and can make holding tight tolerances a nightmare. This requires a more skilled mold designer and process engineer to manage.
- Processing Window: Some materials have a very narrow “processing window” (range of temperature and pressure) where they produce good parts. This can lead to a higher scrap rate.
Here’s a comparison to illustrate the trade-offs.
| Aspect | Polypropylene (PP) | Polycarbonate (PC) | PEEK |
|---|---|---|---|
| Performance | Good chemical resistance, low cost, flexible. | Excellent impact strength, good clarity, moderate temperature resistance. | Extreme temperature and chemical resistance, very high strength. |
| Cost (per kg) | Low ($) | Medium ($$$) | Very High ($$$$$) |
| Processability | Easy to process, low melt temp, good flow. | Requires pre-drying, moderate processing temps. | Very high melt temp, requires specialized equipment, can be difficult to process. |
| Typical Use Case | Containers, living hinges, automotive interior panels. | Electronic housings, safety glasses, clear covers. | Aerospace components, medical implants, high-temp bearings. |
Your final decision will likely be a compromise. You might choose a slightly lower-performing material because it cuts cycle time by five seconds, or you might accept a higher material cost to avoid a complex mold design. This holistic view is what separates good designers from great ones.
Which Common Thermoplastics Should Be on Your Shortlist?
With thousands of polymers available, starting the selection process can feel overwhelming. You can’t possibly know them all. New designers often don’t know where to even begin their search, leading to analysis paralysis or reliance on just one or two familiar materials. But what if you had a ready-made shortlist of the most versatile and widely used plastics to start from?
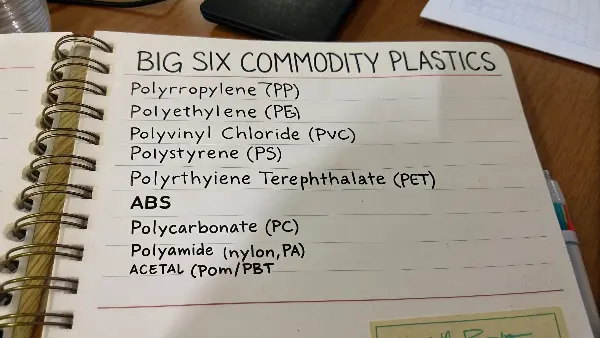
Focus first on the “Big Six” commodity plastics: Polypropylene (PP), Polyethylene (PE), Polyvinyl Chloride (PVC), Polystyrene (PS), Polyethylene Terephthalate (PET), and ABS. These cover a vast range of applications. For higher performance, your go-to engineering plastics should include Polycarbonate (PC), Polyamide (Nylon, PA), Acetal (POM), and PBT. Familiarizing yourself with the core strengths and weaknesses of this focused group will provide a solid starting point for over 90% of injection molding projects.
In my business, A common observation is thousands of different parts, but the reality is that the same dozen or so materials show up again and again. These are the workhorses of the injection molding industry. They are popular for a reason: they offer a fantastic balance of performance, processability, and cost. If you’re a designer, mastering this core group is far more valuable than having a superficial knowledge of hundreds of exotic polymers. When a new project comes in, I mentally run through this list first, trying to find a match before I even consider anything more specialized.
A Practical Guide to the Workhorse Plastics
I like to group them into commodity and engineering plastics. Commodity plastics are produced in high volume and are generally inexpensive. Engineering plastics offer enhanced mechanical and thermal properties, and come with a higher price tag.
Commodity Plastics: The Everyday Champions
These are materials you encounter every single day. They are cost-effective and relatively easy to process.
| Material | Key Strengths | Common Weaknesses | Typical Applications |
|---|---|---|---|
| Polypropylene (PP) | Excellent chemical resistance, high fatigue life, low cost. | Poor UV resistance, susceptible to cold. | Living hinges, containers, car bumpers. |
| Polyethylene (PE) | Varies by density (LDPE/HDPE). Tough, slippery, low cost. | Low stiffness, high thermal expansion. | Bottles, toys, plastic bags. |
| ABS | Good toughness and impact strength, good surface finish. | Poor solvent resistance, low UV resistance. | LEGO bricks, electronic housings, pipes. |
| Polystyrene (PS) | Hard, rigid, clear, very low cost. | Very brittle, poor chemical resistance. | Disposable cups, CD cases, foam packaging. |
Engineering Plastics: For Demanding Jobs
When you need better strength, temperature resistance, or dimensional stability, you step up to this category.
Starting with this curated list provides a powerful and efficient way to begin your selection process. If your part’s requirements can’t be met by any of these, then and only then should you begin exploring more specialized and high-performance polymers.
Start With the Service Environment
List temperature range, duration, humidity, UV, chemicals, impact, vibration, load, pressure, wear and cleaning exposure. Distinguish a short peak temperature from continuous use. A material that survives a brief hot event may creep or lose dimensional stability under a long-term load.
Connect Material Properties to the Geometry
Wall thickness, ribs, bosses, clips, threads, snap fits and flow length influence the result as much as a datasheet value. Reinforcement can increase stiffness while adding anisotropy and warpage. Review gate orientation, weld lines, stress concentration and assembly loading during selection.
Include Process and Tool Constraints
Drying, melt temperature, mold temperature, shrinkage, venting, wear, corrosion, cycle time and cavity balance affect feasibility and cost. A grade with excellent end-use properties may need tooling or process controls that the project cannot support. Use DFM and flow analysis to test the practical window.
Compare Supply, Compliance and Lifecycle Risk
Check approved suppliers, lot consistency, color or additive availability, recycled or bio-content requirements, regulatory documentation and expected product life. A substitution that looks equivalent on paper can change shrinkage, weld-line strength, appearance or processing behavior.
Qualify the Grade on the Finished Part
Test molded parts from the intended tool and process, not only plaques. Measure dimensions, assembly, impact, strength, aging, chemicals, appearance and relevant failure modes. Keep a material record with grade, lot, drying, process range and the reason it was approved.
Choose the Right Plastic Material for an Injection Molding Project: Buyer Review Checklist
- Define service temperature, load, chemicals, moisture, UV, impact and life.
- Check geometry, orientation, weld lines, clips, threads and assembly loads.
- Evaluate drying, shrinkage, mold temperature, wear, venting and cycle implications.
- Review supply, compliance, lot consistency, color and substitution risk.
- Qualify the selected grade on finished parts from the intended process.
Frequently Asked Questions
Should the strongest material generally be selected?
No. Excess strength can add cost, warpage, wear or processing complexity. Select the property set the application needs with an appropriate safety margin.
Can a material datasheet replace part testing?
No. Molded geometry, orientation, weld lines, conditioning and actual process history can change performance. Finished-part validation is essential for critical applications.
Conclusion
Choosing the right material is a critical step that dictates the success of your project. By following a structured framework—defining functional and environmental needs, then balancing performance with cost and processability—you can move from uncertainty to confidence. This methodical approach will not only save you time and money but will also ensure your final product is robust, reliable, and reliably suited for its purpose.