
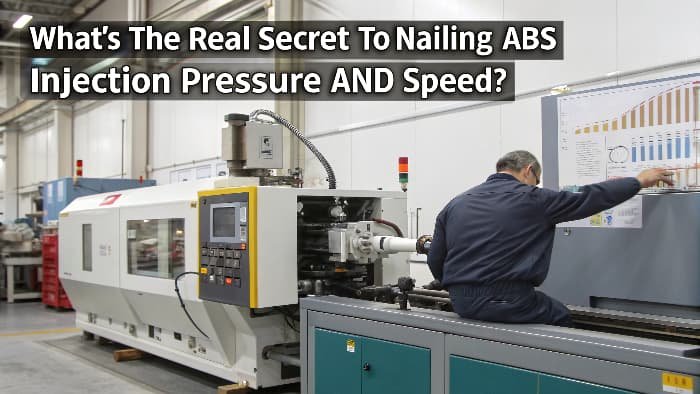
Struggling with ABS part defects? Wasting time and material on trial-and-error? Achieving consistent, high-quality ABS parts requires a deep understanding of its molding parameters.Mastering advanced ABS injection molding involves precisely controlling melt and mold temperatures, injection pressure and speed, holding time, and cooling. Proper material drying and understanding material rheology are also key to preventing defects and ensuring optimal part quality every single time.
ABS molding parameters should be treated as a process window, not a single magic setting. The goal is to produce stable parts with acceptable appearance, dimensions and mechanical performance across normal production variation.
Related CKMOLD resources: injection mold services, DFM analysis, mold design, mold testing and validation, and production injection molding.
Getting those ABS parts just right can feel like a bit of a dark art sometimes, can’t it? I’ve been there. You tweak one thing, and something else goes a bit sideways. But trust me, once you get a handle on a few key areas, it all starts to click. I think this will really help you, the buyer, especially with the precision components you’re producing.
How Do Melt and Mold Temperatures Really Impact Your ABS Part Quality?
Getting temperatures wrong with ABS? You might see flow issues or surface defects. It’s a common headache! But precise temperature control is your first big step towards suitable ABS parts.Melt temperature for ABS typically ranges from 200°C to 250°C (392°F to 482°F), affecting flow and degradation. Mold temperature, usually 40°C to 80°C (104°F to 176°F), influences cooling rate, shrinkage, and surface finish. Fine-tuning these is crucial.
- What happens if the mold is too cold? Well, the plastic cools down way too fast. This can cause high internal stresses in the part, leading to warpage later on, maybe even after it’s shipped to your customer! You might also get a dull or inconsistent surface finish, which isn’t great for cosmetic parts.
-
And if the mold is too hot? A mold that’s too hot can make your cycle times longer than your morning coffee break, seriously hitting your productivity. You might also get issues like sink marks, especially in thicker sections, or parts sticking in the mold, which is just frustrating.
Finding that sweet spot is key. I often tell people, think of it like baking a cake – too hot or too cold, and your cake (or ABS part!) isn’t coming out right. We generally aim for a uniform temperature across the mold surface for consistent results.
Here’s a quick look at what we generally aim for:Parameter Typical ABS Range (°C) Typical ABS Range (°F) Key Impact on Part Quality Melt Temperature 200 – 250 392 – 482 Affects material flowability, potential for degradation, weld line strength Mold Temperature 40 – 80 104 – 176 Influences surface finish, shrinkage, warpage, and overall cycle time What’s the Real Secret to Nailing ABS Injection Pressure and Speed?
Are your ABS parts showing annoying flash or those dreaded sink marks? The culprit might just be your injection pressure or speed settings. These parameters are like the gas pedal and steering of your molding machine – get them right for a smooth ride to quality parts.
Proper injection pressure ensures complete mold filling, while injection speed controls the flow rate and shear. For ABS, moderate to high pressures and speeds are often used, but they must be balanced carefully to avoid defects like flash, burn marks, or jetting.
Okay, let’s talk about pressure and speed. This is where a lot of the magic – or sometimes, the mischief – happens in injection molding. When I was learning the ropes in a bustling factory, I initially thought “more pressure, faster speed, better fill!” Boy, was I wrong sometimes, especially with sensitive materials. For ABS, you generally do need enough injection pressure to pack out the cavity completely, particularly if you’re molding parts with intricate designs or thin walls. If your injection pressure is too low, you’ll almost certainly get short shots, or the part might have voids or sink marks because the material didn’t get pushed forcefully enough into all the nooks and crannies.
But then there’s injection speed. This is how fast you’re pushing that molten plastic into the mold. If you inject too fast, especially with ABS, you can run into a whole host of problems:
- Jetting: This is where the plastic shoots into the mold cavity like a thin, uncontrolled stream instead of flowing smoothly. It looks bad and creates weak spots.
- Burn Marks: If the air in the mold can’t escape quickly enough due to rapid filling, it gets trapped and compressed, causing localized burning of the plastic. You’ll see black or brown streaks.
-
High Shear Stress:Pushing ABS too fast can generate excessive friction (shear), which can degrade the material and reduce its strength. On the other hand, if your injection speed is too slow, the plastic might start to cool and solidify before the mold is completely full. This can lead to flow marks on the surface, poor weld lines where two flow fronts meet, or even a dull surface finish. It’s a real delicate balance. We were getting some streaky flow marks on a large, flat surface. We fiddled with the temperature a bit, but it turned out our injection speed profile needed some careful adjustment. We started a bit slower as the material entered the gate area to prevent jetting and ensure a smooth flow front, and then we ramped up the speed to fill the main body of the part quickly. Problem solved! Those casings came out looking suitable. Here’s a simplified view of how these interrelate, something I generally keep in mind: Setting Impact if Too Low Impact if Too High Ideal Goal for ABS Injection Pressure Short shots (incomplete fill), sink marks, voids Flash (material squeezing out of mold), part sticking, high stress in part Sufficient to fill and pack the mold completely, but avoid overpacking which stresses the mold Injection Speed Flow marks, poor weld lines, dull surface, short shots Jetting, burn marks, material degradation, flash Moderate to high, often profiled (varied during injection) for smooth, quick fill without defects Most modern injection molding machines allow for profiled injection – meaning you can vary the speed at different points of the injection stroke. This is super helpful for ABS. You might start slower as the material enters the gate to prevent jetting, then speed up to fill the main body, and perhaps slow down again at the very end to pack out tricky areas or prevent flash. It takes some experimentation and careful observation, but getting this right is absolutely worth it for complex ABS parts.
Can Holding Pressure and Cooling Time Really Make or Break Your ABS Parts?
Think you’ve got it all sorted after the main injection phase? Not so fast! Holding pressure and cooling time are the unsung heroes for creating suitable ABS parts, playing a massive role in preventing issues like shrinkage and warpage. Let’s see why they’re so critical.
Holding pressure (often called packing pressure) compensates for material shrinkage as the ABS cools in the mold, ensuring dimensional accuracy. Proper cooling time allows the part to solidify sufficiently to be ejected without distortion. Both are vital for stable, well-formed ABS components.
- Overpacking: This can lead to parts sticking stubbornly in the mold, making ejection difficult, or even causing undue stress and potential damage to the mold itself over time.
- High Internal Stresses: Forcing too much material in can build up stresses within the part, which can make it brittle or prone to warping or cracking later on, sometimes days or weeks after molding.
It’s about finding that Goldilocks zone – just right.
Then there’s cooling time. This seems straightforward – just wait for the part to cool down, right? But the duration of that cooling phase, before the mold opens, is absolutely critical. - Too Short a Cooling Time:If you eject the part too soon, it’s still too hot and soft. It can warp as it leaves the mold, or get damaged by the ejector pins pushing it out.
-
Too Long a Cooling Time: Well, your cycle times go through the roof, and your production efficiency plummets. the buyer, as a business owner, you know how much that hurts the bottom line. Every second counts in high-volume production.
Here’s how these critical post-injection parameters play out:Parameter Impact if Not Enough / Too Short Impact if Too Much / Too Long Key Considerations for ABS Holding Pressure/Time Sink marks, voids, under-sized parts, poor surface replication Overpacking, flash, stuck parts, high internal stress, difficult gate removal Must effectively compensate for ABS shrinkage; duration depends on part thickness and gate size Cooling Time Warpage upon ejection, deformation by ejector pins, poor surface finish Unnecessarily long cycle times, reduced production efficiency Depends heavily on the thickest wall section of the part and the mold’s cooling efficiency For ABS, because it has a decent amount of shrinkage (more than, say, polystyrene, but less than nylon), getting the holding phase right is super important for dimensional stability. We often use a declining pressure profile during the holding phase – starting higher and then ramping down. And for cooling, it really depends on the wall thickness of the part. Thicker parts naturally need more cooling time; there’s no magic way around that. We also make sure our mold cooling channels are well-designed and kept clean to ensure efficient and uniform heat removal. It’s all connected, and patience here really pays off in part quality.
Why is Meticulous ABS Material Handling and Drying Absolutely Non-Negotiable?
Ever had a batch of ABS parts come out with frustrating splay marks or unexpected brittleness, even when you thought your machine settings were suitable? The problem might actually start before the material even gets near the molding machine, with improper material handling and, crucially, drying. This step is foundational!
ABS is hygroscopic, meaning it readily absorbs moisture from the ambient air. Molding wet ABS causes serious defects like splay marks, silver streaks, and significantly reduced mechanical properties (e.g., impact strength). Proper drying, typically at 70-80°C (158-176°F) for 2-4 hours, is absolutely essential before processing to ensure optimal part quality.
- Splay Marks / Silver Streaks: This is the most obvious visual defect, appearing as silvery streaks or a fan-like pattern on the part surface. It’s a dead giveaway of moisture.
- Reduced Impact Strength & Other Mechanical Properties: The steam causes hydrolysis, a chemical breakdown of the polymer chains, making the parts brittle and weaker. They can break much more easily than properly dried ABS.
- Internal Voids or Bubbles: Trapped steam can create tiny (or not so tiny) bubbles or voids within the part, compromising its structural integrity.
-
Processing Issues: Excess moisture can also lead to inconsistent melt viscosity, making it harder to control the process.
So, drying isn’t just a suggestion on a datasheet; it’s a must-do, non-negotiable step for quality ABS molding.Drying Parameter General Recommendation for ABS Consequence of Incorrect Setting / Duration Drying Temperature 70-80°C (158-176°F) – check specific grade Too low: insufficient moisture removal. Too high: can start to degrade or discolor the material before molding. Drying Time 2-4 hours (depends on initial moisture and dryer type) Too short: moisture remains, leading to defects. Too long: can sometimes over-dry or degrade certain sensitive grades if temperature is also borderline. Dryer Air Dew Point Ideally below -20°C (-4°F) for desiccant dryers Higher dew point air (more moist air) in the dryer means less effective drying, no matter the temperature. We use desiccant hopper dryers here at CKMOLD for our critical ABS jobs because they do a much better job of getting the moisture content really low, consistently. And it’s not just about drying it once. How you handle the ABS pellets after drying matters too. If those nicely dried pellets sit out in an open machine hopper in a humid factory environment for too long, they’ll just start reabsorbing moisture from the air all over again. So, good hopper design (sealed, perhaps with a blanket of dry air) and efficient material transfer from the dryer to the machine is part of the game. It’s one of those foundational things that, if you get it right every single time, makes everything else downstream so much easier. Trust me on this one, the buyer, proper drying is a true material change for consistent ABS quality and avoiding those frustrating Monday morning surprises.
How Can Smart Mold Design Choices Elevate Your ABS Injection Molding Game?
Struggling with persistent ABS molding defects like warpage, sink marks, or cosmetic flaws, despite having optimized all your machine settings and meticulously dried your material? The issue might well lie within your injection mold design itself. A well-thought-out mold is truly the bedrock of quality ABS parts.
Effective mold design for ABS includes proper gate location and type to ensure smooth, balanced filling, adequate venting to prevent air traps and burn marks, and efficient, uniform cooling channels for consistent temperature control. These elements are critical for minimizing defects and achieving repeatable, high-quality ABS components.
- Gate Design and Location: This is huge. Where the molten plastic enters the cavity (the gate location) and the type and size of the gate used can dramatically affect how the mold fills. A poorly placed or sized gate can cause jetting (that uncontrolled stream we talked about), unsightly weld lines in critical cosmetic or structural areas, or uneven filling leading to warpage. For ABS, we often prefer gate types like tab gates, fan gates, or even hot runner valve gates for larger parts, as these can help promote a smoother, more uniform flow front.
- Venting: As molten ABS fills the mold cavity, it displaces the air that was already in there. If that air can’t escape quickly and completely, it gets trapped and compressed by the incoming plastic. This trapped, compressed air gets super hot and can cause burn marks on the part. It can also prevent complete filling, leading to short shots or voids. Proper venting – creating tiny channels, often at the parting line or via vent pins, that let air out but are too small for plastic to escape – is absolutely essential. Sometimes, these vents are so small you barely notice them on the mold, but their impact on part quality is massive.
-
Cooling Channels: We touched on the importance of mold temperature, but how the mold achieves and maintains that temperature is a critical design feature. Well-placed and adequately sized cooling channels, designed to circulate water or oil, ensure uniform temperature across all surfaces of the mold cavity and core. This helps control shrinkage consistently, prevent warpage, and achieve repeatable cycle times. For complex ABS parts, especially those with varying wall thicknesses, conformal cooling (where cooling channels follow the contours of the part) can be a real material change, though it does add to the initial mold cost.
Here’s a quick rundown of why these matter so much:Mold Design Element Critical Importance for ABS Molding Potential Issues if Poorly Designed or Neglected Gate System (Type, Size, Location) Controls melt flow pattern, fill balance, location of weld lines, shear heat Jetting, cosmetic defects (flow marks, blush), stress concentrations near gate, difficult de-gating Venting (Channels, Pins, Parting Line) Allows trapped air and gases to escape from the cavity during filling Burn marks, short shots (incomplete fill), voids, diesel effect, poor surface finish Cooling System (Layout, Size, Proximity) Ensures uniform and efficient heat removal for consistent solidification and cycle Warpage, sink marks, inconsistent part dimensions, excessively long cycle times, hot spots Draft Angles Provides slight taper on vertical walls to facilitate easy part ejection Scratches, drag marks on part surface, difficulty in ejection, part sticking, mold damage Ejection System Pushes the solidified part out of the mold Ejector pin marks, part distortion during ejection, part sticking Drying and Material Condition
ABS can absorb moisture, and wet material may cause splay, bubbles or surface defects. Drying requirements depend on grade, storage and humidity. A stable process begins with known resin condition, especially for cosmetic parts or parts that will be painted or plated.
Melt and Mold Temperature Balance
Melt temperature affects flow, weld lines, surface finish and degradation risk. Mold temperature affects gloss, replication, shrinkage and cycle time. Higher settings are not automatically better; the useful range should be validated against part appearance and dimensions.
Injection Speed, Pressure and Packing
Injection speed should fill the cavity without jetting, burns or excessive shear. Packing pressure and time control sink, part weight and shrinkage, but excessive packing can create stress or flash. Gate freeze-off studies help define a reliable packing window.
Cooling and Cycle Stability
ABS parts can show warpage, sink or dimension drift if cooling is uneven or rushed. Cooling time should be set from part thickness, mold temperature and dimensional requirements. For production, repeatable cycle time matters as much as the first good sample.
Advanced ABS Injection Molding Parameters for Stable Parts: Buyer Review Checklist
- Dry ABS according to grade and storage condition.
- Record melt temperature, mold temperature, injection speed and packing data.
- Use part weight to judge packing consistency.
- Check gate freeze-off before finalizing packing time.
- Validate dimensions after parts reach a stable inspection condition.
FAQ
What causes splay in ABS injection molding?
Splay can come from moisture, excessive shear, contamination or trapped gas. Drying and venting should be checked early.
How do you reduce sink marks in ABS parts?
Review wall thickness, rib design, gate size, packing pressure, packing time and cooling balance.
Conclusion
Mastering ABS involves fine-tuning temperatures, pressures, speeds, and times. Don’t forget material drying and smart mold design. These steps will lead you to consistently high-quality ABS parts. I hope this helps you achieve great results!