
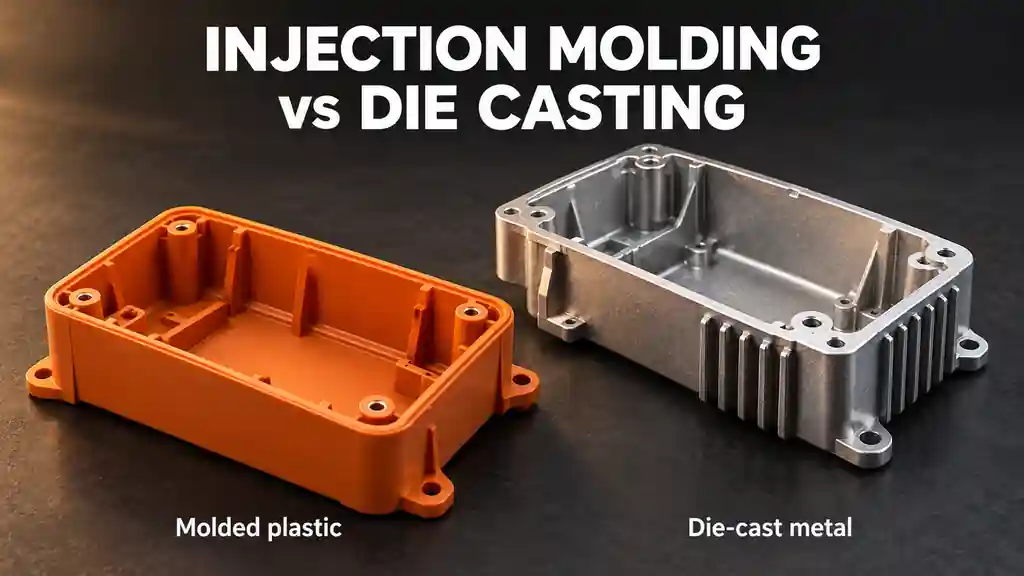
Picking the wrong process for a new part is expensive. I’ve seen buyers pay $40,000 for a die-cast tool, then learn a plastic part would have worked fine. I’ve also seen plastic housings crack in the field because the part really needed metal. Both mistakes cost money, time, and customer trust. So in this guide, I’ll show you how I decide between injection molding and die casting, using real numbers and simple rules.
Injection molding makes plastic parts by injecting melted polymer into a steel mold. Die casting makes metal parts by forcing melted aluminum, zinc, or magnesium into a hardened steel die under high pressure. Choose injection molding when you need light, low-cost, insulating, or colorful parts at high volume. Choose die casting when you need strength, stiffness, heat resistance, heat dissipation, or EMI shielding. Both need costly tooling, so both make the most sense at thousands of parts or more. The right answer depends on what the part must do, not on habit.
I work with injection molds and CNC machining every day at CKMOLD, and buyers ask me this question all the time. So below, I break the decision into small pieces: materials, performance, cost, lead time, quality risks, and supplier questions. Jump to the parts that matter most to you. By the end, you should know which process fits your part. You’ll also know what to send a supplier to get an accurate quote.
What Is the Real Difference Between Injection Molding and Die Casting?
On paper, the two processes look almost the same. Both push hot liquid into a steel tool. Both pump out thousands of identical parts. That’s why many buyers treat them as interchangeable. But that thinking leads to bad quotes and wrong tooling. The material, the heat, and the tool wear are very different. Once you see those differences, the choice gets much easier.
The real difference is the material and the heat. Injection molding melts plastic pellets at about 180–400°C (355–750°F) and injects them into a mold, where they cool into shape. Die casting melts non-ferrous metals at about 400–700°C (750–1,300°F) and injects them into a hardened steel die at very high pressure. Because die casting runs much hotter, its tools face more thermal stress and wear out faster. Injection molding usually gives near-finished parts. Die casting usually needs trimming and machining afterward.
How Injection Molding Works
Injection molding starts with small plastic pellets. A turning screw inside a heated barrel melts them. Then the machine pushes the melted plastic into a closed mold. The plastic cools against the steel and takes its shape. The mold opens, and ejector pins push the part out.
A typical cycle runs about 15 to 60 seconds. Thicker walls take longer to cool. So wall thickness drives your cycle time, and your cycle time drives your part price. If you want the basic mechanics, the Wikipedia page on injection molding is a good place to start.
How Die Casting Works
Die casting starts with a pot of molten metal, not pellets. There are two main machine types:
- Hot-chamber machines keep the injection system sitting in the molten metal. They are fast. They work well for zinc and some magnesium alloys, because those melt at lower temperatures.
- Cold-chamber machines ladle metal into a shot sleeve for every cycle. Aluminum needs this method. Molten aluminum would attack the steel parts of a pump sitting inside it.
The metal fills the die in a fraction of a second and freezes fast. The North American Die Casting Association (NADCA) publishes the design and tolerance standards most serious die casters follow.
Side-by-Side Basics
| Factor | Injection Molding | Die Casting |
|---|---|---|
| Material | Thermoplastics, some thermosets, silicone | Aluminum, zinc, and magnesium alloys |
| Process temperature | About 180–400°C (355–750°F) | About 400–700°C (750–1,300°F) |
| Tool | Steel or aluminum mold | Hardened tool steel die (often H13) |
| Typical cycle | About 15–60 seconds | Seconds for small zinc parts; a minute or more for large aluminum parts |
| Tool life | Up to 1,000,000+ cycles | Often around 100,000 shots for aluminum |
| After molding | Often near-finished | Usually trimmed, deburred, and machined |
| Typical parts | Housings, covers, clips, connectors | Brackets, heat sinks, structural housings |
Why the Heat Difference Matters So Much
In my experience, heat is the root of almost every other difference. A hotter process means more stress on the tool. That means shorter tool life, more trimming, and higher tooling cost. But that same heat gives you a metal part with strength and thermal properties that common plastics can’t match. So it’s a trade-off, not a contest with one clear winner.
Which Materials Can You Use for Plastic vs Metal Parts?
Material choice is where most projects go right or wrong. Pick a plastic that’s too weak, and parts fail in the field. Pick a metal when plastic would do, and you pay for weight and machining you never needed. I’ve seen both happen. The good news is that each process has a clear, short list of go-to materials. Here are the ones I see most often.
Injection molding uses thermoplastics such as ABS, PP, PC, nylon (PA), and POM, plus some thermosets and liquid silicone rubber. You can add glass fiber, color, UV stabilizers, or flame retardants. Die casting uses non-ferrous alloys only. Aluminum (like A380) is the most common for housings and structural parts. Zinc (like Zamak 3) suits small, detailed, high-strength parts. Magnesium (like AZ91D) is chosen when weight matters most. Steel and iron are not practical to die cast, because their high melting points would destroy the dies.
Common Plastics for Injection Molding
| Plastic | What I Use It For | What to Watch |
|---|---|---|
| ABS | Housings, consumer products, good cosmetic surface | Weak against UV and moderate heat |
| PP | Living hinges, containers, chemical resistance | Hard to paint or glue; shrinks more |
| PC | Clear lenses, tough covers | Can crack with some cleaning chemicals |
| PA66 + 30% glass fiber | Metal replacement, brackets, structural parts | Absorbs moisture, so size can shift |
| POM (acetal) | Gears, clips, sliding parts | Hard to bond or paint |
| PPS / PEEK | High heat, harsh chemicals | Expensive and harder to process |
One big strength of injection molding is that you can tune the material. Glass fiber adds stiffness. Colorants remove the painting step. Flame retardants help electrical products meet UL 94 flammability ratings. Mineral fillers reduce warpage. That kind of flexibility is hard to match in metal.
Common Alloys for Die Casting
| Alloy | Typical Use | Notes |
|---|---|---|
| Aluminum A380 | Housings, brackets, heat sinks | The most common die-casting alloy in North America |
| Aluminum ADC12 | Same jobs as A380 | Japanese standard, often quoted by Asian suppliers |
| Zinc (Zamak 3, Zamak 5) | Small detailed parts, hardware, handles | Heavy, but excellent detail and long die life |
| Magnesium AZ91D | Lightweight housings and frames | The lightest structural metal used in die casting |
Here’s a tip from years of quoting. If your drawing says A380 and an overseas quote says ADC12, ask about it. They are similar, but their chemistry is not identical. Make sure the supplier confirms the exact grade on the material certificate. For quick property checks, I use MatWeb, a free material database.
Scrap and Recycling
This matters for both cost and sustainability reports. Die-casting scrap, like runners and overflows, goes back into the furnace with very little loss in properties. Plastic is different. Every time you melt a thermoplastic, its long molecular chains break down a little. So most molders limit regrind (ground-up runners and rejects) to a fraction of the mix, often around 10–25%. Some medical and safety parts allow none at all. Ask your supplier what regrind level they use. It’s a quiet way some vendors cut costs at your expense.
How Do Plastic and Metal Parts Compare in Real-World Performance?
A part can look perfect on the screen and still fail in the customer’s hands. Maybe it gets too hot. Maybe it bends under load. Maybe it messes with a nearby radio signal. These problems show up late, often after tooling is paid for. So I always start with one question: what does this part have to survive? The answer usually points to plastic or metal pretty quickly.
Die-cast metal parts win on strength, stiffness, heat resistance, thermal conductivity, electrical conductivity, and built-in EMI shielding. Injection-molded plastic parts win on low weight, corrosion resistance, electrical insulation, and design freedom like snap fits and molded-in color. If your part carries load, runs hot, or must block electromagnetic noise, die casting is usually the safer choice. If it needs to be light, insulating, or cosmetic, injection molding usually wins.
Performance at a Glance
| Property | Injection-Molded Plastic | Die-Cast Metal |
|---|---|---|
| Strength and stiffness | Moderate; glass fiber helps a lot | High |
| Heat resistance | Many common plastics soften around 80–150°C | Aluminum holds its shape well above that |
| Thermal conductivity | Very low (ABS ≈ 0.2 W/m·K) | High (A380 ≈ 96 W/m·K) |
| Electrical behavior | Insulator | Conductor |
| EMI/RFI shielding | Needs coating, filler, or inserts | Built in |
| Corrosion | Doesn’t rust | May need coating outdoors |
| Density | About 1.0–1.4 g/cm³ | Mg 1.8, Al 2.7, Zn 6.6 g/cm³ |
Heat Is the First Thing I Check
If your product has a motor, LEDs, or a power board, I look at heat before anything else. Aluminum pulls heat away from hot components. Plastic traps it. As the table shows, aluminum moves heat hundreds of times better than ABS. That’s why LED light housings, power supply cases, and telecom boxes are so often die-cast aluminum.
One warning about zinc. It’s strong at room temperature. But above about 100°C, it loses strength and slowly deforms under load. This is called creep. So I don’t recommend zinc for parts that are both hot and loaded.
EMI Shielding Has a Hidden Cost
EMI means electromagnetic interference. It’s electrical noise that can upset nearby electronics. A metal enclosure blocks it naturally. A plastic housing can do it too, but you’ll pay for conductive paint, plating, conductive fillers, or metal inserts. So add that cost to your plastic quote before you compare it with a die-cast quote. Otherwise, plastic looks cheaper than it really is.
Where Plastic Quietly Wins
Plastic doesn’t rust, so you can skip coatings in many environments. It insulates, which matters for handheld electrical products. And you can mold snap fits, living hinges, screw bosses, and soft-touch grips right into the part. Each of those features can remove a screw, a bracket, or an assembly step. In a US plant, where labor is expensive, those savings add up fast.
Which Process Costs Less Over the Life of Your Product?
Most buyers I talk to compare the tool price and stop there. That’s a trap. A cheaper tool that wears out early, or parts that need extra machining, can cost far more over three years. I’ve watched a "cheap" quote turn into the most expensive option on a project. So let’s look at the full cost picture: tooling, tool life, part price, and finishing.
Injection molding usually costs less overall for parts that don’t need metal performance. Die-casting dies typically cost more and wear faster because of thermal cycling. A die for aluminum parts often lasts around 100,000 shots, while a hardened steel injection mold can run over 1,000,000 cycles. Plastic parts also need less finishing. Both processes have high upfront tooling but low cost per part, so both pay off at volume. For plastic parts, injection molding usually becomes the clear choice at around 10,000 units or more.
Tooling Cost and Tool Life
| Item | Injection Molding | Die Casting |
|---|---|---|
| Rough tool cost | $3,000–$80,000+ | $10,000–$120,000+ |
| Tool life | 100,000 (P20 steel) to 1,000,000+ (hardened steel) | Around 100,000 shots for aluminum; zinc dies last much longer |
| Part cost at volume | Low | Low to moderate, plus machining |
| Secondary operations | Often none | Trimming, deburring, machining, coating |
These ranges swing a lot with part size, cavity count, and complexity. So use them as a sanity check, not a quote.
In the US, many buyers use the SPI mold classes, now maintained by the Plastics Industry Association. A Class 101 mold is built for more than one million cycles. A Class 103 mold is meant for medium runs, usually under 500,000. If you expect a long production life, ask your supplier which class they are building to.
Why Die-Casting Dies Wear Out Faster
Every shot heats the die surface fast, and then it cools again. After thousands of cycles, tiny surface cracks form. This is called heat checking. You’ll see it as fine raised lines on your parts. Then the die needs repair or replacement. Zinc casts at a much lower temperature, so zinc dies often last many times longer than aluminum dies.
A Simple Tooling Math Example
Say a die-casting die costs $50,000 and lasts 100,000 shots. That’s $0.50 per part in tooling alone, before metal, machining, or coating. Now say a $40,000 hardened steel injection mold runs 1,000,000 shots. That’s just $0.04 per part. Your real numbers will differ, but the pattern usually holds. And if you need 500,000 aluminum parts, budget for at least one major die repair or a replacement die.
The Real Break-Even Question
I don’t start with "plastic or metal?" I start with "does this part truly need metal performance?" If not, injection molding usually wins on weight, unit cost, and assembly. If yes, die casting is usually far cheaper than CNC machining every part from a solid block. Fictiv’s cost and lead time comparison is a useful second opinion on volume ranges.
How Do Lead Time and Secondary Operations Affect Your Launch?
Late parts hurt more than high prices. If your launch slips, you lose orders, and your sales team loses trust in you. I’ve seen schedules slip not because of the tool, but because nobody planned for the machining, plating, or painting after casting. So when I estimate lead time, I count every step until the part is ready for your assembly line.
Injection molds typically take about 4–8 weeks to build, and molded parts often come out near-finished, with color and texture molded in. Die-casting dies often take about 6–12 weeks, and the parts usually need trimming, deburring, CNC machining, and surface finishing such as powder coating, painting, or plating. Those extra steps can add 1–3 weeks per production batch. So for tight launch dates, injection molding is usually faster from first shot to ready-to-assemble part.
What Happens After the Part Leaves the Tool
| Step | Injection Molding | Die Casting |
|---|---|---|
| Runner and gate removal | Often automatic, or a quick trim | Trim press removes runners, overflows, and flash |
| Deburring | Rarely needed | Common |
| CNC machining | Only for special features | Common for bores, threads, and sealing faces |
| Surface finish | Color and texture molded in | Powder coat, paint, plating, or chem film |
| Extra inspection | Visual and dimensional | Plus porosity checks, like X-ray or leak tests |
Why Die Castings Usually Need Machining
Die casting holds decent tolerances. But features like bearing bores, O-ring grooves, threaded holes, and flat sealing faces usually need CNC machining to hit spec. We do a lot of CNC machining on cast parts at CKMOLD. The most useful thing a buyer can do is mark the drawing clearly. Show which features are "as-cast" and which must be machined. That one note saves days of emails. It also stops you from paying for machining you don’t need.
Plan for machining stock, too. The die caster leaves a little extra metal on faces that will be machined. If your casting supplier and machining supplier are different companies, make sure they agree on datums. Datums are the reference points used to measure the part. If they don’t match, parts get rejected for reasons nobody can explain.
Finishing Traps I See Often
- A380 doesn’t anodize well. Its high silicon content gives a dull, blotchy finish. Powder coating or painting is usually a better match.
- Molded-in texture beats paint. Textures like VDI 3400 or Mold-Tech patterns give a finished look with no painting step.
- Color matching takes time. Molded-in color needs approval samples. Add about a week if appearance is critical.
Ask for a Step-by-Step Lead Time
A single number like "6 weeks" hides too much. Ask suppliers to break it down: tool build, T1 samples (the first trial parts), design changes, first article inspection, and production. Then you can see where the risk sits and plan your launch around real dates.
What Quality Problems Should You Watch For in Each Process?
Nothing ruins a good week like a batch of rejected parts. And with both processes, defects can hide inside the part where you can’t see them. A housing can pass a visual check and still leak or crack later. I don’t say this to scare you. I say it because the best suppliers plan for these defects before the tool is even cut.
The biggest die casting risk is porosity: tiny gas or shrinkage holes inside the metal. Porosity limits heat treatment, welding, and pressure-tight uses, unless the supplier uses vacuum die casting or other high-integrity methods. The main injection molding risks are sink marks, warpage, short shots, flash, and weld lines. Most of these come from wall thickness, gate location, and cooling design. A good supplier catches them early with mold flow analysis or casting simulation, before steel is cut.
Common Defects and How They Get Fixed
| Defect | Process | What You’ll See | Common Fix |
|---|---|---|---|
| Porosity | Die casting | Hidden holes, leaks under pressure | Better venting, vacuum casting, impregnation |
| Cold shut | Die casting | Lines where metal didn’t fuse | Hotter die, better gating |
| Heat checking | Die casting | Fine crack pattern on the surface | Die repair and maintenance |
| Sink marks | Injection molding | Small dents over thick areas | Core out thick walls, adjust packing |
| Warpage | Injection molding | Bent or twisted parts | Even walls, balanced cooling |
| Short shot | Injection molding | Part not fully filled | Better venting, more pressure |
| Flash | Both | Thin extra material at the parting line | Better tool fit and clamp force |
Why Porosity Is a Big Deal
Porosity comes from gas trapped during fast filling, or from metal shrinking as it cools. You often can’t see it from the outside. But it causes three real problems:
- Heat treatment: trapped gas expands and causes surface blisters.
- Welding: gas escapes into the weld and weakens it.
- Pressure-tight parts: pump housings, valve bodies, and fluid fittings can leak.
If your part faces any of these, ask about vacuum die casting, squeeze casting, or vacuum impregnation. Impregnation seals the pores with resin after casting. It’s a common, low-cost fix for leak problems.
Injection Molding Defects Start With Design
Most molding defects trace back to wall thickness. Thick sections cool slowly and sink. Uneven walls cool at different rates and warp. So I push customers toward even walls, often around 1.5–3 mm for many parts, with ribs instead of thick blocks. Gate location matters too, because it controls where weld lines form.
What I’d Ask a Supplier to Show You
- Mold flow analysis for plastic parts, or casting simulation for die castings
- A first article inspection (FAI) report with real measured dimensions
- CMM reports (from a coordinate measuring machine) for tight-tolerance features
- X-ray or CT scans for critical castings
- Leak test data for pressure parts
- Material certificates for every batch
- Quality certification, such as ISO 9001, or IATF 16949 for automotive
In my experience, a supplier who offers these without being asked usually runs a tighter shop.
Can You Replace a Die-Cast Metal Part With Injection-Molded Plastic?
Metal parts are heavy, and heavy parts cost more to ship, more to assemble, and sometimes more to make. Many buyers I work with have an old die-cast part in their product that nobody has questioned in ten years. That part may be costing them money every single day. Metal-to-plastic conversion isn’t always possible. But when it works, the savings can be big.
Yes, often. Converting a die-cast part to a glass-fiber-reinforced engineering plastic, such as PA66-GF30, PPA, or PPS, can cut part weight by roughly 30–50%. It can also combine several metal parts, screws, and brackets into one molded part. This reduces assembly time and removes painting or machining steps. But conversion only works when the part’s loads, temperatures, and shielding needs fit what the plastic can handle. Test the design with simulation and real prototypes before you commit.
Why Plastic Can Be So Much Lighter
Aluminum A380 weighs about 2.7 g/cm³. Glass-filled nylon (PA66-GF30) weighs about 1.37 g/cm³. So the same volume of plastic weighs roughly half as much. But plastic parts usually need ribs and a bit more material to stay stiff. That’s why real-world savings land around 30–50%, not a full 50% every time.
Good Candidates for Conversion
- Brackets and mounts with moderate loads
- Housings that don’t need heat sinking or EMI shielding
- Parts you already paint just to stop corrosion
- Assemblies with many small screws, clips, and brackets
- Products where weight matters, like handheld tools, drones, and vehicles
Poor Candidates for Conversion
- Parts that run above about 150°C for long periods, unless you pay for PPS or PEEK
- Parts under constant heavy load, because plastic can creep (slowly stretch over time)
- Housings for high-power electronics that need to dump heat
- Tight-tolerance nylon parts in humid places, because nylon absorbs moisture
How I Approach a Conversion
- List the real loads, temperatures, chemicals, and service life the part must handle.
- Pick two or three candidate resins and compare their data sheets.
- Redesign for plastic. Don’t copy the metal shape. Use even walls, ribs, and draft angles.
- Run FEA (a computer stress test) and mold flow analysis.
- Make prototypes in the real resin, often by CNC machining.
- Test them in the actual product, not just on a bench.
On one project, a customer had a die-cast aluminum bracket held by two screws and a clip. We redesigned it as one glass-filled nylon part with a built-in snap fit. It came out about 40% lighter, and the customer dropped an assembly step. The biggest lesson? Copying the metal design into plastic would have failed. The redesign is where the savings came from.
When Should You Combine Both Processes or Use Neither?
Sometimes the "plastic or metal" question has no clean answer. The part needs metal strength in one area and plastic’s look and feel in another. Or you only need 300 pieces, and a $40,000 tool makes no sense. Forcing one process here wastes money. The smarter move is often to mix processes, or use a different method until your volume grows.
Combine both processes when a product needs metal performance in some areas and plastic benefits in others. A common example is a die-cast aluminum chassis for strength and heat, with injection-molded plastic covers, buttons, and clips for looks and low cost. Overmolding plastic onto metal inserts is another option. For low volumes, often under 1,000 parts, CNC machining, urethane casting, or 3D printing usually costs less than buying hard tooling. For small, complex metal parts at high volume, metal injection molding (MIM) is also worth a look.
Hybrid Designs That Work Well
Once you start looking, you see hybrid designs everywhere:
- Power tools: a die-cast aluminum gear case for strength, inside a molded plastic housing with an overmolded rubber grip.
- Outdoor LED lights: a die-cast aluminum body that acts as the heat sink, with a molded polycarbonate lens.
- Electronics enclosures: a die-cast base for shielding and heat, with a plastic cover or bezel for looks.
- Insert-molded parts: brass threaded inserts or stamped metal pieces molded right into plastic. You get metal threads without a metal part.
The key is giving each material the job it does best. Metal handles load and heat. Plastic handles looks, grip, and cost.
Low-Volume Options Before Hard Tooling
| Quantity | Plastic Part | Metal Part |
|---|---|---|
| 1–50 | 3D printing or CNC machining | CNC machining |
| 50–1,000 | Urethane casting or an aluminum bridge mold | CNC machining or investment casting |
| 1,000–10,000 | Aluminum or soft-steel injection mold | CNC machining or die casting, based on long-term demand |
| 10,000+ | Hardened steel injection mold | Die casting |
A bridge mold is a cheaper, faster tool, often made of aluminum. It makes real production-grade parts while your full tool is being built. It’s a smart way to start selling sooner.
Metal Injection Molding (MIM)
MIM is a different process. It mixes fine metal powder with a binder, molds it like plastic, then sinters it in a furnace. It works for small, complex steel or stainless steel parts that die casting can’t make, like tiny gears or surgical tool parts. Xometry’s comparison of MIM and die casting explains the trade-offs well.
My Usual Path for New Products
Many of our projects follow the same path. We start with CNC-machined prototypes to test fit and function. Once the design is locked, we move to an injection mold. That way, the customer doesn’t pay for tool changes caused by early design mistakes. And if a part clearly needs metal, I say so.
How Do You Choose the Right Process and Supplier for Your Part?
You can read every guide online and still get stuck at the quoting stage. Suppliers send back numbers that don’t match. One is half the price of another, and you can’t tell why. That confusion usually comes from missing information in the request. When I get a complete request for quote (RFQ), I can quote faster and more accurately. Here’s how to make that happen.
Start with the part’s job. If it must carry load, survive heat, move heat away, or block EMI, lean toward die casting. If it must be light, insulating, colorful, or cheap at volume, lean toward injection molding. Then check your annual volume and product life. Finally, send suppliers a complete package: 3D CAD file (STEP), 2D drawing with tolerances, material, annual volume, finish, and target launch date. Choose a supplier that gives design feedback (DFM) before quoting, not just a price.
Quick Decision Guide
| If Your Part Needs… | I’d Usually Choose |
|---|---|
| Load-bearing strength and stiffness | Die casting |
| Heat dissipation | Die casting (aluminum) |
| Built-in EMI/RFI shielding | Die casting |
| Lowest weight | Injection molding (or magnesium die casting) |
| Electrical insulation | Injection molding |
| Molded-in color, texture, or snap fits | Injection molding |
| Lowest unit cost at 10,000+ parts | Injection molding |
| Metal performance at low volume | CNC machining |
| Metal strength plus plastic looks | Hybrid design |
What to Put in Your RFQ
- 3D CAD file (STEP or IGES) plus a 2D PDF drawing
- Material grade, or the performance you need if you’re unsure
- Annual volume and expected product life
- Critical tolerances, and which surfaces are cosmetic
- Surface finish: texture, color, or coating
- Compliance needs, such as RoHS, UL 94 flame ratings, or FDA-grade materials
- Target launch date, and target price if you can share it
The more complete your package, the closer your quotes will be to each other. That makes comparing suppliers much easier and much fairer.
Questions I’d Ask Any Supplier
- Do you build tools in-house, or outsource them?
- What steel do you use, and what tool life do you guarantee?
- Who owns the tool? (It should be you, in writing.)
- Will you give me a DFM report and simulation before cutting steel?
- What inspection equipment do you have, like CMM or X-ray?
- How do you handle engineering changes and tool maintenance?
- Can you handle secondary work, like CNC machining and assembly, in one place?
For a design-focused view of this decision, the DFMA overview of die casting vs injection molding is worth reading.
And if you want a second opinion on a real part, you can send your drawings to CKMOLD. I’ll tell you honestly whether it should be plastic, metal, or a mix of both.
So, Plastic or Metal?
Injection molding is the plastic process. Die casting is the metal process. Choose die casting when the part needs strength, heat control, or shielding. Choose injection molding when weight, insulation, looks, and unit cost matter most. Compare tool life, finishing, and lead time, not just tool price. If you’re unsure, start with a DFM review. At CKMOLD, we say "Master Molding Right," and for me, that starts with picking the right process before any steel gets cut.