
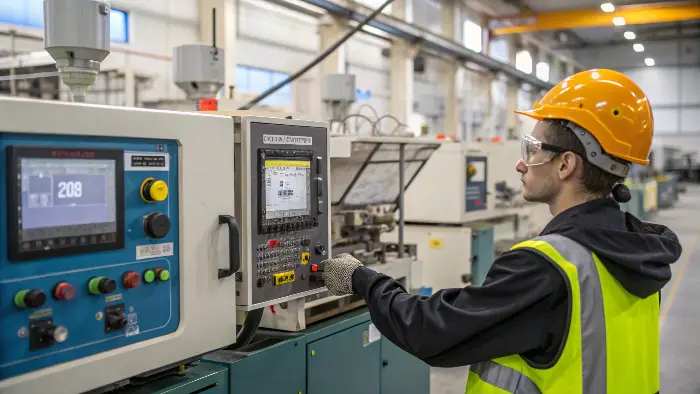
Are TPU defects messing with your production? It’s a real headache, leading to waste and delays. But don’t worry, we can figure this out together.
TPU defects can be frustrating because the material is flexible, moisture-sensitive and often used on parts where feel and appearance matter. Effective troubleshooting means separating material drying, mold design, process settings and demolding behavior.
Related CKMOLD resources: injection mold services, DFM analysis, mold design, insert molding and overmolding, and mold testing and validation.
Solving TPU injection molding defects involves identifying the specific issue, like burns or sink marks, understanding its root cause—often material overheating, poor cooling, or mold flaws—and then adjusting process parameters or the mold design. It’s about a systematic approach.
It’s frustrating when you pull a part from the mold and it’s just not right. I’ve been there, many times. The good news is, most TPU molding problems have solutions. You just need to know where to look. Let’s get into how we can tackle these common headaches and get your production running smoothly.
What Kinds of Defects Plague TPU Injection Molding, You Ask?
Seeing a bad part is one thing. Knowing exactlywhat kind of defect you’re dealing with is another. Misidentifying can send you down the wrong troubleshooting path.Common TPU injection molding defects include short shots, flash, sink marks, voids, burn marks, warping, and delamination. Each has unique visual cues and points to different underlying problems in material, process, or mold.
| But learning to spot and name these defects was the first step towards fixing them. It’s like a doctor diagnosing an illness before prescribing medicine. For TPU, which can be a bit more sensitive than other plastics, this precision is key. Some defects are obvious, like a part that isn’t fully formed – that’s a short shot. Others are more subtle, like slight discoloration indicating a burn. | Defect Type | Visual Appearance | Common TPU-Related Triggers |
|---|---|---|---|
| Short Shot | Incomplete part, material doesn’t fill the cavity. | Low melt temp, insufficient material, slow speed | |
| Flash | Excess material squeezed out at parting lines. | Low clamp force, high melt temp/pressure, worn mold | |
| Sink Marks | Depressions on thicker sections of the part. | High shrinkage, insufficient packing, hot mold | |
| Burn Marks | Black or brown streaks/spots, often at flow end. | Trapped air, excessive shear heat, high speed | |
| Warping | Part distorts or bends after ejection. | Uneven cooling, high stress, poor part design | |
| Delamination | Surface layers peeling or flaking. | Moisture in TPU, incompatible material mix | |
| Stringing/Drooling | Fine strands of TPU from nozzle after injection. | High nozzle temp, material degradation, suck-back issue |
Understanding these helps you narrow down the cause. For instance, TPU is hygroscopic, meaning it loves to absorb moisture. If you see delamination or splay marks (silver streaks), wet material is a very likely suspect. I generally tell the production team: “Dry your TPU properly, folks! It saves a world of trouble.” It’s a simple step, but so crucial.
So, How Do You Actually Solve These TPU Injection Molding Problems?
Okay, you’ve spotted a defect. Now what? Just knowing the name isn’t enough, right? You need a plan, a systematic way to fix it, or you’ll just be guessing.
To solve TPU injection molding problems, first pinpoint the defect. Then, analyze potential causes related to material, machine settings, or mold design. Systematically adjust one parameter at a time—like temperature, pressure, or speed—or consider mold modifications if needed.
- Material Issues: TPU is sensitive. Is it dried properly? Is it the right grade for the application? Sometimes, the material itself is the starting point.
- Process Parameters: This is where most of the “tweaking” happens. Things like melt temperature, injection speed, pressure, and cooling time are critical. For TPU, getting these just right is a balancing act.
-
Mold Design/Condition: Sometimes the mold itself is the problem. Poor venting can cause burns. Inadequate cooling channels lead to warping or long cycle times. Gate location and size are also huge factors.
Here’s a general approach I teach:Problem Area Potential Cause Examples General Solution Approach Material Handling TPU not dried (moisture) Ensure proper drying (time & temp per supplier spec) Wrong TPU grade Verify material properties match application needs Melt Temperature Too high (degradation, burns) Lower barrel/nozzle temps incrementally Too low (short shots, poor flow) Increase barrel/nozzle temps incrementally Injection Speed Too fast (shear burn, flash, trapped air) Reduce injection speed, use profiled injection Too slow (short shots, flow marks) Increase injection speed, check for obstructions Injection/Holding Pressure Too high (flash, overpacking, sticking) Reduce pressure settings Too low (short shots, sink marks, voids) Increase pressure settings, check for leaks Cooling Insufficient cooling time/uneven cooling Increase cooling time, optimize mold cooling channel design Mold Design Poor venting (burns, short shots) Add/improve vents in the mold Incorrect gate size/location (flow issues, stress) Modify gate design (requires mold work) Inadequate draft angles (sticking, scuffing) Increase draft angles in the mold The trick is to change one thing at a time and observe the result. Document everything. If you adjust melt temperature, see what happens. If that doesn’t fix it, return it to the original setting (or the new best setting) and try adjusting injection speed. It’s a process of elimination. And generally, generally, check the TPU supplier’s datasheet. They often provide excellent starting parameters.
What’s the Right Injection Pressure for TPU, Anyway?
You hear a lot about temperature and speed, but what about pressure? Getting the injection pressure right for TPU is super important. Too little, and you get an incomplete part. Too much, and you might flash the mold or stress the material.
The ideal injection pressure for TPU isn’t one-size-fits-all; it varies based on TPU hardness (shore value), part complexity, wall thickness, and mold design. Generally, it’s lower than for rigid plastics, often in the range of 60-100 MPa, but generally start with supplier recommendations.
- TPU Hardness: Softer TPUs generally need less pressure to flow. Harder, more rigid TPUs might need a bit more oomph to fill complex cavities.
- Part Design: Thin walls, long flow paths, or intricate details? You’ll likely need more pressure to push the material through and fill everything completely. Simple, chunky parts? Less pressure might do.
- Mold Design: The gate size and type play a big role. A small pin gate will require higher pressure than a larger tab gate for the same part. The runner system efficiency also matters.
- Melt Temperature: A hotter, more fluid melt will flow easier, potentially requiring less pressure. Conversely, a cooler melt might need more pressure. But be careful – too hot and you risk degradation.
-
Injection Speed: Higher speeds can sometimes help fill, but they also generate more shear heat, which might affect the material and pressure needed.
Here’s a simplified look at how pressure phases work and what to watch for with TPU:Pressure Phase Purpose TPU Considerations Potential Issues (Incorrect Pressure) 1st Stage (Fill) Fills ~95-99% of the mold cavity quickly. Use enough to fill, but avoid over-velocity (shear). Short shots (low), flash/burns (high) 2nd Stage (Pack/Hold) Compensates for shrinkage as material cools. Crucial for TPU to avoid sinks/voids; duration matters. Sink marks/voids (low), overpacking/sticking (high) My advice is generally to start with the TPU manufacturer’s datasheet. They usually give a recommended processing window, including pressures. Then, it’s about careful adjustment. Use just enough fill pressure to get the material into the cavity, and then apply holding pressure to pack it out nicely without causing flash or stressing the part. It’s a bit of an art, guided by science! For many common TPUs, I’ve found pressures in the 800 to 1500 psi (hydraulic pressure, which translates to higher plastic pressure) range can be a good starting point, but this is very machine-dependent. Generally monitor the plastic pressure if your machine displays it.
Wait, Are We Talking Injection or Compression Molding Defects for TPU?
Sometimes people get their molding terms mixed up, especially with flexible materials like TPU. If you’re looking for remedies for compression molding defects, but you’re injection molding TPU, the solutions won’t match up.
While this article focuses on TPU injection molding defects, it’s important to know that compression molding is a different process. Remedies for compression defects, like trapped air or uneven cure, address issues specific to that method and usually don’t apply directly to injection molding.
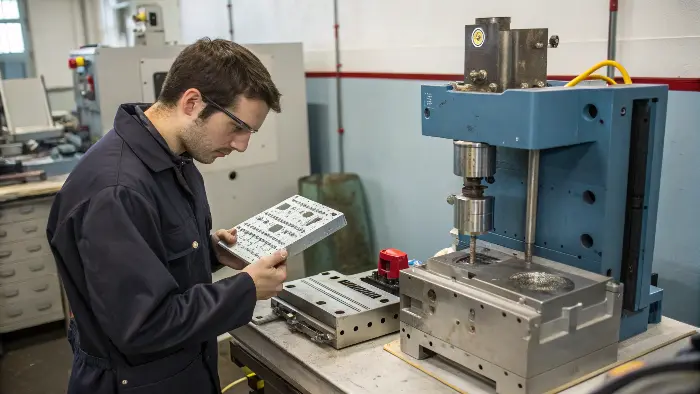 Turns out, he was actually using a small compression molder for prototypes, not an injection molder! The troubleshooting paths are quite different. For injection molding, we’re forcing molten plastic into a closed mold. Compression molding, on the other hand, involves placing a pre-measured amount of material (often a preform or powder) into an open, heated mold cavity. The mold is then closed, and pressure is applied to force the material to fill the cavity and conform to its shape. So, why does this distinction matter for troubleshooting? Because the physics and the common problems are different!Key Differences Affecting Defects: Turns out, he was actually using a small compression molder for prototypes, not an injection molder! The troubleshooting paths are quite different. For injection molding, we’re forcing molten plastic into a closed mold. Compression molding, on the other hand, involves placing a pre-measured amount of material (often a preform or powder) into an open, heated mold cavity. The mold is then closed, and pressure is applied to force the material to fill the cavity and conform to its shape. So, why does this distinction matter for troubleshooting? Because the physics and the common problems are different!Key Differences Affecting Defects: |
Feature | Injection Molding | Compression Molding |
|---|---|---|---|
| Material Feed | Molten, injected under high pressure. | Pre-measured charge (solid/powder) placed in mold. | |
| Pressure | High injection & pack pressure. | Applied by closing press, generally lower. | |
| Flow Dynamics | Complex flow paths, potential for shear. | Material flows and spreads under compression. | |
| Air Traps | Venting is critical to let air escape ahead of melt. | Air can be trapped if charge isn’t placed well or mold closes too fast. | |
| Cycle Times | Generally faster, especially for thermoplastics. | Can be longer, especially if curing is involved. |
Common Compression Molding Defects (and why they differ):
- Trapped Air/Porosity: More common if the preform isn’t right or the closing speed is too fast. In injection molding, this is usually a venting issue.
- Incomplete Fill/Shorts: Often due to insufficient material charge or low pressure/temperature. In injection, it could be that, or flow restrictions, premature freeze-off.
- Uneven Cure (for thermosets/some TPEs): Due to inconsistent mold heating or cure time. While TPU is a thermoplastic, if you were compression molding a thermoset elastomer, this would be key.
- Warping: Can happen in both, but causes in compression might relate more to uneven charge distribution or temperature, while in injection, it’s often differential shrinkage and cooling.
So, if you’re injection molding TPU and see, say, burn marks, you’d check your injection speed, venting, and melt temperature. If you were compression molding and saw something similar (though less likely to be classic “burns”), you might think about trapped volatiles or material degradation from excessive heat/time before full compression. The remedies for “short shots” in compression molding might involve adding more material to the charge, while in injection molding, you’d look at increasing shot size, pressure, or speed, or checking for flow restrictions.
Our focus here at CKMOLD, and in this blog post, is primarily on injection molding because that’s how most high-volume TPU parts are made. Understanding that difference is the first step to making sure you’re barking up the right tree when troubleshooting. If your problem is with TPU injection molding, then the advice on parameters like injection pressure, speed, and temperature is what you need!Bubbles, Splay and Surface Streaks
Moisture is a common cause of bubbles or splay in TPU, but contamination, excessive shear and thermal degradation can also contribute. Drying records, material age, barrel residence time and screw speed should be checked before making large temperature changes.
Short Shots, Burns and Poor Filling
TPU may need careful flow-path design and venting. Short shots can come from low melt temperature, restricted gates, inadequate injection pressure or trapped gas. Burns usually point to trapped air or excessive shear. Defect location is the map that shows where the flow is struggling.
Sticking, Deformation and Ejection Marks
Soft TPU parts can stick to the core, stretch during ejection or show ejector marks. Draft angle, surface finish, ejector area, cooling time and demolding sequence should be reviewed. A part that is too hot at ejection may deform even if the shot fills well.
Overmolding Adhesion Problems
Poor TPU adhesion may involve substrate incompatibility, contamination, low substrate temperature, weak mechanical locking or process settings. Adhesion troubleshooting should include peel testing and examination of whether failure is adhesive, cohesive or mechanical.
Troubleshooting TPU Injection Molding Defects: Buyer Review Checklist
- Check TPU drying conditions before troubleshooting bubbles or splay.
- Map defect locations to understand flow, venting and gate behavior.
- Review draft, cooling and ejection for sticking or deformation.
- Inspect shutoffs and substrate tolerance for TPU overmolding flash.
- Use adhesion testing when troubleshooting overmolded parts.
FAQ
Why does TPU stick in the mold?
TPU may stick because of low draft, high surface friction, insufficient cooling, poor ejection layout or part geometry that grips the core.
What causes bubbles in TPU molded parts?
Bubbles often come from moisture, trapped gas, contamination or thermal degradation. Proper drying and venting should be checked early.
Conclusion
Fixing TPU injection molding defects isn’t black magic. It’s about understanding the material, the process, and being systematic. With the right approach, you can master molding TPU and get those parts that meet the agreed requirements.