
Have you ever looked at a simple plastic part and wondered how it was made so perfectly? Many designers feel the pressure to create flawless products but are unsure about the manufacturing process behind them. This uncertainty can lead to costly design errors. Understanding the core process isn’t just for factory workers; it’s a vital skill for anyone involved in product creation. It empowers you to design better, more efficient parts from the start.
Plastic injection molding is a manufacturing process for producing parts by injecting molten material into a mold. It works by melting plastic pellets and forcing the liquid plastic under high pressure into a custom-made mold cavity. The plastic then cools and solidifies into the shape of the cavity. Finally, the mold opens and the finished part is ejected. This method is highly efficient for mass-producing identical plastic parts with complex shapes and high precision, from simple bottle caps to intricate car components.
I’ve spent my entire career in the mold industry, and I can tell you one thing for sure: the magic is in the details. On the surface, injection molding seems simple. You melt plastic and shape it. But the real expertise lies in understanding every single step, from the material’s melting point to the exact second the part cools. This knowledge is what separates a good part from a great one. Let’s break down this amazing process together, so you can see why it’s the backbone of modern manufacturing.
What is the simple definition of injection molding?
Are you trying to explain injection molding to a colleague or client without getting lost in technical terms? It’s frustrating when a simple concept gets buried under complex jargon, making you feel like you don’t grasp the basics. This can make it hard to communicate your design intent effectively. But what if you could define it in a way anyone could understand? Having a clear, simple definition is the first step toward mastering the process.
At its core, injection molding is a method for mass-producing plastic parts by using a mold. Think of it like a very advanced waffle iron. You have two metal halves that form a hollow shape, or "cavity," inside. You inject hot, liquid material (melted plastic) into that cavity. Then, you let it cool and harden. When you open the mold, you have a perfectly formed plastic part. This process is repeated thousands of times to create identical items.
When I first started in this business, my mentor used the ice cube tray analogy with me, and it has stuck with me ever since. It’s a great way to simplify the idea. You have the tray (the mold), you pour in water (the molten plastic), you put it in the freezer (the cooling process), and then you pop out the ice cubes (the finished parts). Of course, the real process is much more complex and precise, involving high pressures and temperatures, but the fundamental idea is the same.
The Two Key Words: Injection and Molding
To truly understand the definition, let’s break down the two main words.
- Molding: This is the act of shaping a material. In our case, we are shaping plastic. The "mold" itself is the tool that defines the shape. It’s usually made of steel or aluminum and is precision-machined to create the exact geometry of the desired part. The quality of the mold is everything. A poorly made mold will always produce a poor part.
- Injection: This is the action of forcing the material into the mold. We don’t just pour the plastic in like water into an ice cube tray. We use a powerful machine to inject it under very high pressure. This pressure is crucial because it ensures the molten plastic fills every single tiny corner and detail of the mold cavity, creating a detailed and solid part.
This combination of a precise mold and a high-pressure injection is what makes the process so versatile and reliable for creating everything from simple toys to critical medical devices.
What is the basic principle of injection molding?
You understand the simple definition, but do you feel like you’re missing the ‘why’ behind it all? It’s one thing to know what happens, but another to understand the core principles that make it work. Without this deeper knowledge, troubleshooting design flaws or optimizing a part for production can feel like guesswork. Understanding the fundamental science is what turns a good designer into a great one, allowing you to predict and solve problems before they happen.
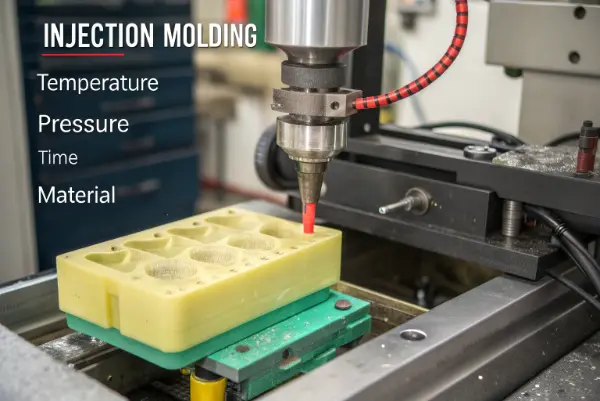
The basic principle of injection molding is the controlled transformation of a thermoplastic polymer from a solid to a liquid and back to a solid within a shaped mold. It relies on the precise management of four key variables: temperature, pressure, time, and material. The plastic material is heated until molten, injected under high pressure to fill a mold cavity completely, held under pressure while it cools and solidifies, and then ejected as a finished part. This cycle leverages the physical properties of plastics to create repeatable shapes.
The entire process is a delicate dance between heat and pressure over a specific amount of time. I learned early on that you can’t master injection molding by just following a manual. You have to develop a feel for it. You have to understand how a slight change in temperature can affect the plastic’s flow or how a little more pressure can prevent sink marks. It’s a science, but there’s an art to it as well. The basic principle is simple, but the application is where true skill comes in.
The Four Pillars of Injection Molding
The success of any injection molding project rests on the perfect balance of four fundamental elements. If one is off, the entire process can fail.
| Principle | Role in the Process | Why It’s Critical |
|---|---|---|
| Temperature | Melts the plastic and controls its flow. Also manages the cooling rate. | Too hot, and the plastic degrades. Too cold, and it won’t fill the mold completely, causing a "short shot". Proper cooling temperature is needed to solidify the part without warping. |
| Pressure | Forces the molten plastic into the mold cavity and holds it there. | Injection pressure ensures every detail is filled. Holding pressure compensates for shrinkage as the plastic cools, preventing defects like sink marks and voids. |
| Time | Governs the duration of each stage of the cycle (injection, cooling, ejection). | The cycle time directly impacts production efficiency and cost. Cooling time is often the longest part and must be precise to ensure the part is solid enough to eject without damage. |
| Material | The specific type of plastic polymer being used. | Every plastic has unique properties: a different melting point, flow rate, and shrinkage rate. The entire process must be calibrated to the chosen material to achieve the desired result. |
Mastering these four pillars is the true principle of injection molding. It’s not just about the machine; it’s about understanding how these forces interact to turn raw plastic pellets into a precise, functional product.
How does plastic injection molding work?
Knowing the principles is great, but do you find it hard to visualize the actual step-by-step machine process? It’s common to feel a disconnect between the theory and the mechanical reality happening inside that big, noisy machine. This gap in knowledge can make it difficult to design parts that are truly optimized for manufacturing. To design effectively, you need to see the process through the machine’s eyes. Let’s walk through the entire cycle, step by step.
The plastic injection molding process works through a precise, automated cycle. First, the two halves of the mold are clamped together with immense force. Then, plastic pellets from a hopper are melted in a heated barrel by a reciprocating screw. This screw then injects the molten plastic into the mold cavity. The plastic is held under pressure as it cools and solidifies. Finally, the mold opens, and ejector pins push the finished part out, at which point the cycle begins again.
I remember the first time I stood next to a large injection molding machine. The sounds and the power were incredible. The clank of the mold closing, the whir of the screw, and then the satisfying thud of a finished part dropping into a bin. It looks like brute force, but it’s pure precision. Every movement and every second is calculated. Seeing that cycle repeat flawlessly, producing hundreds of parts an hour, is what got me hooked on this industry. It’s a perfect blend of power and control.
Breaking Down the Injection Molding Cycle
The process can be broken down into four main stages. Each one is critical to the success of the final part.
1. Clamping
Before any plastic is injected, the two halves of the mold tool must be securely closed. A clamping unit applies a massive amount of force—we’re talking tons of force—to hold the mold shut. This force is essential to counteract the high pressure of the injected molten plastic. If the clamping force is too low, the plastic can seep out of the mold cavity, creating a defect called "flash." The machine has to hold the mold together perfectly, creating a tight seal for the magic to happen.
2. Injection and Dwelling
Once the mold is clamped, the injection phase begins. Plastic pellets, which are stored in a hopper, are fed into a long, heated barrel. Inside the barrel, a large screw turns. This screw does two things: it transports the pellets forward along the barrel, and its turning motion, combined with heater bands around the barrel, melts the plastic into a liquid state. When enough molten plastic is ready, the screw moves forward like a plunger, injecting the plastic into the mold cavity at high speed and pressure. This is followed by a "dwelling" or "holding" phase, where pressure is maintained to pack more plastic in as it starts to cool and shrink.
3. Cooling
This is often the longest and most critical part of the cycle. Once the mold cavity is filled, the molten plastic must cool down and solidify into its final shape. The mold has internal cooling channels through which water or oil circulates to regulate the temperature and carry away heat from the plastic. The cooling time depends on the type of plastic, the thickness of the part, and the mold temperature. If you eject the part too early, it will be deformed. If you wait too long, you’re just wasting time and money.
4. Ejection
After the part has cooled sufficiently, the clamping unit opens the mold. An ejection system, usually a series of pins or a plate, pushes the solidified part out of the mold cavity. The part falls into a collection bin, and the machine is ready to start the entire cycle all over again. For some complex parts, a robotic arm might be used to carefully remove the part from the mold. This entire cycle can take anywhere from a few seconds to a couple of minutes, depending on the part’s size and complexity.
What are the 5 types of plastic molding?
You’re getting a good handle on standard injection molding, but is that the only option out there? Many designers limit their thinking to one process, not realizing that a different type of molding might be cheaper, faster, or better suited for their project. Choosing the wrong process can lead to compromised designs or unnecessary production costs. Knowing the different molding techniques available expands your design toolkit and empowers you to make the best possible choice for your product.
While there are many plastic manufacturing methods, five common types of molding include: thermoplastic injection molding, blow molding, extrusion molding, compression molding, and rotational molding. Each process is suited for different part geometries, production volumes, and material types. For example, injection molding is ideal for complex solid parts, while blow molding is used for hollow objects like bottles, and extrusion is used for continuous shapes like pipes or films. Understanding their differences is key to selecting the right manufacturing path.
In my trading business, clients often come to me with a design and say, "I need this injection molded." But after we talk, we sometimes realize a different process would be a better fit. I once had a client who wanted to make a simple plastic tray. We could have injection molded it, but since the design was open and had a uniform wall thickness, we looked at thermoforming instead, which saved them a huge amount on tooling costs. It’s my job to know all the options, not just the most common one. Your job as a designer is to be aware of them so you can ask the right questions.
Comparing Common Plastic Molding Processes
Let’s look at five major types of plastic molding. I’m including standard injection molding on the list for a clear comparison. Each has its own strengths and is used to create the plastic products we see around us every day.
| Molding Type | Basic Process | Common Products | Key Advantage |
|---|---|---|---|
| 1. Injection Molding | Molten plastic is injected under high pressure into a closed mold cavity. | Lego bricks, phone cases, car dashboards, medical syringes. | High precision, excellent for complex shapes, very fast cycle times for high-volume production. |
| 2. Blow Molding | A hollow tube of heated plastic (a "parison") is placed in a mold, and air is blown into it, forcing it to take the mold’s shape. | Bottles, tanks, hollow containers, traffic cones. | Ideal for producing hollow, thin-walled parts quickly and cost-effectively. |
| 3. Extrusion Molding | Molten plastic is pushed through a die to create a continuous shape with a fixed cross-section. | Pipes, window frames, straws, plastic films, wire insulation. | Excellent for long, continuous parts. Very high production speed and low tooling cost. |
| 4. Compression Molding | A pre-measured amount of plastic (a "charge") is placed into a heated, open mold cavity. The mold is then closed, applying pressure to force the material to fill the cavity. | Electrical outlets, dinnerware, rubber seals, automotive parts. | Good for large, heavy parts. Can handle thermoset plastics that can’t be injection molded. |
| 5. Rotational Molding | Plastic powder is placed in a hollow mold, which is then heated and rotated on two axes. The powder melts and coats the inside of the mold. | Kayaks, large tanks, playground slides, coolers. | Excellent for creating very large, hollow, and stress-free parts with uniform wall thickness. |
Each of these methods has its place. Your choice depends entirely on your product’s shape, size, function, and how many you need to make.
Conclusion
We’ve covered a lot, from the basic definition of plastic injection molding to how the cycle works and even other molding types. The key takeaway is that this process, while complex, is based on simple, controllable principles. Understanding these fundamentals empowers you as a designer or engineer to create better products. It is the foundation of modern manufacturing, and knowing it well is a huge advantage in any product development journey.