
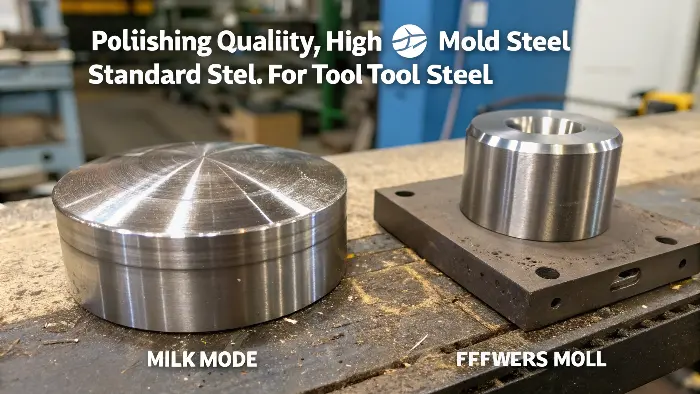
Advanced mold polishing is the controlled transition from machined steel to a surface that performs consistently in production. It requires more than finer abrasives: the steel, EDM layer, scratch direction, geometry, cleanliness, edge control and inspection method all affect the molded result. A professional process defines the finish before work begins and verifies it on the part.
Related CKMOLD resources: mold design, mold testing and validation, production injection molding.
Why is a Suitable Mold Surface Finish Non-Negotiable for Your Product’s Success?
Tired of seeing those annoying surface defects on your plastic parts? More often than not, these issues trace right back to the mold’s surface. A consistent mold surface isn’t just a ‘nice-to-have’; it’s absolutely essential for your product’s aesthetic appeal and its functional integrity.
A suitable mold surface finish is non-negotiable because it directly translates to the quality of your final product. It impacts everything from appearance and part release to tool longevity and even the mechanical properties of the molded component. Think of it as an investment, not an expense.
Let me break this down a bit. When I talk to business owners like the buyer, who are laser-focused on product quality and efficiency, the conversation often turns to how a superior mold finish can be a material change. It’s not just about looking good – though that’s a big part of it!
The Direct Impact on Part Aesthetics
Ensuring Smooth Part Ejection
A super smooth, well-polished surface means less friction when the plastic part is ejected from the mold. This might sound minor, but it has big implications. Smoother ejection reduces stress on the part, minimizing the risk of warpage, drag marks, or even breakage. It also means faster cycle times because parts release cleanly without sticking. For the buyer, faster cycle times mean higher output and better cost efficiency.
Extending Mold Lifespan
Believe it or not, a good polish can also help your mold last longer. A properly polished surface is more resistant to corrosion and wear, especially with some of the more abrasive or corrosive plastics. When the surface is immaculate, there are fewer microscopic pits or crevices where trouble can start. We’re talking about protecting a significant investment here.
Functional Implications
Sometimes, the surface finish has functional requirements. For optical parts, clarity is key, demanding an optical-grade polish. For parts that need to seal, a smooth mating surface is critical. Any deviation can lead to product failure. So, you see, it’s way more than just shine.
What Key Polishing Stages Does CKMOLD Master for consistent Surfaces?
Are you sometimes confused by all the different polishing grades and what they mean? Or maybe you’re unsure what level of finish your specific mold actually needs? It can be a bit of a maze. At CKMOLD, we try to demystify this process for our clients, guiding you to the specified finish for your application.
CKMOLD masters key polishing stages, from initial rough grinding all the way to a true mirror finish if required. We meticulously progress through various grit sizes of stones, papers, and diamond pastes, ensuring each step reliably prepares the surface for the next, ultimately achieving the specified SPI standard your project demands.
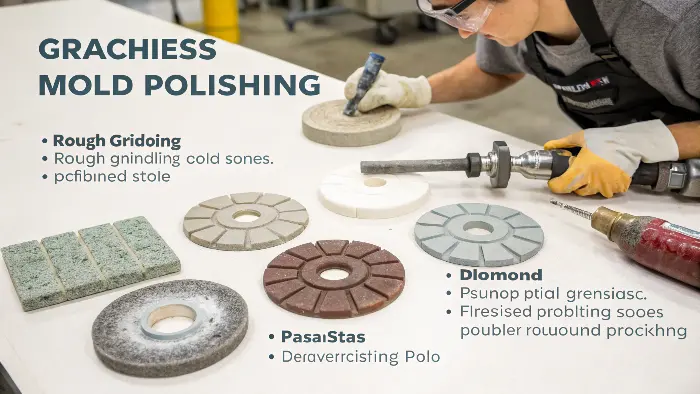
Achieving that suitable surface isn’t a single-step job; it’s a carefully orchestrated sequence. I often compare it to painting a masterpiece – you start with broad strokes and gradually refine down to the finest details. Skipping steps or rushing the process? That’s a recipe for disaster, leading to waves, orange peel, or hidden scratches that only show up at the very end. We’ve developed a robust methodology.
Stage 1: Initial Grinding and Shaping (Stone Polishing)
After machining, the mold cavity will have tool marks. The first step is to remove these and establish the basic geometry. We use coarse to medium grit abrasive stones, often with lapping machines or by hand for intricate areas. The goal here is to get a uniform, flat (or contoured, as designed) surface, removing any EDM scale or machine marks. This stage sets the foundation; if this isn’t right, nothing else will be.
Stage 2: Fine Sanding (Paper Polishing)
Once the stoning is done, we move to abrasive papers, starting with a grit that smoothly transitions from the last stone. We then work our way down through progressively finer grits – say, from 400 grit up to 1200 or even 2000 grit. The key here is to remove all scratches from the previous stage, changing the polishing direction with each grit to ensure complete coverage. This is where skill and patience really shine.
Stage 3: Lapping and Buffing (Diamond Paste Polishing)
This is where we start to see the real gloss develop. We use diamond pastes, again in decreasing micron sizes, applied with soft wood, felt bobs, or cloth. This stage refines the surface to a high sheen. For many commercial finishes (like SPI B-series), this might be close to the final step. It requires a very clean environment and meticulous technique to avoid embedding any stray particles.
Stage 4: Final Mirror Finish (Optical Polishing, if required)
| For the highest gloss, like SPI A-1 (mirror finish) or optical applications, we go even further. This often involves ultra-fine diamond pastes (e.g., 1-micron or even 0.5-micron) and specialized buffing techniques. It’s incredibly labor-intensive and requires our most skilled technicians. The result is a surface so smooth it’s consistent to the naked eye and under magnification. To give you an idea, here’s a simplified look at common SPI finishes: |
SPI Finish | Description | Typical Application | Polishing Method |
|---|---|---|---|---|
| D-1 to D-3 | Dull/Frosted/Satin | Non-critical surfaces, textured parts | Dry Blast (Glass Bead, Sand) | |
| C-1 to C-3 | Stone Polish (Matte) | Some industrial parts, low gloss needs | Fine Stone (e.g., 600 grit stone) | |
| B-1 to B-3 | Paper Polish (Semi-Gloss) | Medium gloss, many consumer products | Fine Emery Paper (e.g., 600 grit paper) | |
| A-1 to A-3 | Diamond Buff (High Gloss) | Mirror finish, lenses, high-end products | Diamond Buff (e.g., Grade #3 to #15 Diamond Buff) |
Understanding these stages and their outcomes is crucial for specifying the right finish for your parts, and that’s something we generally discuss upfront with clients like the buyer.
How Does Mold Steel Selection Impact the Final Polishing Outcome?
Hardness and Polishability
Generally, harder steels can take a higher polish. However, they are also more difficult and time-consuming to polish. So, there’s a balance. Steels like S136 (a stainless type) can be hardened to around 50-52 HRC and are renowned for their excellent polishability, making them ideal for mirror finishes on parts that need corrosion resistance. Pre-hardened steels like P20 are easier to machine but typically won’t achieve the same super-high gloss as a through-hardened, high-purity steel. NAK80 is another popular choice; it’s a pre-hardened steel (around 40 HRC) that offers a surprisingly good polish, often up to an SPI A-2, due to its clean composition.
Inclusions and Impurities
This is a big one. Non-metallic inclusions (like sulfides, oxides, silicates) within the steel matrix are an enemy of high-quality polishing. During polishing, these tiny impurities can be dislodged, leaving pits or streaks. Or, they might be harder or softer than the surrounding steel, leading to an uneven surface. This is why steels produced using processes like Electro-Slag Remelting (ESR) are preferred for critical polishing jobs. ESR helps to remove these impurities, resulting in a much cleaner, more homogenous steel. You can really tell the difference when you’re aiming for that A-1 finish.
Grain Structure
A fine, uniform grain structure is also essential. Coarse or inconsistent grains can lead to an “orange peel” effect after polishing, especially on softer steels. The uniformity ensures that the material abrades consistently, allowing for a smoother, more even surface.
CKMOLD’s Steel Recommendation Approach
When a client like the buyer comes to us, we don’t just ask “What finish do you want?” We ask about the part’s application, the type of plastic being molded, expected production volume, and of course, the desired surface finish. Based on all this, we recommend the most suitable steel. It might be a slightly higher upfront cost for a premium steel, but it often saves money in the long run through easier polishing, better part quality, and longer mold life. It’s about making the smart choice from the very beginning.
What Common Polishing Pitfalls Can Ruin Your Mold, and How Do We Sidestep Them?
The Dreaded “Orange Peel”
This looks just like it sounds – a dimpled, uneven surface texture resembling an orange’s skin. It often happens when polishing softer steels, or if the polishing direction isn’t varied enough, or if too much pressure is applied with buffing wheels. It’s a sign that the metal surface has been disturbed rather than smoothly abraded. Our technicians are trained to recognize the early signs and adjust their technique immediately.
Scratches and Drag Marks
These are probably the most common issues. A stray piece of grit, a contaminated polishing cloth, or simply using too coarse an abrasive for too long can leave deep scratches. Drag marks occur when a piece of dislodged metal or abrasive gets trapped and dragged across the surface. The solution? Meticulous cleanliness, progressing patiently through grit sequences, and careful inspection under good lighting at every step. It sounds simple, but it demands discipline.
Over-Polishing and Edge Dubbing
You can actually polish too much! Over-polishing, especially on sharp edges or intricate details, can round them off or “dub” them. This can alter the part’s dimensions or fit. This is where the “art” of polishing comes in – knowing just how much material to remove and when to stop. Our polishers develop a feel for this that only comes with experience. For delicate features, we often use custom-shaped tools and a very light touch.
CKMOLD’s Proactive Prevention Strategies
How do we avoid these? It’s not magic, it’s methodology.
- Training: Continuous training for our technicians on different steels, new abrasive technologies, and defect recognition.
- Controlled Environment: Our polishing area is kept clean to minimize contamination.
- Right Tools for the Job: Using appropriate stones, papers, pastes, and lapping tools for each specific steel and finish. We don’t cut corners here.
- Step-by-Step Inspection: We inspect the surface after each grit stage, often using magnification. It’s much easier to correct a small issue early than a big one later.
- Communication: Clear understanding of the client’s requirements (in comparable programs need for consistent quality) from the get-go.
By focusing on these areas, we prevent these pitfalls rather than having to fix them later. It’s all about delivering that suitable mold surface the first time.Surface Specification Determines the Process
High gloss, optical-adjacent, texture-ready, matte and functional release surfaces need different preparation. The specification should identify zones, gloss or roughness expectation, allowable flow marks, gate evidence and whether the finish must match a master or molded reference.
Remove EDM and Machining History Without Losing Geometry
EDM recast, milling marks, grinding burns and inclusions must be removed in a planned sequence. Excessive stock removal can widen a shutoff, change a corner or alter a critical dimension. Surface correction and dimensional control must be reviewed together.
Control Abrasive Direction and Cleanliness
Scratch direction helps reveal unfinished areas and creates a predictable surface before the next stage. Clean tools, separate compounds and controlled lubricant prevent contamination. A small embedded particle can create a visible line or reject a high-gloss cavity.
Protect Functional Edges and Deep Features
Polishing a cosmetic surface must not round a sealing land, parting edge, gate or rib. Deep pockets and narrow ribs may need small laps, stones or ultrasonic tools with limited stroke. The process should identify features that cannot tolerate manual over-polishing.
Validate the Surface Through Molding
Light and magnification are useful, but the molded part shows whether the surface releases, reproduces texture, hides or reveals weld lines and meets the visual requirement. Trial parts should be assessed under agreed lighting, viewing direction and handling conditions.
Advanced Injection Mold Polishing: Buyer Review Checklist
- Define surface zones, gloss or roughness targets and molded appearance acceptance criteria.
- Remove EDM, machining and grinding damage with enough control to preserve dimensions.
- Keep abrasive stages, direction, lubricant and tools clean and traceable.
- Protect shutoffs, gates, sealing edges, ribs and deep features during finishing.
- Approve the finish through steel inspection and controlled molding trials.
FAQ
What makes polishing an advanced moldmaking operation?
It requires control of steel condition, abrasive sequence, geometry, contamination, edge protection and molded-part validation at a demanding finish level.
Can a mirror finish hide poor steel preparation?
No. Deep EDM or machining damage must be removed; fine compound may improve reflectivity without removing the underlying defect.
Conclusion
In essence, achieving superior surface finishes at CKMOLD is a blend of art, science, and meticulous process. It ensures your products look great, perform flawlessly, and your manufacturing runs smoothly. We’re committed to this.